If you’ve had success propagating houseplants in the past, you may have been able to use a leaf cutting to do so rather easily. With Pilea Peperomioides, the normal process used for houseplant leaf cuttings needs an additional step to create a new Pilea plant from a leaf cutting.
Can you propagate Pilea from a leaf? While it isn’t the easiest method, it is possible to grow a new Pilea plant from a leaf cutting. For this to work, you must also cut a small slice of the trunk along with the leaf. With a Pilea leaf only and no trunk cutting, the leaf will root, but no new leaves will grow.
Many people say it is impossible to get a new plant from a Pilea leaf cutting, but with a little bit of extra information, it will work. If you have an opportunity to take a cutting from a healthy Pilea plant, be sure to do it properly for best results.
If you have questions about propagating, ideal care and conditions, pruning, transplanting or anything else about your Pilea, grab our latest book, Caring for Pilea Peperomioides.
Pilea Leaf Propagating
Many people have tried propagating new Pilea plants from just a leaf cutting in the past and have had no success. That is because the Pilea petiole (or the stalk that joins the leaf to the stem) does not have the tissue needed to grow new leaves and eventually a new plant.
If all you have is a leaf, you can root it in water. The roots will sustain the individual leaf, but you will not be able to grow new leaves or eventually a new Pilea plant from that cutting.
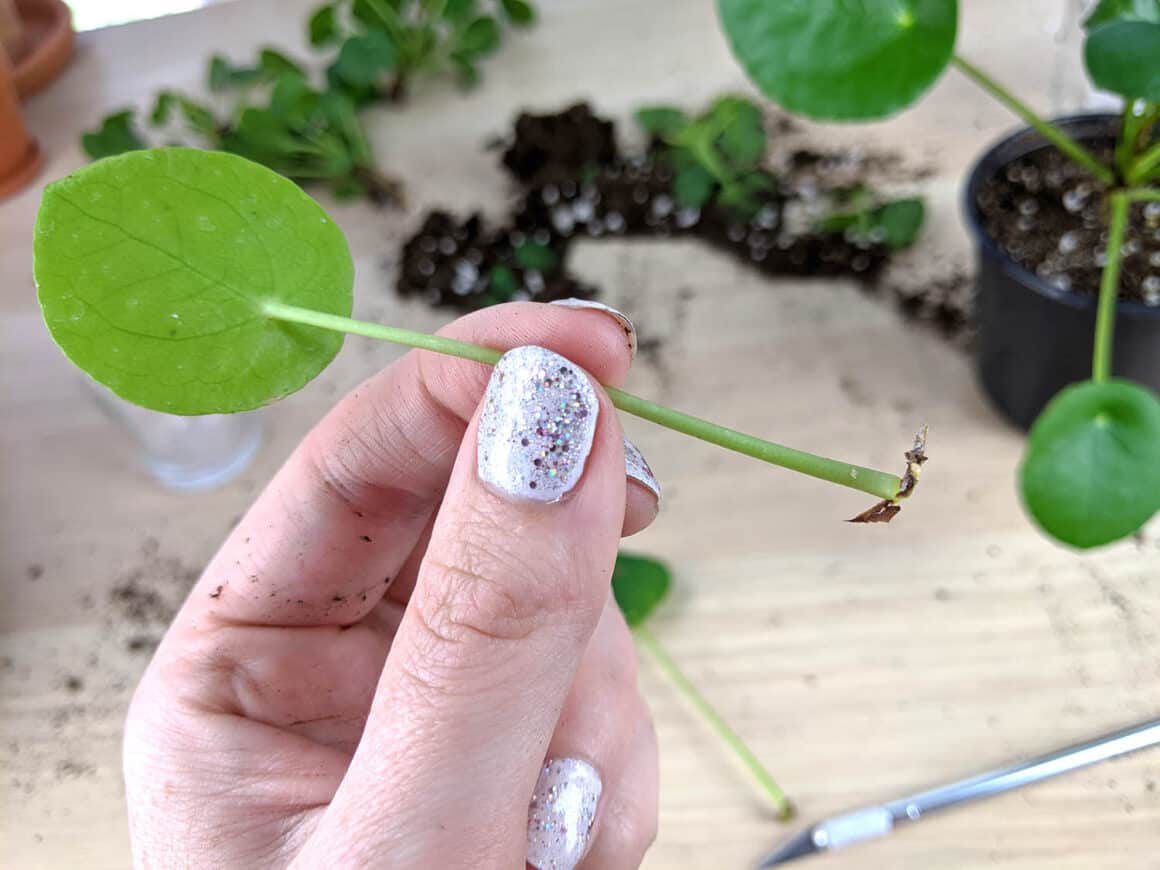
The trick to propagating Pilea leaves is to also take a bit of the trunk when you cut the leaf. A small amount of the trunk will allow the Pilea what it needs to create a new plant. Continue reading for step by step instructions on propagating with this method.
Take the Cutting
First of all, it is important to note that you will need a healthy leaf. You will not be able to produce a new plant from a leaf that has fallen from your Pilea plant. This is for two reasons: one, if the leaf has fallen off, it is probably not healthy and two, you need to cut the trunk with the leaf as stated above.
Before taking the cutting, make sure you have a sharp knife, as you will want to make sure you can cut the tissue cleanly. Be sure to clean your knife before using it.
Find a large, healthy leaf for your cutting. Follow the petiole (or stalk) back to the main trunk and use your knife to get a small slice of the trunk at the base of the stalk, being careful not to cut too deep and potentially damage your mother Pilea. You will only need a small bit of trunk connected to your leaf to grow a new plant.
With any propagation technique, it is recommended to take several cuttings as not all of them will root. This will be the case even with the healthiest of leaves.
Root in Water
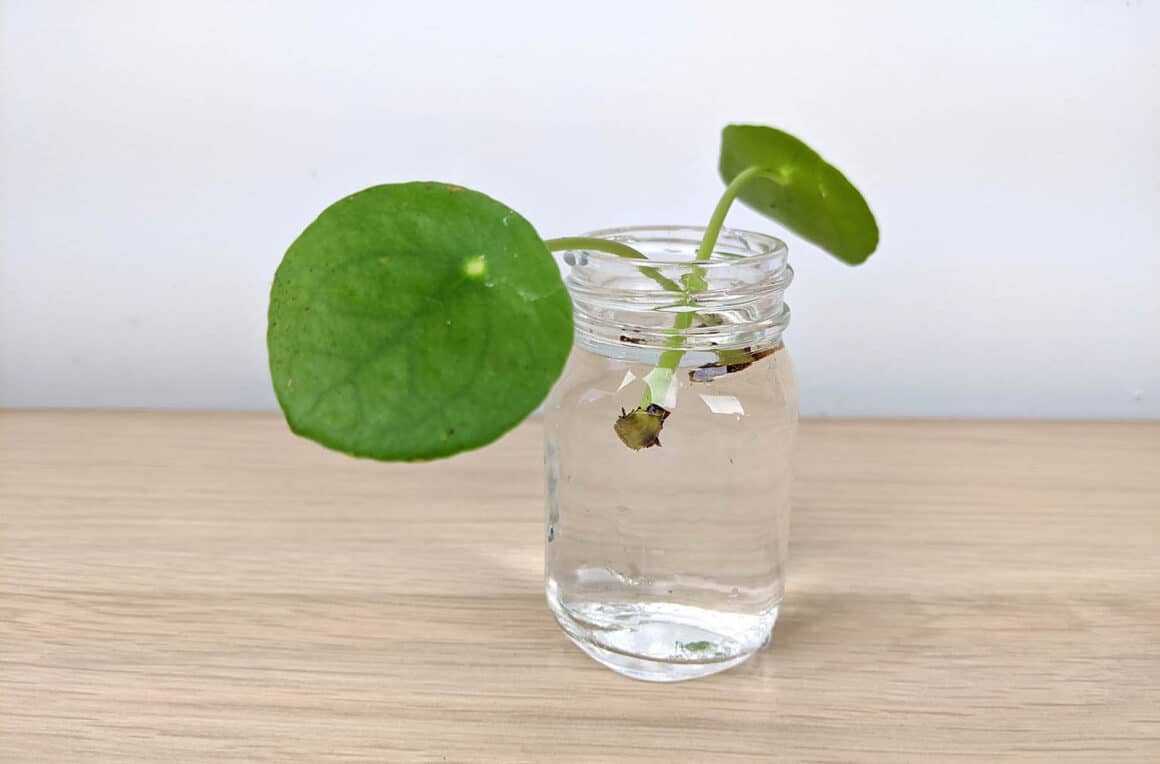
The next step is to root your cutting. For leaf propagation, I recommend rooting in water instead of directly in soil. To root your Pilea leaf, simply place the cutting into a small bottle of water. Be sure that only the trunk and base of the stalk are in the water, not the leaf itself.
It is important to regularly change your water. For your Pilea leaf propagation, the water should be changed at least once a week, or when you notice it looks dirty. Be gentle with your leaf while changing out the water as the small roots that will start to grow will be delicate.
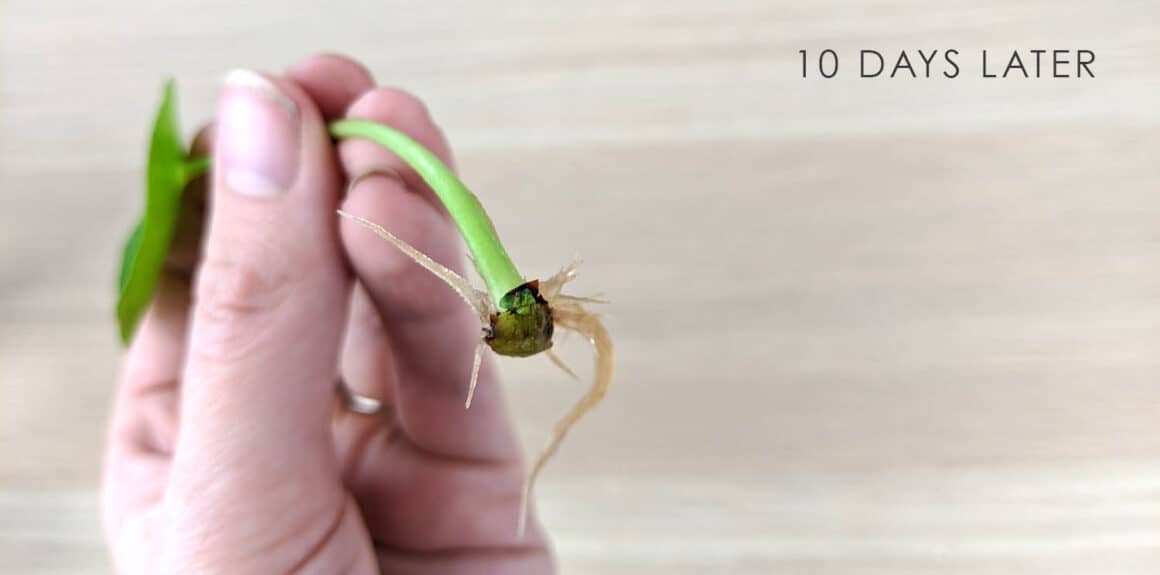
Put your leaf in an area with bright indirect light. After a few weeks, you should notice roots starting to grow. Within a month or two, you will start to see a new pup (or plantlet) forming at the base of the leaf from the trunk cutting.
Don’t be alarmed if your original leaf is starting to die. Within time, a small pup should appear at the base of the leaf which will be all you need to have another Pilea plant.
Pot In Soil and Watch It Grow!
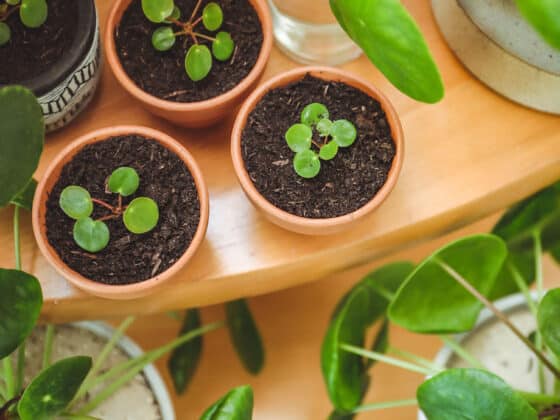
After a month or two, the Pilea pup at the base of your cutting should be large enough to put into soil. It is best to wait until the pup is about 1”-2” tall, with at least 1” of roots.
Once you are happy with the size of your new pup, you can move the plantlet to its own pot. Choose a small pot with a drainage hole for your new plant. For best results, I recommend planting in a succulent potting mix, as Pileas need to have soil that drains well.
Place your new Pilea in bright, indirect light. Care for it in the same way that you do your full size Pilea plant, being careful not to overwater it. Do not worry if a leaf or two drop from your new pup, it is not unusual for that to happen when repotting a Pilea plant.
Congratulations! You did it! You did the “impossible” and created a new Pilea from a leaf cutting.
Best Time for Propagating
The best time for any type of propagating is when the plant is in its growing season and has plenty of energy to send to new growth. Typically, the best time to propagate a Pilea is in spring.
Pileas tend to be in their growing season from spring through summer and into early fall. They become dormant in the colder months from late fall to winter. This time may be extended or shortened based on where you live.
It is possible to propagate at any time of year, but for best results, do so in the spring or summer months.
Simpler Options for Propagating Pilea
Leaf propagation is not the easiest method for propagating a Pilea Peperomioides. However, if taking a cutting from a larger plant is your only option, or you simply love a good challenge, go ahead and give it a try.
If you read this and decided this sounds too complicated for you, never fear, there are easier ways to turn one Pilea into two, three, or more.
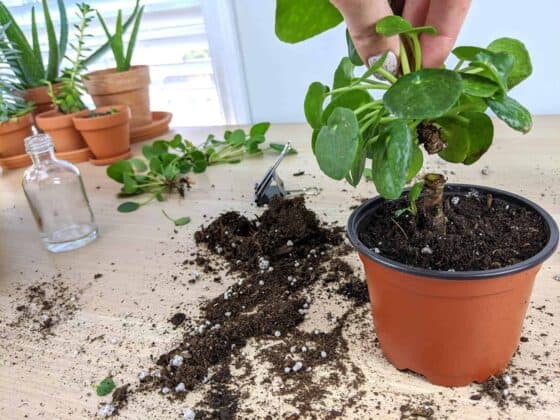
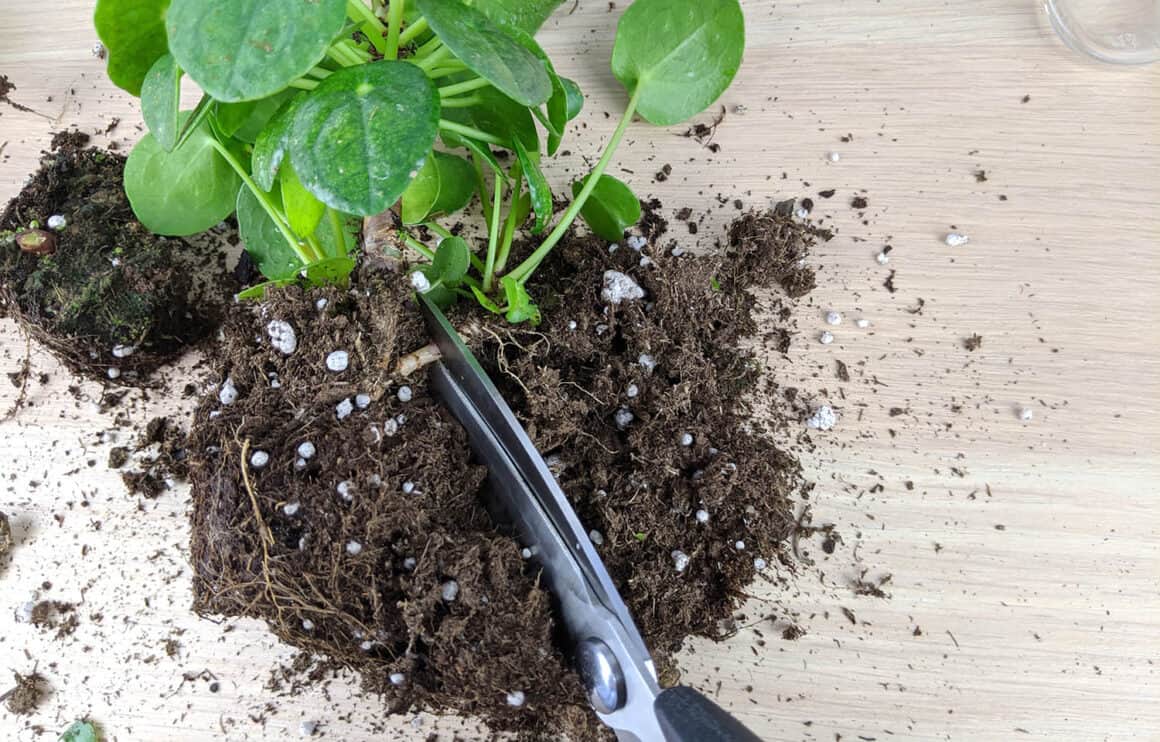
The easiest way to propagate a Pilea is by digging up the small pups that pop up in the soil next to your mother plant. This plant will be connected to the mother by a rhizome, similar to an umbilical cord. To harvest this pup, follow the stem down about ½” under the soil and cut the connecting rhizome with a sharp knife. Since this new plant will already have roots, simply put it in some soil and watch it begin to grow in a matter of a few weeks.
The next most common method is to snip the pups that pop up on the trunk of the mother plant. To take a cutting this way, use a sharp knife and cut as close to the mother trunk as possible. Since this plantlet will not have any roots yet, it is easiest to root them in water (the same process as with a leaf cutting) and put them into soil once they have about ½” of roots.
Remember that no matter which of these two methods you use, the bigger the baby, the better chance it has to live away from the mother. I suggest you wait until the new plantlet is about 2” tall before removing it from the soil or the trunk.
For more information on propagating Pileas, read this article which will give you step by step instructions.
Pilea: The Plant You Can Share
One of my favorite things about this popular plant is how easily it can become two, three, four or more plants to spread around your home or share with those you love.
Can you propagate a Pilea from a leaf? While leaf cutting propagation is not the simplest option for Pileas, it is certainly possible if you add in the extra step of cutting a portion of the trunk off with the leaf. Remember, Pilea leaves alone don’t have what they need to create a new plant. Cutting a slice of the trunk is the only way to make sure you have a cutting that can thrive into a new plant. Good luck!