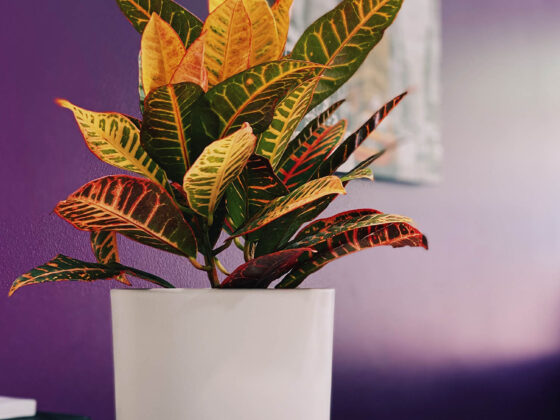
Crotons are popular houseplants known for their bright coloring and funky variegation. Although it can be a little tricky to learn how best to care for them in your home, you may find yourself wanting more once you get the hang of it. The good news is that Crotons are pretty easy to propagate! However, there are many ways to do so, and some are better than others.
Crotons are easy to propagate and do best when grown from stem cuttings rooted in water or soil. Air layering is another reliable technique. Avoid growing from seed, dividing or splitting the plant, or rooting individual leaves, as these methods offer unreliable or unusable results.
Like many other houseplants, there is a slew of information out there on the “best” methods for propagating Crotons, some of which offer dubious results. The rule with Crotons is not to overcomplicate things. I’ll cover all the different methods you can use to propagate these plants, pointing out the easiest ways to go about it and calling out the techniques you shouldn’t waste your time on.
A Quick Note on Croton Sap
Crotons are part of the Euphorbia family, a group of plants that often have a white, latex-like sap that can irritate your skin if you come into contact with it. Because these propagation methods all involve pruning or cutting away parts of the plant, you will likely come into contact with the sap at some point.
If you know you are sensitive to the sap or don’t really care to find out, wear protective gloves, an apron, or some old clothes to cover your skin from possible exposure. If you do get any on your hands, avoid touching your face or eyes and wash with warm water and a gentle soap to remove the sap as soon as possible.
The Best Methods for Propagating Crotons
The first thing you should know about Crotons is that they do really well when propagated from cuttings. There’s no point in burying the lead with this one because out of all the methods floating around the internet, taking cuttings from a mature plant is the most reliable method, but it also aligns with proper care methods for the plant.
Crotons are known for their flashy foliage and vibrant colors, so encouraging more leaf growth is the best way to keep your plant looking its very best. You need to regularly prune the plant back, which helps you control shape and size and promotes new bunches of leaves to form along the stems.
Because a healthy Croton requires regular pruning (at least once every few months), you have plenty of opportunities to propagate new plants from the cuttings you are already taking off. The only decision you need to make is whether you want to root the cuttings out in soil or water.
Propagating Cuttings in Soil
The first method to propagate Crotons is by taking cuttings from the plant and rooting them out in soil. These are often called “unrooted cuttings” because you clip off bits of the mature plant and stick them directly into potting soil without first rooting the cuttings in water.
The benefit of unrooted cuttings is that you save yourself some time by planting the cuttings directly into the soil, where they’ll root out fully without the added step of placing them in water for several weeks. The downside to this method is that all the progress goes unseen as it roots out in the soil, so it can sometimes be tricky to know the cuttings are actually progressing.
Step One: Take the Cutting
To propagate unrooted cuttings, you first need to prune away parts of the stems on your mature plant. Using clean, sharp clippers or scissors, make a 45-degree cut along the stem, usually wherever you’d like to see a new burst of leaves.
For best results, each cutting should be about three to six inches, have about three leaves on it, and be about ¼ to ½” thick. The key here is to have a portion of the stem with some nodes (usually located right above where a leaf meets the stem) containing auxiliary buds from which new growth will eventually grow.
You can succeed with much smaller cuttings that contain at least one node, but the failure rate is higher, and I’ve found that using the slightly larger cuttings with more leaves is easier, especially if you’re new to propagating plants.
Step Two: Plant in Growing Medium
Once your Croton cuttings are in hand, you can stick them directly into propagation trays or small pots filled with wet potting soil. If you want to, you can dip the cut ends into a rooting hormone powder before sticking them into the soil to encourage faster rooting, but it’s not required.
Step Three: Care for Your Cuttings
The key to getting these cuttings to root out is to keep the soil moist, the temperature warm, and the humidity high. Check the soil regularly and mist the cuttings if things look like they’re drying out.
Some people cover their propagation trays and pots with plastic lids or plastic bags. If you choose to use a plastic covering, keep it on for about a week while your tray or pot is placed in a warm spot and receives a lot of indirect sunlight.
Over the next four weeks, the cuttings should begin to root out into the soil. Check the drainage holes at the bottom of the container for signs of roots poking out, or give the cutting a gentle tug. If you feel resistance, then the cutting is beginning to root. Keep the rooted cuttings in their containers for a few more weeks to ensure they are well established in the soil before transplanting them to bigger pots.
Propagating Cuttings in Water
The other common and successful way to propagate Crotons is to create rooted cuttings. These are basically the same as above, but with the added step of placing the fresh cuttings from the mature plant into a container of water to allow them to root out before planting them in soil.
This is sometimes referred to as “striking a cutting.” While it seems like an extra step, many folks prefer this method because it’s super easy to do, and you can see the progress the roots are making, which can help you determine when to plant the cuttings in soil.
Step One: Take the Cutting
The method to create rooted cuttings starts the same. Prune your mature plant with sharp, clean clippers, ensuring each one has a few leaves attached.
Step Two: Place the Cutting In Water
Once you have the cuttings, simply put them in a glass or jar filled with room temperature water and place it in a window that receives lots of bright, indirect light. Within five or six weeks, you should start seeing roots forming from the cut end submerged in the water.
Plan on changing the water your cuttings are sitting in at least weekly, if not more often. This keeps things fresh and avoids the buildup of mold or slime around the cuttings.
Step Three: Transfer Cuttings to Soil
Once these new roots reach about three inches, you can then transplant the now-rooted cuttings to small containers filled with moistened potting soil to root out fully. Take the same care of your transferred cuttings as we listed above in Step Three of Propagating in Soil.
Air Layering
A less common but still tried and true method for propagating Crotons is something called “air layering.” This is more often used in areas where Crotons are grown outdoors but can still be done inside. Though it is a bit more involved than taking cuttings, it still works well for those who want to try it.
Air layering is a propagation method that works by creating a wound along the stem of your Croton and covering it with moss to encourage roots to form. Eventually, when the roots are long enough, the whole top part of the stem (along with the roots) can be removed and potted as a new plant.
Step One: Wound Your Croton Stem
To air layer your Croton, start by selecting a stem that receives lots of indirect light and locate a spot along its length to make your cut. You should make sure there are several leaves above the area you’ll be making your cut. Using a sharp, clean knife, cut about halfway through the stem and wedge a toothpick or something similar in the wound to keep it slightly open. Sap will run freely from the wound for a few minutes but eventually slow and stop.
If you plan on using rooting hormone, now is the time to dust the wound with the powder. Again, not absolutely necessary, but it does help speed the process up.
Step Two: Insulate the Wound
Apply a thick layer of well-moistened sphagnum moss around the cut. Sphagnum moss (sometimes known as sphagnum peat moss) is a material found in many garden centers and florist shops. Although it often gets confused with regular peat moss, it is actually the moss that grows on top of peat bogs and only a portion of what ends up in peat moss.
Sphagnum moss is better to use in air layering propagation because it has a neutral pH, whereas peat moss can be somewhat acidic. Cover the moss ball in several layers of plastic wrap with the wound wrapped in moistened sphagnum moss. This will trap the moisture in and around the cut to keep the humidity high.
Step Three: Wait
Within weeks, new roots will begin growing from the cut you made in the stem. During this time, keep a close eye on the moss to ensure it retains its moisture. If it looks like it’s drying out, temporarily remove the plastic wrap just long enough to moisten the moss.
Step Four: Remove the Cutting from the Mother Plant
When the roots are about three inches in length, you can cut the now-rooted stem all the way off the mature plant and transplant it to a new pot filled with high-quality potting soil.
Transplanting Cuttings
Regardless of which method you used to create your fully rooted, propagated cuttings, at some point, you’ll need to begin transplanting your baby plants into larger pots. Like I mentioned earlier, it’s best to wait a few extra weeks after your cuttings have rooted out in the soil they were planted in. You want your new plants to be well-established in the soil, usually waiting until new growth begins forming. That way, you’ll know your new plants are happy and healthy.
If there’s plenty of space for your plant to grow, transplanting can often wait a season or two, but you may find that new growth comes on fast once your cuttings become established in their pots.
Pick a container about one to two inches larger than the current pot. Gently remove the entire soil ball with the plant and place it in the new container so that the plant’s crown is situated just below the lip of the pot. Fill around the root ball with fresh potting soil and gently pat it down to hold the plant in place.
This is also a good time to pot up several plants together if you want to create a Croton that looks fuller and bushier. Pick three to four plants that are roughly the same size and space them evenly within a larger container. Water your Croton transplants deeply, allowing the excess liquid to drain from the bottom of the pot. The root system should begin to establish itself in its new container within a few weeks.
The Best Time to Propagate Crotons
Croton plants, when grown indoors, don’t usually go fully dormant, even in the winter. During the colder, darker months, growth may slow down, but the plants rarely shut down as many other houseplants do. Because of this, you can usually propagate via cuttings or air layering any time of year without issue.
I prefer to propagate my Crotons using cuttings during the spring or summer months. Because Crotons are more active during this time, I usually prune back the plants as part of their regular maintenance anyway, so it’s easy to throw the clippings into a glass of water to root out. This also ensures the plant has plenty of time to heal the cut wounds and push new growth before it inevitably slows down in the winter.
Croton Propagation Methods to Avoid
Whether rooted or unrooted, cuttings are the best way to propagate your Croton plant by far. While air layering is also a reliable method that has its applications, it is a little more complicated than cuttings. However, alternative methods of propagation are definitely not reliable, and in most cases, won’t yield a healthy plant anyway, and therefore not worth your time.
Leaf Propagation
If you search for Croton propagation on the internet, you’ll undoubtedly run across articles or videos explaining how easy it is to root a Croton plant from a single leaf. Strangely, most of these videos never show the final product. Why? Because you can’t actually root an entirely new Croton plant from a single leaf.
While it is possible to take leaves from your Croton and root them out in water, those “cuttings” will never actually grow new plant tissue. To produce new growth from a Croton cutting, you need at least one node that contains an auxiliary bud, from which new stem growth will be produced. Without that node, you’ll only ever have a rooted leaf. Yes, you can plant it in soil. And, yes, it may live for several months. However, that’s all it will ever be.
Plant Division or Splitting
Perhaps because indoor Croton specimens tend to be bushy and shorter, many people seem to be wondering if they can ever divide the plant and grow each half into two new, mature Crotons. Technically, splitting your plant is possible, but it depends on your specific plant. Let me explain.
Crotons, in general, do not produce new stems from the base of the plant. Any new growth is created on the growth tips (or apical meristems) located at the end of the stems. When we prune our Crotons back, a new branch can form from the first node located beneath the cut line, but again, it isn’t often that a new stem emerges from the soil. So, if it looks like your Croton has multiple stems protruding from the soil, chances are three to four individual plants were planted together in one pot. This is a common trick of the nursery trade to make plants appear bushier.
If you have multiple plants in a single pot, you can attempt to split the individual stems from one another and plant them separately. For this to work, you would need to gently untangle the separate root systems from one another before splitting the plants. If you have a single-stemmed plant, you should not attempt to divide it. In doing so, you would only be damaging the root system to the point that you might end up killing the plant.
In some instances, Crotons may produce a “sport.” This is a shoot that grows out separately from the parent plant. These can be potted separately, but these tend to be unstable and may look nothing like the parent plant. So, while splitting your Croton is technically possible, it’s not an easy or reliable propagation method, especially when compared to using cuttings.
Croton Seeds
Growing Crotons from seeds is another example of something that’s possible, but probably not worth the bother. Croton seeds are finicky, generally with low germination rates. Most importantly, the seeds do not keep their parental characteristics and may look nothing like the plants they were collected from.
While you can definitely experiment with growing Crotons from seed, perhaps sowing from a specimen with attractive variegation, the only way to get a plant that looks like the mature plant you already own is to take a cutting.
Final Thoughts
If you’ve ever wondered if it’s possible to propagate Crotons yourself, I hope you now know just how easy it is! Croton cuttings tend to root very quickly in both soil and water, and since pruning should already be a regular part of your care for this plant, you’ll have plenty of opportunities to try it out.
That being said, stick with cuttings or air layering. Other propagation methods are more difficult, less reliable, or just don’t work. You are, of course, free to experiment, but if you are hoping to create clones of a particularly beautiful Croton, your best bet is to take some cuttings.