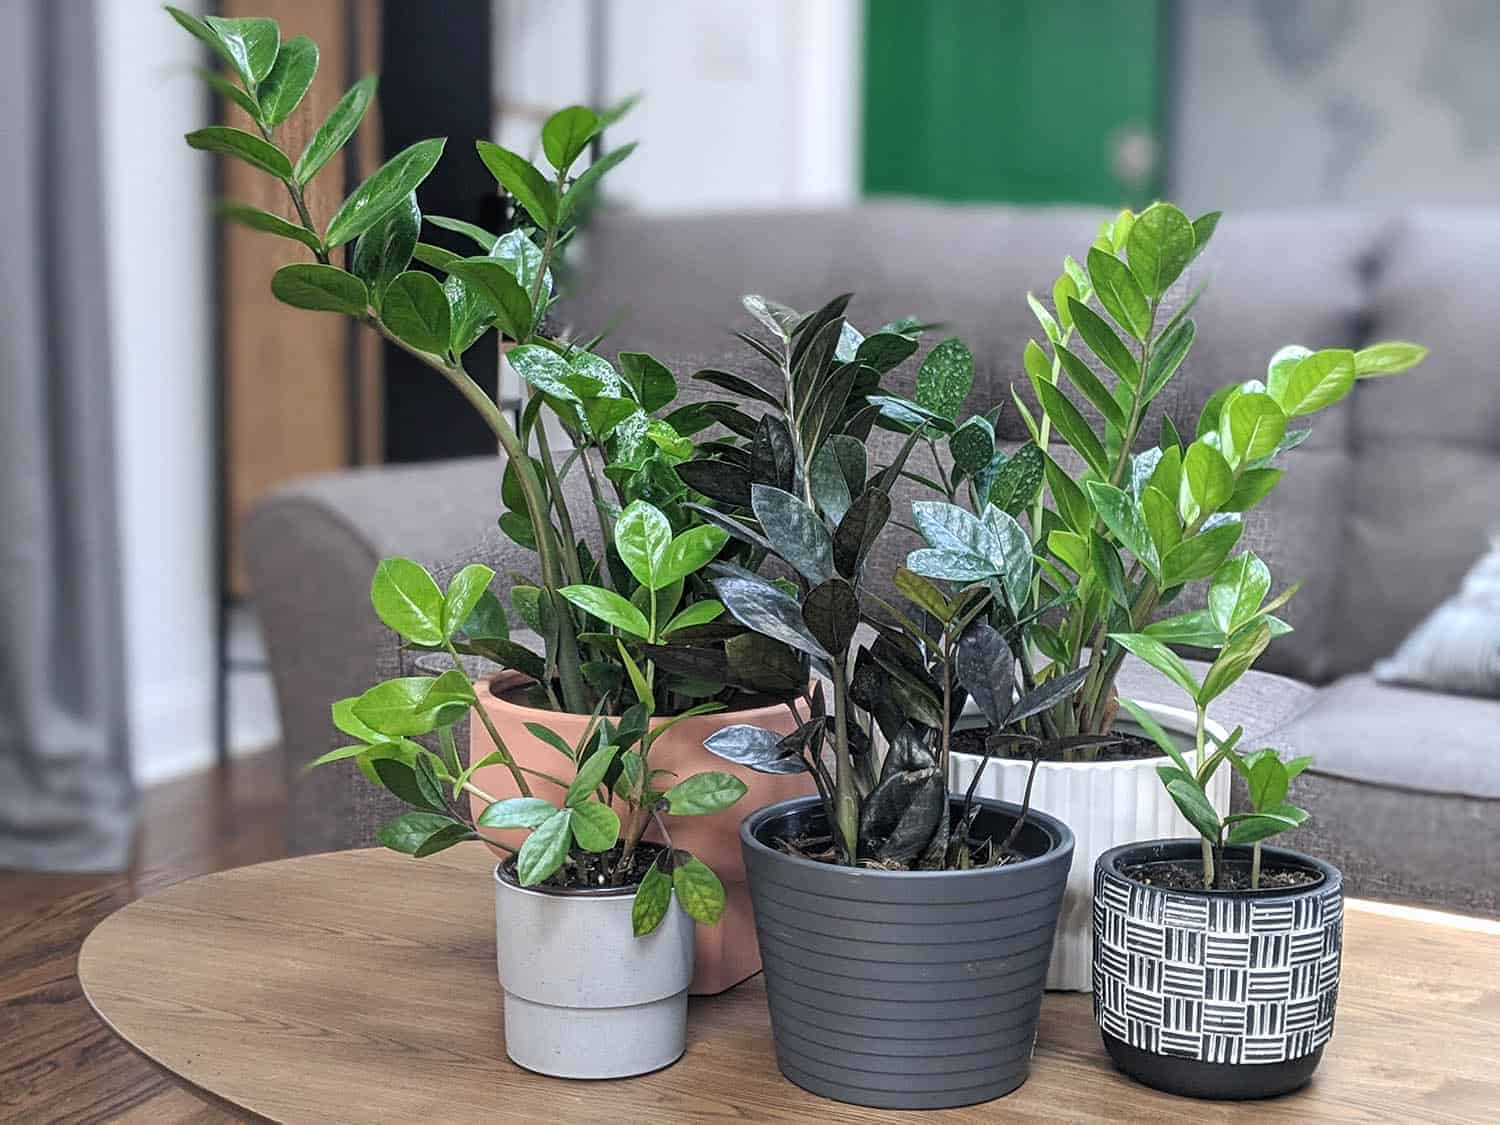
ZZ Plants (Zamioculcas zamiifolia) are widely popular houseplants that are easy to grow, reaching heights of over three feet tall with proper care. But since these plants can grow so large, it’s common for ZZ owners to ask if they can be divided, creating two or more moderately-sized plants.
ZZ owners rejoice! These hardy plants can be easily divided to make two, or even three, separate Zamioculcas zamiifolia plants. This separation and repotting are possible because of the plants’ unique root system and can be done on plants of all sizes.
Wondering if you’re up to the task of dividing your ZZ? The process is simpler than you might think. And while any time you take a knife to a plant can be stressful, keep reading to learn more about exactly what to do and when to do it.
Dividing ZZ Plants: The Basics
Plant lovers know that sometimes plants can become overcrowded – filling up a planter or competing for space in a garden. Dividing plants is an easy way to create more plants, and allow a little more growing space for the plants you already have. But not all plants can be divided.
Dividing works best with plants that can sustain, and regrow, their own root systems after being divided. For example, plants like succulents and ferns can be easily rooted after division.
ZZ Plants are even better suited to division because of their special root system, which allows ZZ owners added confidence in dividing their ZZ Plants.
Why Should You Divide a ZZ
Mature ZZs can become very large. Even though they are slow growers, they can eventually outgrow their current planters, or start to crowd each other for space.
How do you know if the pot is getting crowded? Once your ZZ Plant has grown within a half-inch of the planter’s edge, or if you start to notice exposed rhizomes above the soil, you may want to divide the plant. While you can also repot the whole ZZ into a larger planter, dividing allows you to create two, or maybe three plants out of the original ZZ.
That said, creating space isn’t the only reason to divide a ZZ. Some plant owners divide their plants as a fun and inexpensive way to grow their collections. Whatever your reason, these plants can then be spread through your home or office for a bit of added beauty.
A Short Review of Root Structure
We’ve written an entire article on the root structure of ZZ Plants that you can read here. But if you’re just looking for a quick overview, I’ll give you the cliff notes below.
When most people think of roots, they tend to think of thin, threadlike structures that tend to be bunched together in a ball. Often these threads can grow very long and can get damaged in repotting. These thin roots work like little straws, absorbing water, and nutrients from the soil.

Rhizomes, the root structure of ZZs, are not technically roots in the traditional sense, nor are they bulbs. They are actually a modified stem structure that supports the plant beneath the soil.
In an adult ZZ Plant, these rhizomes tend to look like potatoes, and they work a bit more like organic storage units. Their fleshy structures absorb water, allowing the plant to stay hydrated in drought conditions.
Since these plants are native to Africa, much of which is known for high temperatures, these rhizomes can help keep the plant healthy during dry seasons. This can make the plants very easy to care for as house plants. They also make it much easier to divide your plant, since a whole rhizome, or even a portion of the rhizome, can be repotted with success.
How to Divide a ZZ
Before you start dividing your ZZ Plant, you should prepare a place to work. Dividing a ZZ plant can get a bit messy, since you will be removing the plant from its container, dividing or cutting the rhizome, and then repotting. The odds of getting soil everywhere are pretty high, and the plants can get heavy, especially if they are large.
If you have a big ZZ, consider asking a friend to help you unpot the parent plant and repot the new plants. This will help you prevent stem breakage. Also, consider dividing the plant outside and make sure you have your gloves, planters, potting mix, and a clean, sharp blade handy.
Now, before we get started, a word of caution…
Safety First
You may have heard that ZZ Plants are poisonous or dangerous. This is mostly based on a misunderstanding. ZZ Plants are perfectly safe in most homes.
The concern over ZZ plant safety is that they create calcium oxalate, a substance made of tiny crystals found in their sap. These microscopic crystals are sharp and can cause irritation or even an itchy or painful rash. The same crystals can also cause a sore mouth and throat, or an upset stomach if swallowed. Pets can also experience these side effects if they eat the plant or play with broken stems or leaves.
Does that mean you can’t touch your plant? Not at all! The shiny coating that makes ZZ leaves so beautiful is made of a waxy “cuticle.” This thick coating of wax helps keep the plant safe from environmental issues, but it also protects you and your skin.
Because of the cuticle, most ZZ Plant owners never get a rash, and calcium oxalate only appears if leaves or stems are broken. However, If you have sensitive skin or are worried about getting a rash, try wearing gloves when you handle your plant. This is especially true when pruning, repotting, or dividing your plant, since you may break stems in the process.
To make a long story short – wear gloves, and keep babies and curious pets away from your ZZ, and you shouldn’t have to worry about a rash. Now you’re ready to start dividing your ZZ!
Separating Rhizomes
First, you will need to get your ZZ Plant out of its planter or pot, so put on your gloves and, if needed, get a friend. Some ZZ owners may have their plant in a very thin, plastic pot like you might find at a garden center. These pots are often intended to be torn or cut, and are certainly disposable. If this is the case, removing your plant will be very easy.
If your Zamioculcas zamiifolia is heavy, you may want to gently lay the planter on its side. Be careful and get help, if needed. Tipping the planter too hard could break a delicate or decorative pot, or could separate the rhizomes from the plant due to trauma.
Once the plant is on its side, run your finger, or a small blade, around the inner rim of the pot. Your goal is to start separating the dirt from the edges of the planter, making it easier to gently slide the plant out.
After you have separated the dirt from the sides of the planter, wiggle the planter back and forth, pulling on it gently. The plant should soon begin to slide out of the planter. If not, you may want to have a friend lightly pull on the planter while you hold onto the plant.
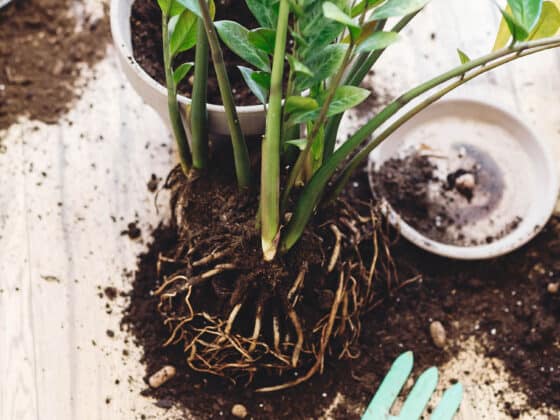
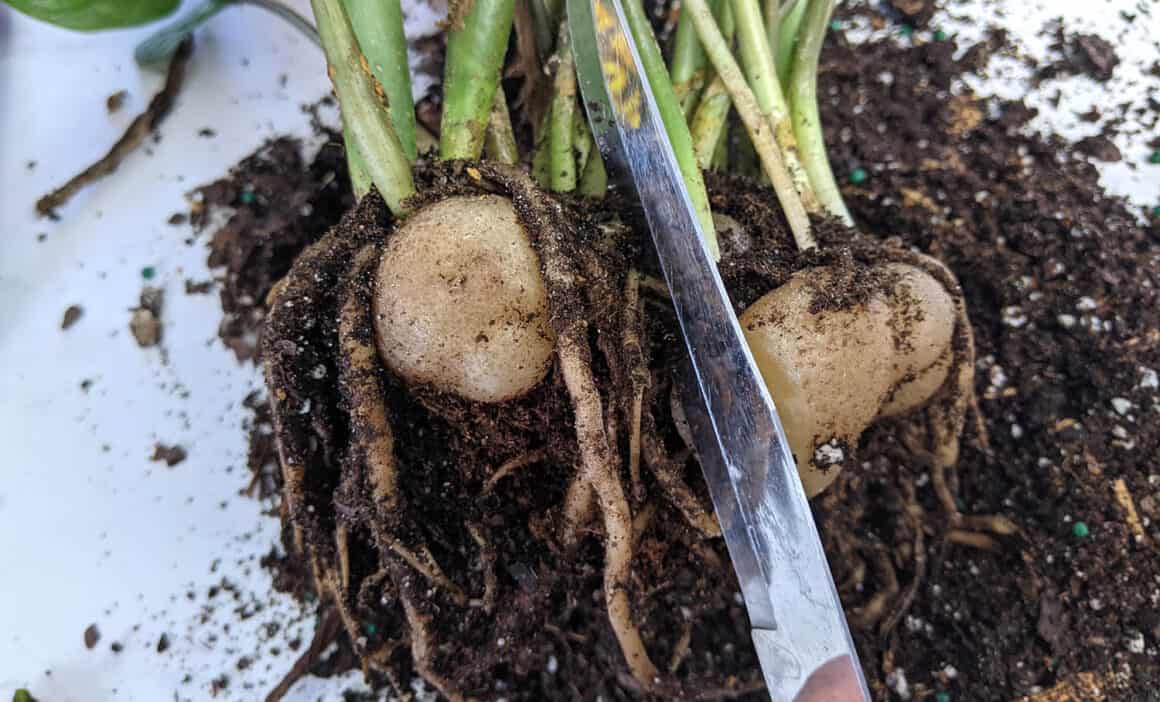
Be careful to wear gloves and hold the plant toward the base of the stems to not break off leaves or tear stems. Once the plant is free, you should see the potato-like structures, covered in dirt.
You will likely see at least a few rhizomes clustered together with multiple stems growing out of each of them. One way to divide the plant is to keep the individual rhizomes in one piece, but separate them from each other.
How easy that is to do will depend on how closely connected the rhizomes are to each other. In some cases, they have grown so close together that they are one compact block of rhizomes. If that’s the case, we will discuss the solution in the next section.
If your rhizomes are not as tightly packed together, you should be able to separate the potato-shaped structures. You may still need a sharp knife to accomplish this without risking damage to the plant, though you will have less to cut to make the separation. Also, as we said before, make sure your knife is very clean, or you may transfer bacteria into the rhizomes of your plant.
Splitting Rhizomes
If your rhizomes are tightly packed together, it may be harder to figure out how to divide them. But that is okay. Rhizomes are sturdy and can survive when cut into sections, which you may now have to do.
Depending on if you plan to turn your parent plant into two or three other ZZs, look over the rhizome cluster carefully. You are looking for a place to cut that will allow each new plant to have a portion of the cluster roughly the same size.
Once you have decided where you will cut, take your clean, sharp knife and begin to make your incisions. But take your time! A rhizome cluster can be surprisingly hard to cut. Applying too much pressure to the blade increases the risk that the knife will slip. This could cut your plant in a way that hurts its future growth or could result in a nasty cut on your hand. Instead, cut slowly and steadily until your rhizomes are split the way you wanted.
Best Soil for ZZ Plants
Now that you have separated your plant, it is time to replant your ZZs! Overall, ZZ Plants are less picky than many other plant species when it comes to their potting soil. After all, they are known for being “survivor” plants that can tolerate most conditions.
But, as we discussed earlier, these plants have a rhizome structure that absorbs water, helping them grow even in drought conditions. As a result, ZZ Plants do not thrive when overwatered. Sitting in moist, cold soil will eventually rot the rhizomes, which will kill the plant.
Since it can be very easy to forget when you last watered a plant, or how much water you used, the safest way to protect your ZZ from a watery grave is to use well-draining soil. You can consider using a blend of regular potting soil and cactus mix, both of which should be easy to find at a local garden center.
Cactus mix is different than typical soil because it has ingredients like perlite and sand added in. These additives give the soil a light texture that won’t trap too much water or turn into mud. But don’t plant your ZZ in sand or perlite alone! Since ZZ plants grow tall, they need a bit of structure to help them stand. The rhizomes won’t “anchor” well in soil that is too light.
Feeling a little overwhelmed by the potting soil options? Consider Black Gold’s Natural and Organic Potting Soil. It’s available in stores and online and contains perlite and fertilizers.
Want to try making your own mix? Adding in a bit of succulent soil mix can add drainage to the potting soil you already own.
Containers for ZZ Plants
Once you pick a well-draining soil for your plant, you need to pick the right container. Since you know that too much water is bad for a Zamioculcas zamiifolia, finding a planter with excellent drainage is critical. Multiple drainage holes allow excess water to run out of the bottom of the pot. They can also allow air to circulate in the bottom of the pot, keeping the roots dryer.

Also, porous planter materials like concrete and terra cotta can help draw excess water from the soil, though the effect is not dramatic. For this reason, many people insist on planting ZZs in these types of materials.
The size of your planter is also worth considering. While ZZ plants aren’t the fastest growing plants, their large rhizomes can eventually fill up a pot. Make sure you pick a wide and deep planter to give your plant room to grow and lets you plant the rhizomes deep enough to give tall stems support.
But beware: planters that are too large for small plants will retain too much moisture and dry out slowly after waterings. This is not good for a ZZ! Instead, find a pot that allows 2 to 3 inches of soil between your rhizomes and the edge.
Now that you’ve potted your ZZ divisions remember not to overwater. Allow the soil to dry out in between watering sessions, and when in doubt if it’s time to water again, wait a few more days. Dividing a ZZ can cause stress to the plant. You’ll need to take extra care of your newly divided ZZs for a while.
If you start to see yellowing or leaf drop, you may be overwatering. Scale back the water usage and watch for signs of ongoing illness. If you continue to see yellowing, consider misting your plant with water instead of pouring water into the soil for a few weeks.
What to Expect From Your ZZ
Congratulations – you have divided and repotted your ZZs! But even though ZZs are easy to grow plants, you will want to keep them as healthy as possible. Thankfully, some simple tips can help you get the most out of your plants and keep them growing strong and beautiful.
Remember that a newly divided ZZ has just been through a stressful situation and keep a close watch on it. Avoid areas with hot or cold drafts or direct light as these can further stress your plant.
With a little extra care, your new ZZ will recover nicely. Whether you have a ZZ that has become too large for your space, or you’re just itching to turn your one ZZ into two, division is the simplest way to propagate a ZZ. But do remember, ZZs should only be divided every year or two. Dividing a ZZ over and over again will potentially harm the plant.