Growing plants in a terrarium can be a deeply satisfying project. It’s like creating and caring for your own little world. And it’s a great way to keep plants that crave humidity happy. Tending a terrarium is very different from standard houseplant care, and covering every detail would be a job for an entire blog. But this article will describe the key requirements to get your houseplant terrarium up and running.
Build your terrarium in a glass container tall to hold your plants along with a good-sized soil layer. Always choose species with similar moisture and light requirements. Use a gritty potting mix and water or mist it sparingly. Keep your terrarium out of direct sunlight – otherwise, you’ll cook your plants!
There’s a lot of variety in terrarium styles, from tiny test tubes of moss to large, open-topped aquarium tanks. Different types will suit different plants, so make sure to have a clear plan for your setup from the beginning. We’ll explain how to prepare, assemble, and tend your terrarium below.
Why Grow Plants in a Terrarium?
If you’re accustomed to raising your houseplants in ordinary pots, you might not see the point of a terrarium. After all, these finicky bottled-up environments are less forgiving of care errors than an open-air container. Why go to the trouble?
Here are the main reasons you might want to make a terrarium:
- To grow moisture-loving plants. Terrariums trap almost all the water vapor that rises up from the soil and plants inside. This produces an extremely humid space, ideal for species that crave moisture.
- For the gram. A well-made terrarium can be a work of art. You can achieve some very cool effects by combining different plants and decorative elements in an elegant glass vessel.
- To challenge yourself. Some indoor gardeners like to test their skills with a tricky project. Some people grow Bonsai trees or delicate plants like the White Fusion Calathea for the same reason.
- For relaxation. Maintaining a terrarium can be a meditative experience, a bit like arranging a rock garden. It takes a combination of precision and patience that can calm and focus your mind.
Whatever your reasons, we hope this guide helps you craft a beautiful terrarium in which your plants will thrive.
Closed vs. Open Terrariums
You’ll need to make one big decision right at the top: will your terrarium be open or closed?
The classic terrarium is a sealed environment in which moisture recycles over and over. But you can also take a halfway approach (or a ⅔, ¾, etc. approach) by using a container that’s open on the top or side. This will still retain some moisture, creating a more humid environment than an ordinary pot. But it won’t be quite as steamy as a fully enclosed terrarium.
Closed terrariums work great for plants that grow in very damp environments like swamps, streams, or cloud forests. Mosses and ferns love a closed terrarium, as do creeping tropical vines like the String of Turtles.
Open terrariums are ideal for species that appreciate humidity but also need a fair amount of air circulation. Many aroid plants, like Anthuriums or Monsteras, will do well in this kind of environment. Open terrariums are also better for plants that grow tall or climb high, which may be hard to contain in a closed terrarium.
There are some differences in maintenance, too. Taking care of plants in an open terrarium isn’t much different from tending a houseplant in an ordinary pot. There’s more humidity, and the lack of drainage holes calls for extra caution about overwatering. Aside from that, you can more or less follow the standard care practices for the houseplants you’ve chosen.
A closed terrarium requires less frequent watering and maintenance. However, you may need to regularly prune the plants to keep them contained. You’ll also have to watch out for mold, excess condensation, and overheating.
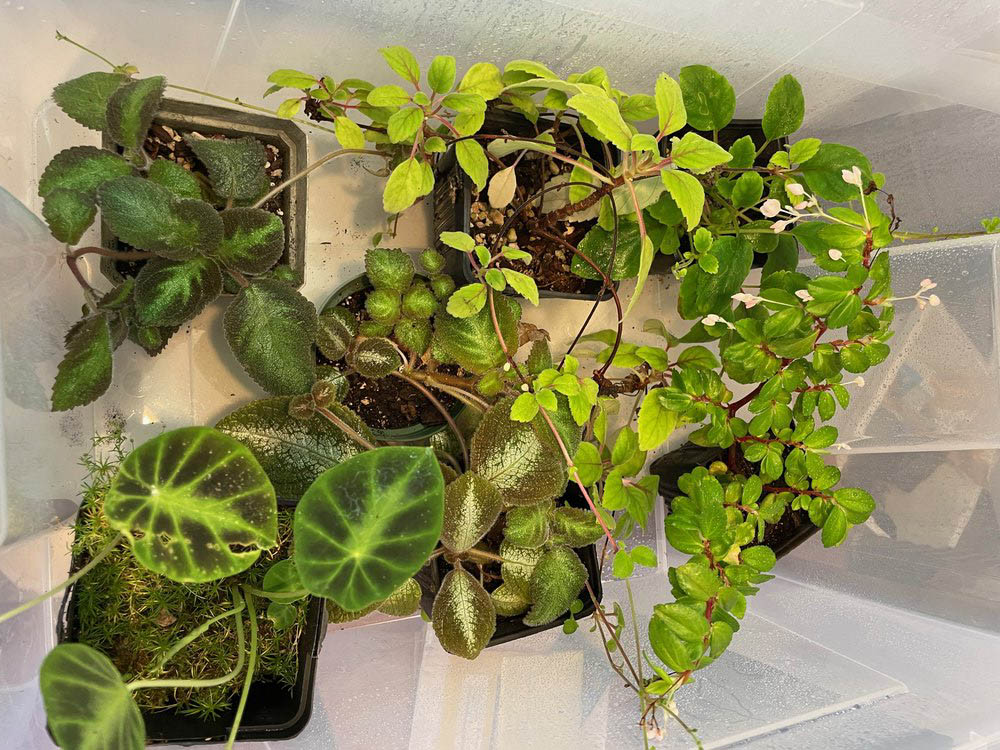
Good Plants for Terrariums
Here are a few examples of plants that thrive in terrariums:
Closed Terrarium Plants
- Maidenhair Fern. Often considered a difficult houseplant because it’s so greedy for moisture, but will thrive in a terrarium.
- Peperomia. A huge genus containing hundreds of cultivars, most of which have compact leaves that fit nicely in a jar.
- Nerve Plant. Offers great visual appeal with the branching patterns on its low-growing foliage, often in shades of red or pink.
- Bun Moss. Loves humidity and grows in bright green, spiky tufts.
- Creeping Fig. A glossy, dwarf-leafed vine that may require some pruning to keep in check.
- Parlor Palm. This tropical tree will grow to fit its container, giving you a dense canopy of slender foliage near the top of your terrarium.
- Lemon Button Fern. Rounded, sweet-smelling leaves that flourish in moist conditions.
- Java Moss. A fibrous, fuzzy-looking moss that can grow in water, on soil, or attached to the surface of rocks or logs.
- Orchids. You’ll have to be careful not to overwater them, but compact orchids make fantastic additions to terrariums.
Open Terrarium Plants
- Anthurium. Beautiful epiphytes that like both humidity and airflow, with several dwarf varieties that fit well in terrariums.
- Calathea. Loves humidity, but too susceptible to root rot for a closed terrarium.
- Pothos. This plant loves to spread out, so it’s great for a hanging, partly open terrarium.
- Air Plant. Since you water these soil-free plants by dunking them in a jar, you’ll want them in a container that allows easy access.
- Croton. A cool plant with glossy leaves featuring speckles of vivid color.
- Bromeliad. The plants in this family produce gorgeous, long-lasting flowers, and many are epiphytes that appreciate a good amount of air circulation.
Cacti, Succulents, and Terrariums
A quick online search might give you the impression that succulent plants make great choices for terrariums. Actually, cacti and other desert plants are about the worst options for a closed container. They tend to rot when the humidity is high and the soil is damp. They also like full sunlight, which is dangerous in a terrarium.
Most “succulent terrariums” are really miniature gardens arranged in glass bowls to show off the cool-looking rocks and sand. Some do have high walls and small openings, but this isn’t really good for the plants inside. The less terrarium-like their environment is, the happy your Escheverias and Lithops will be.
If you intend to keep succulents in a glass container, we’d advise using one with a very large opening. Since there are no drainage holes, you should water very infrequently. Use a coarse potting mix that won’t hold water for long, and use plenty of it. Deeper soil means moisture is more likely to pool below the level of the roots, where it can’t rot them.
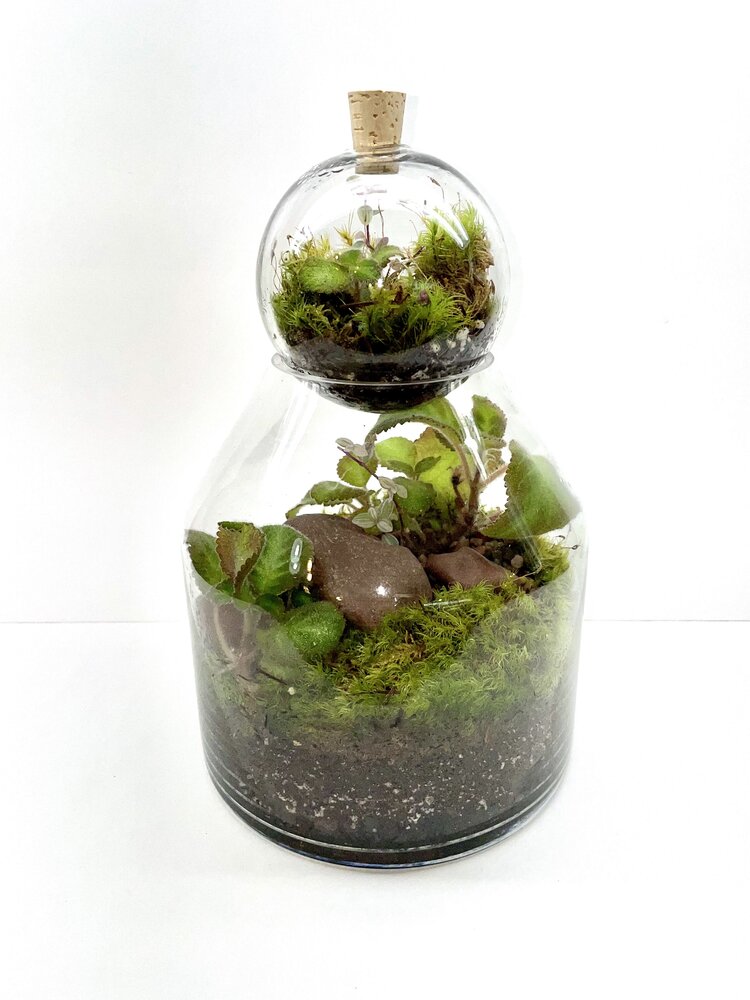
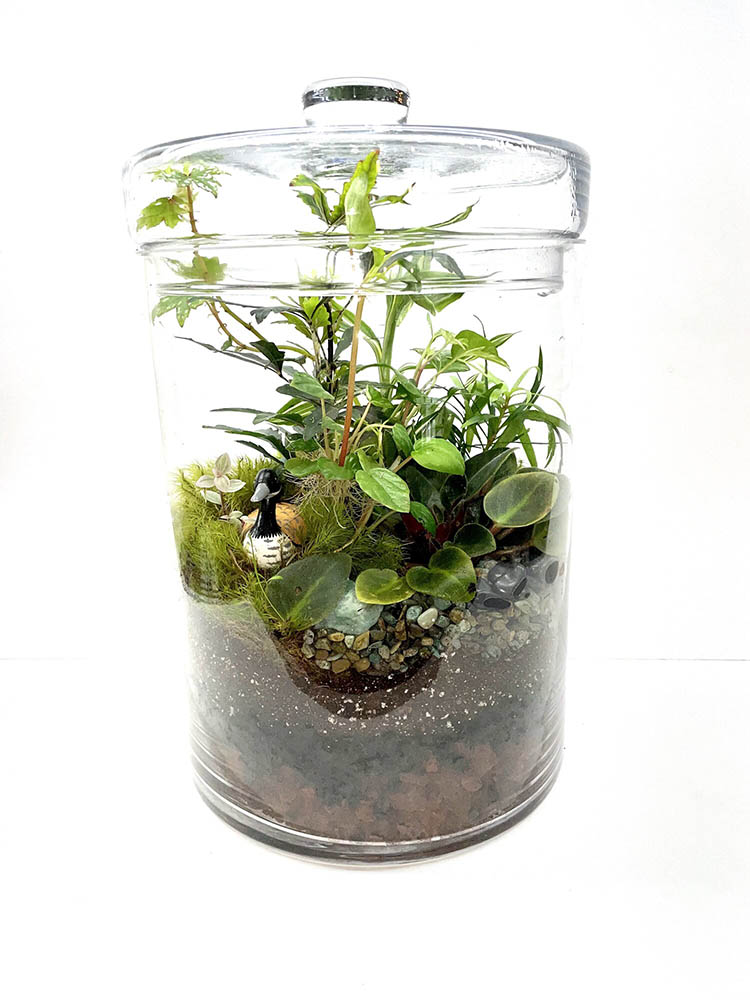
Choosing Your Terrarium Container
You can make a terrarium in almost any kind of clear glass vessel. The lid doesn’t have to be transparent, though it will let in more light if it does.
For terrarium newbies, we advise picking a container with a mouth that’s wide enough to get your hand through. This makes it easier to reach in and perform any maintenance. If you go with a narrow bottle, you’ll have to develop some skill with long-handled tweezers!
On the other hand, if you’re going to leave the terrarium partly open, you may want the base to be wider than the opening. This will help keep the humidity level in the container high despite the exchange of air at the top.
The next thing to consider is the amount of space inside. How tall will your plants get? How many of them are you going to include? Make sure you’re leaving room for all the occupants, as well as a hefty amount of whatever growing medium you’re using. You want your plants to be able to put down roots and stay healthy.

Plan to leave at least 2-4 inches of soil for your plants to dig into. And budget enough space for any top dressing and/or drainage layer you’re using. (We’ll get into the different layers of the terrarium a bit further down.)
Container Options
Here are a few classic types of terrarium containers:
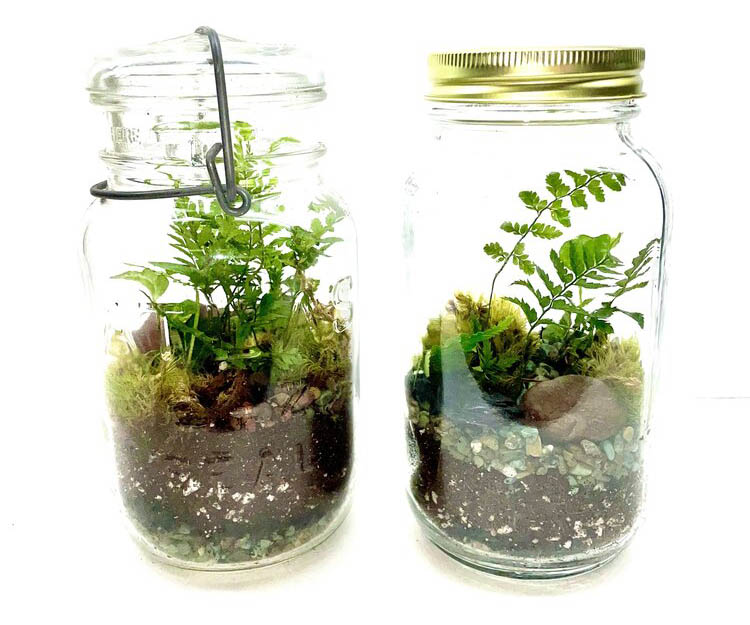
- Glass jars with resealable lids make perfect terrarium containers. Mason jars, cookie jars, jam jars, you name it. There’s a huge range of shapes and sizes to choose from.
- A fishbowl is good for an open terrarium. You can cover the opening with a watch glass to turn it into a closed terrarium.
- Aquariums and reptile tanks are excellent for housing large, extravagant terrariums. You may be able to find one secondhand without taking too much of a hit to your wallet.
- Wardian cases are geometric, metal-framed glass boxes to help you nail that neo-Victorian aesthetic. There are tons of different options for sale from craft hubs like Etsy.
- Erlenmeyer flasks or other pieces of chemistry glassware give your terrarium a bit of a mad-science flair.
If you’re going with a pre-used container, clean and disinfect it before planting! Scrub it out thoroughly, then wipe the interior and rim with rubbing alcohol.
What Goes Into Terrarium Soil?
Preparing the right growing medium is one of the most important ways to set your terrarium plants up for success. Here’s where we confront one of the biggest challenges we’ll face: avoiding root rot.
Root rot is a hazard for any houseplant. It’s harder to keep at bay in a terrarium, though, because excess water can’t flow out the bottom. Overly wet soil offers an airless environment where fungi and bacteria can breed and attack the roots.
Using a potting mix that leaves room for air will reduce this danger. Your substrate should include a decent proportion of chunky ingredients that don’t hold much water. This helps keep moisture from getting stuck in the upper layers of the soil.
Gritty Ingredients for Terrarium Soil:
- Pumice. Lightweight and porous volcanic rock that’s great for drainage.
- Perlite. Heat-treated volcanic glass that wicks up moisture while letting most of it run through.
- Orchid bark. Thick chunks of conifer bark to create gaps within the soil.
- Lava rock. Common in bonsai plantings, this stuff acts much like pumice in the mix.
- Horticultural charcoal. Chunky but lightweight, and may have some ability to absorb unwanted odors.
- Coarse sand. Not beach sand – the pebbly stuff you’d grow cacti in.
You should also have some water-retentive organic matter to keep the roots from drying out. The plants you’ll use in a terrarium like their soil damp – just not flooded.
Moisture-Holding Ingredients for Terrarium Soil:
- Coconut coir. These soft fibers are pH-neutral and long-lasting. They tend to clump loosely, leaving a bit of room for air, while still soaking up water.
- Sphagnum moss. We’re talking about dead, dried moss, not the living stuff you might grow in your terrarium. It tends to stay very moist, making it a good substrate for plants that prefer high humidity.
- Worm castings. Also called vermicompost, this is the stuff left behind when earthworms eat rotting plants. It’s nice and crumbly, perfect for soil texture, and it includes some nutrients to nourish your terrarium.
We don’t recommend using garden soil or ordinary houseplant potting soil. They’re too thick for a terrarium. Garden soil may also contain mold spores that can get out of hand in your tank. The same goes for standard compost (as opposed to commercially produced worm compost).
Preparing Terrarium Soil
As you gain experience with terrarium care, you’ll probably develop your own favorite substrate recipe. In the meantime, here’s one to get you started. Keep in mind that these percentages are by volume, not weight.
- 50% pumice, lava rock, or perlite
- 20% coconut coir
- 10% sphagnum moss
- 20% vermicompost
That mix should be spongy but airy, great for the moisture-hungry plants you’d keep in a fully enclosed terrarium. For species that prefer a bit more aeration, like aroids, try this drier blend:
- 40% orchid bark
- 25% pumice
- 25% coir
- 10% vermicompost
If you want to save time and effort by using store-bought soils, we’d recommend mixing succulent soil and African Violet potting mix. Go with a 50-50 combo for plants that like it damp. For aroids, air plants, bromeliads, etc, use 60-70% cactus mix.
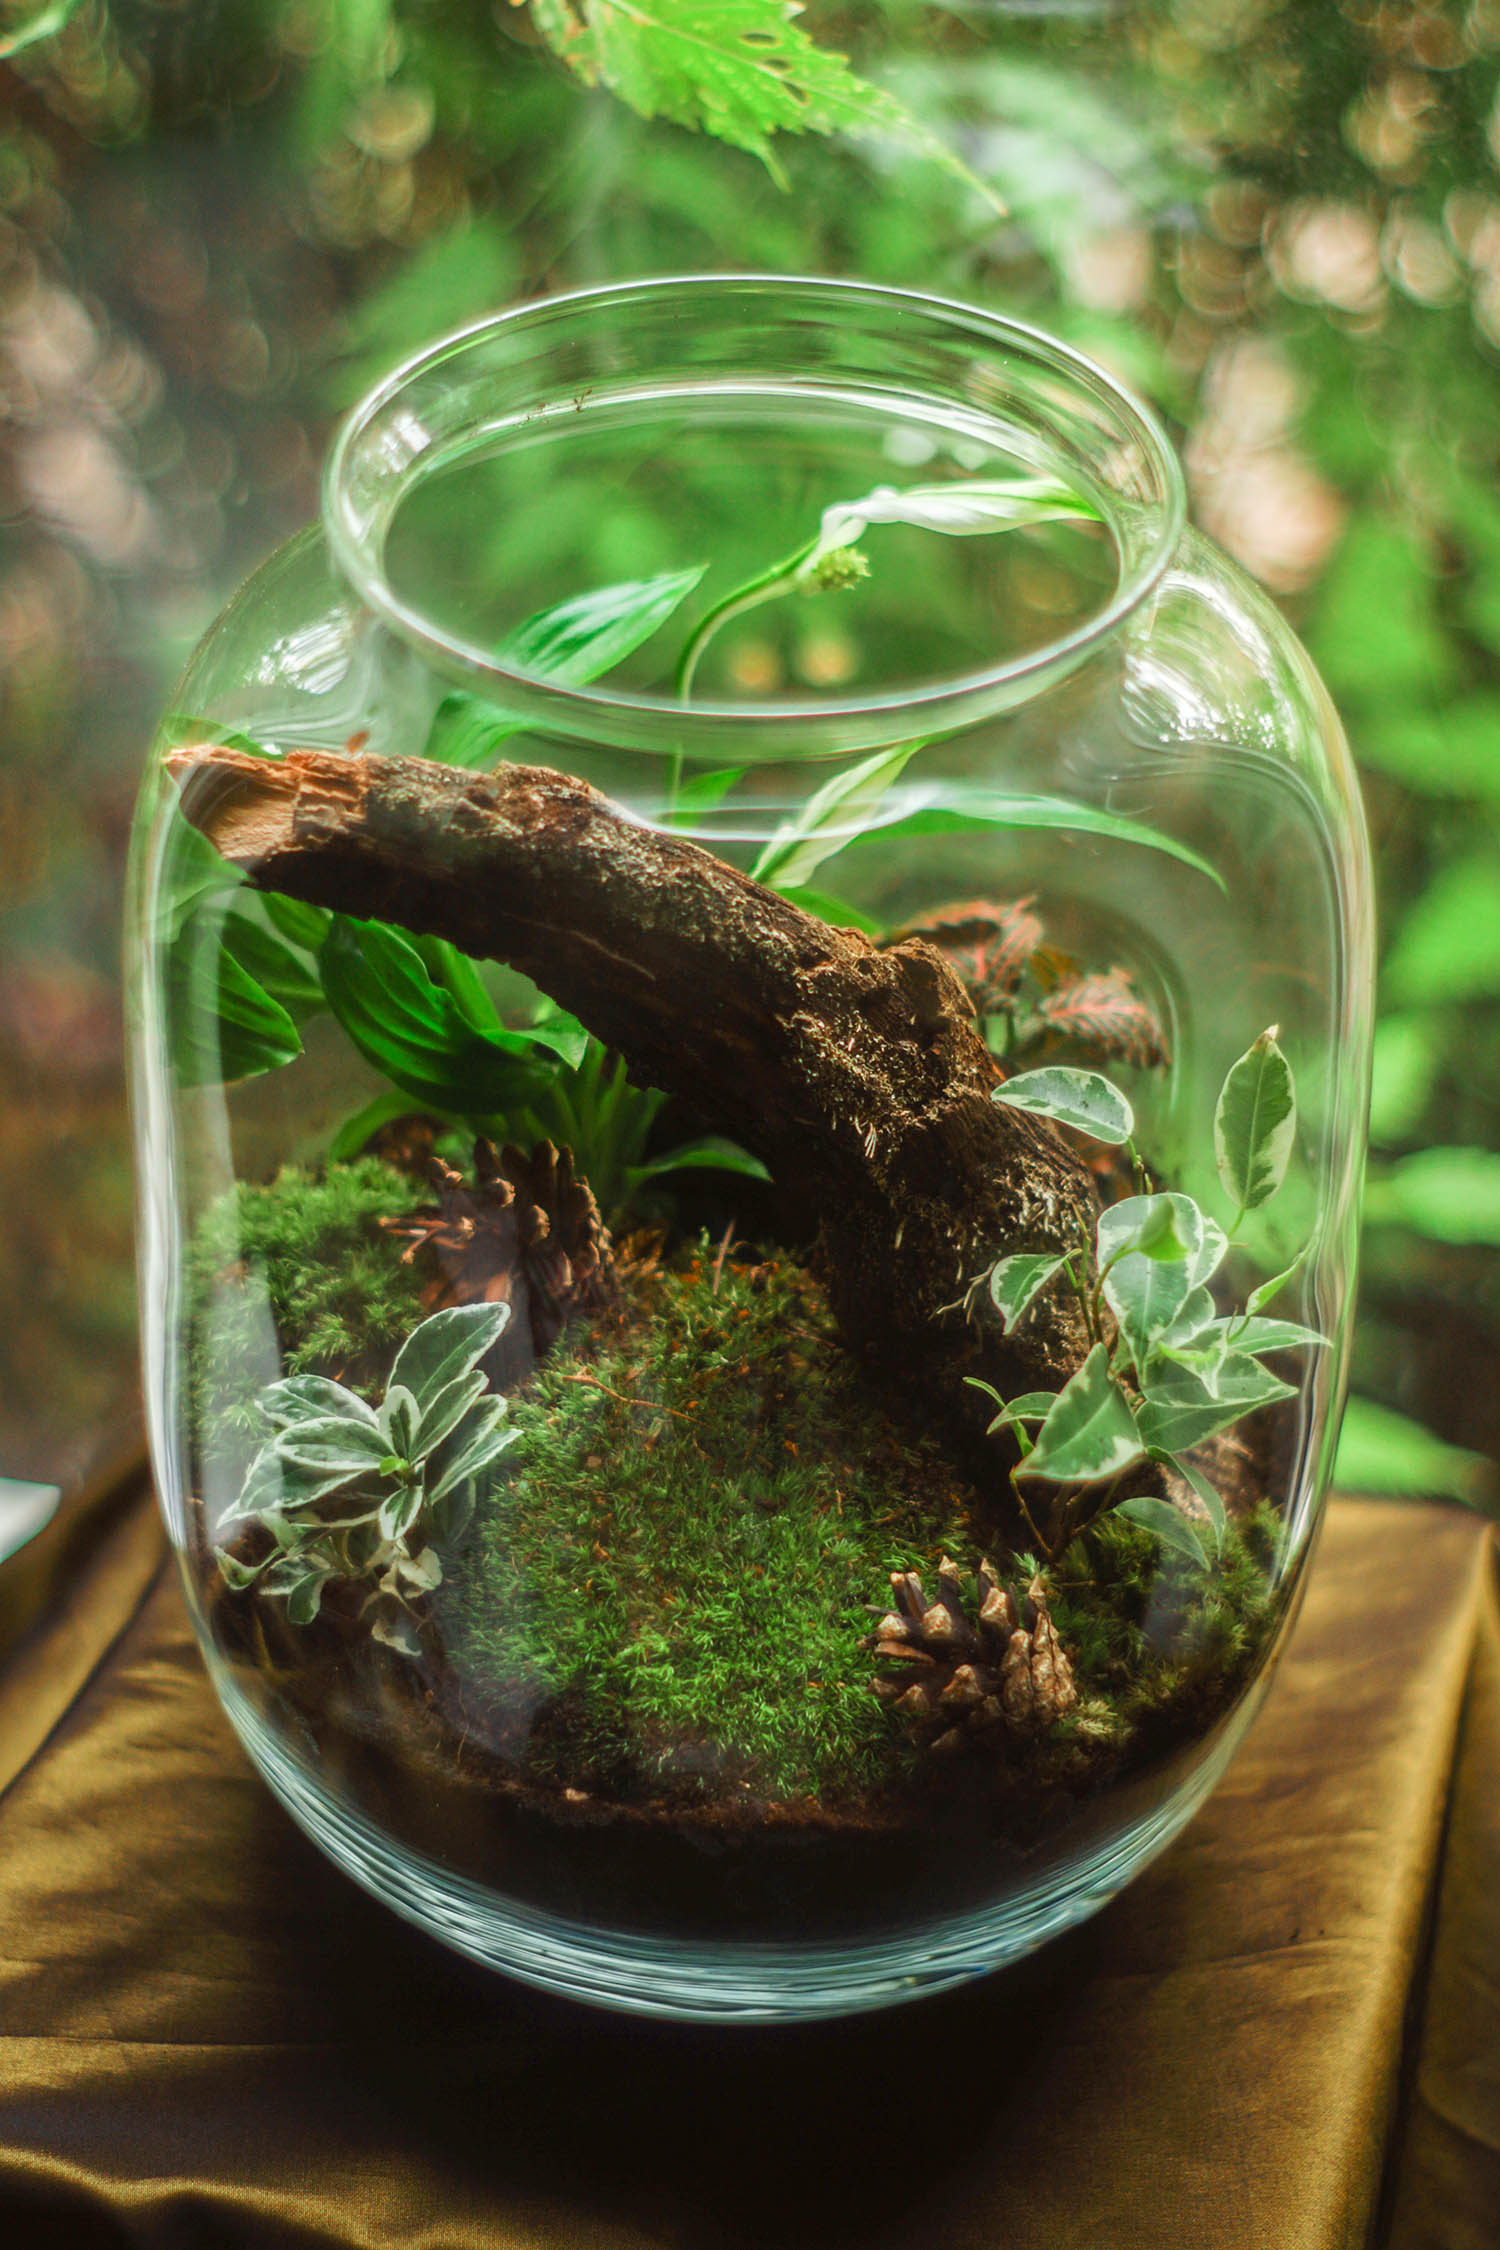
Layering Your Terrarium
The typical terrarium is arranged in a precise series of layers. The basic setup, from top to bottom, looks like this:
- Drainage Layer. Also called the “false bottom”, this is a layer of coarse gravel or other rocky material. It provides a space where excess water can sit once it trickles out of the substrate. The rocks help elevate the soil and roots above the standing water to avoid root rot.
- Moss Layer. A mat of dried moss to block substrate particles from mixing in with the gravel layer. Some people replace this with an artificial membrane of fine mesh.
- Charcoal Layer. Activated charcoal meant to soak up potential contaminants and absorb odors.
- Substrate Layer. Here’s where you place the growing medium for your plants’ roots. Again, it should be at least 2 inches thick, but 4 or more inches is better.
- Plant Layer. The actual arrangement of plants growing in your terrarium.
- Top Dressing. Rocks, pebbles, colorful sand, or other nice-looking inorganic elements that sit on top of the substrate. We’re listing these last because you’ll usually add them after the plants are rooted.
Here’s the dirty little secret of terrarium building: most of those layers are optional. You can make a perfectly good terrarium with just your substrate and plants.
The top dressing is purely ornamental, and the value of the charcoal layer is unclear. People make a lot of claims about charcoal’s ability to filter out “toxins”, but the science behind them is hard to pin down.
The drainage layer can contain some of the overflow if you accidentally water your terrarium too much. However, it only provides a small buffer that isn’t necessary if you’re careful with your watering. And if you leave out the drainage layer, the moss layer serves no purpose.
Should You Leave Out the Layers?
Despite all of the above, we’re not saying you shouldn’t layer your terrarium – just that you don’t need to. If you want to set your terrarium up in the classic style, go for it! Just keep a few key pieces of advice in mind.
First of all, the “drainage layer” doesn’t actually drain any liquid from the terrarium. There’s nowhere for the water to go once it reaches the rocks. Either it will evaporate and rise into the soil, or it will sit there and stagnate. And if the water level gets high enough to touch the soil, you’re back to worrying about root rot.
So treat your drainage layer as an early warning system, not a safeguard. When you see liquid pooling there, it means there’s more water in the terrarium than the substrate can absorb. That means it’s time to back off from watering and maybe crack the lid to let some moisture evaporate.
Next, remember that layers of gravel, charcoal, moss, and ornamental rocks all take up space that the roots could use. When there’s too little soil, it can get very saturated very quickly, leading to a higher risk of rot. Don’t get so carried away with adding cool-looking layers that you cramp your plants.
Finally, don’t count on your charcoal layer to protect against things like mold growth or over-fertilization. It might help cut down on funky odors, but it’s not going to act like a water filter.
Getting Ready to Build Your Terrarium
Make sure you’ve got all your materials ready to go – your container, your plants, your growing medium, and any decorative features. You should water your plants the day before you transfer them into the tank.
Thinking of decorating your terrarium with rocks, branches, or other materials gathered from the wild? Sterilize them first. This is as simple as dunking them in boiling water for a minute. (For those new to terrariums, natural ornamental elements like this are called hardscaping.)
For tall terrariums with narrow openings, it may be helpful to have some long, skinny tools. That will keep you from having to slide your hand inside every time. This set is made for tending aquariums and should work well for your miniature garden.
If you’re going to use a drainage layer, we’d suggest skipping the moss layer. Cover the rocks with a bit of anti-weed garden mesh instead. It will last longer and take up less space. Cut the mesh to fit into your jar or tank with a little extra material to tuck up at the edges.
For the drainage layer itself, use large pieces of rock or clay. Pumice, lava rock, and pea gravel are good options. So is LECA, a hydroponic substrate that consists of big pellets of puffed-up clay. LECA can soak up a fair amount of water, potentially increasing the buffering power of your false bottom.
How to Make Your Terrarium
Time for the moment of truth! It’s time to put it all together and craft your terrarium.
Layers
Add the layers in the order we listed them above, beginning with the false bottom. Place your mesh cutout over the drainage rocks (if using them), then lay down your charcoal and/or substrate. Lightly moisten your soil with a spray bottle before scooping it into the container. The substrate layer should be roughly as damp as a wrung-out sponge.
The standard approach is to smooth out your layers so that they’re even on all sides. Alternatively, you could create a slight slope, letting you play around with adding plants at different heights. This will give you a clear “front” and “back” side for display purposes.
Again, feel free to skip any of the layers except the substrate.
Plants
Now start arranging your plants, along with any hardscaping. You might want to put heavy decorations in place before adding the vegetation. The first plants to go in should be mosses or low-lying creepers. Adding the shorter ones first leaves you more room to work.
To place each plant in the terrarium, use your fingers or tools to create a shallow depression in the soil. Nestle the roots in, then bury them with a bit more substrate. This isn’t necessary for moss – you can just lay it down on the damp soil.
You may find that the root balls of some of your plants are too tall or wide to fit. Don’t hesitate to prune the roots or break them up and spread them out. They should recover quickly in the humid environment of a terrarium. If you need to clip the foliage to make it fit, disinfect your scissors with some rubbing alcohol first.
Finishing Touches
Once all the plants are in place, add any top dressing and level out the surface. Then you can add any last decorative rocks, twigs, gnomes, or toy dinosaurs that your heart desires.
Give the inner walls of your terrarium a light misting with filtered water from a spray bottle. Then seal up the top (if it’s a closed terrarium) and let it get grow!
Taking Care of a Terrarium
In theory, you should hardly ever need to open a well-ordered terrarium. In practice, you’ll have to monitor your little ecosystem and make sure it stays balanced. Here are your main maintenance concerns:
Lighting
Terrariums shouldn’t sit in direct sunlight – the enclosed environment heats up too fast and can fry your plants. Place your terrarium somewhere that will let it get bright light without the sun shining right on it. Some people prefer to use only artificial lighting for their tanks.
Water Levels
If water starts accumulating in the drainage level, open the lid and let some moisture evaporate. Or use a turkey baster to suck some water out from between the rocks.
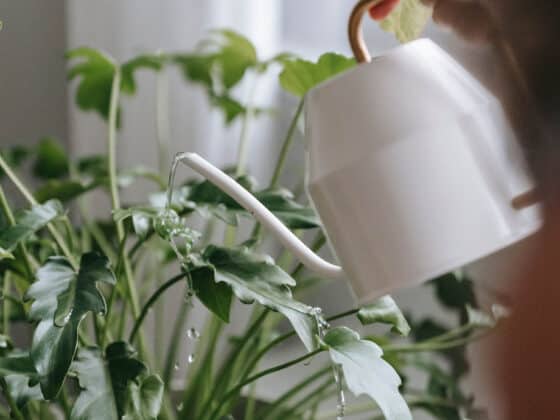
Your goal for your terrarium is to keep the soil mildly damp at all times- not dry, but not soggy. If there’s a large amount of condensation on the sides, wipe it away with a microfiber cloth. If the substrate is drying out, give the terrarium another few blasts of distilled water from your spray bottle. Be sparing with the water, or you can easily destroy your terrarium.
Pruning and Cleaning
You’ll probably need to prune the plants every few months to keep them from getting huge. Sanitize your scissors with rubbing alcohol before making any cuts.
Watch out for mold, too. If you spot mold buildup early, you can usually brush it off with a paintbrush and prevent it from spreading. When scraps of vegetation shrivel up and fall off your plants, take them out with your tweezers before they rot.
Fertilizer
Terrarium dwellers need much less nutrition than other houseplants, but they do need some. Once or twice per growing season, you can add a tiny bit of liquid fertilizer to your spray bottle. If you used worm castings in your substrate, your plants already have some nutrients, and you can wait a year or two before adding any fertilizer.
Final Thoughts
A terrarium is a fun and striking way to grow your humidity-loving houseplants. Most of the work happens at the beginning; once you’ve set it up, your main task is not to kill it with too much light, water, or fertilizer. We hope our guide has inspired you to build a lush and thriving terrarium!