Though Monstera Deliciosa is a moisture-loving tropical plant, it’s always possible to have too much of a good thing. Allowing your plant’s soil to become waterlogged can lead to the dreaded condition known as root rot. Luckily, it’s often possible to rescue your Monstera from a root infection caused by overwatering.
To save your Monstera from root rot, remove it from the soil and trim away the infected portions of the root mass to keep the disease from spreading. Then place it into all-new soil, in a different pot if possible. Make sure your Monstera’s new container has good drainage, and correct your watering technique, to keep the problem from recurring.
Depending on the extent of the rot, you may need to severely prune your Monstera’s foliage so that the roots don’t need to devote much energy to upkeep. This is never fun, but extreme measures can be necessary when you’re dealing with a massive systemic infection! The good news is that if the Monstera survives treatment, it should eventually grow back to its former leafy glory.
Why Is My Monstera Rotting?
Readers who are new to growing Monsteras may be surprised to learn that overwatering is a severe problem. It’s easy to assume that underwatering and other forms of neglect are the biggest threats to a houseplant. This notion has led many well-intentioned growers to kill their Monsteras with kindness.
It’s true that plants need to absorb plenty of water to survive and grow. But as anyone who’s dealt with athlete’s foot knows, damp and dark areas are the perfect breeding grounds for fungi and bacteria.
There are lots of opportunistic microbes that can lurk quietly in your soil, only to begin growing like crazy once they detect favorable conditions. Your Monstera’s roots are a juicy target for these rapacious organisms.
Although it’s possible to save an overwatered Monstera from root rot, you’ll have a much easier time if you keep the problem from happening in the first place. So let’s look at a few of the common mistakes that can cause this condition:
Watering on a schedule. New houseplant growers often water at fixed intervals. But plants don’t absorb water on a fixed schedule, so this can lead to waterlogged soil. Instead, give your Monstera more to drink once the top two inches of soil have dried out.
Poor drainage. Even if you’re careful about your watering habits, fully enclosed containers can trap water in the base and cause root rot. Always use a pot with drainage holes.
Heavy soil. The other cause of drainage issues is soil that’s not loose enough. Use good potting soil instead of gardening soil, and if necessary, lighten it with an additive like sand or perlite. For more information on the best potting soil for Monsteras, click here.
For a more detailed guide to properly watering your Monstera, check out our article on the subject.
Can’t You Grow Monsteras in Water?
The question of overwatering can be even more confusing if you know that many people grow Monstera Deliciosa in water for prolonged periods, without any soil at all. But if they can survive that, how can they possibly be at risk of overwatering?
The answer is actually a little complicated – we discuss it in more detail in this article – but the short version is that when grown entirely in water, Monsteras produce a different type of root. These more slender and fragile roots are built to absorb the correct amount of moisture.
Also, damp soil is much more hospitable to fungi and bacteria than water alone.
Warning Signs Of Overwatering and Root Rot
Root rot is a particularly insidious problem for plant growers because it begins underground. By the time your Monstera’s leaves or stems show stress, the rot underneath may be fairly advanced.
The only sure way to diagnose root rot is to take your plant out of the soil and inspect its root system directly. That said, there are some indicators that can alert you that it’s time to look under the hood.
Often the earliest sign is simply that the plant is growing slowly or not at all. Monsteras are prized partly because they’re quite tough, and they can shrug off lots of problems that would prevent growth in more finicky houseplants.
If you haven’t substantially changed your Monstera’s nutrition or lighting conditions, and it’s having a slow or nonexistent growing season, root rot could be the problem.
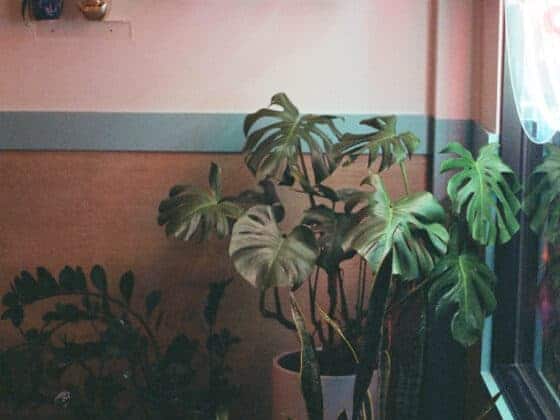
Another potential danger sign is yellowing or faded leaves. A small amount of yellowing is normal, but when many leaves are becoming discolored at once, it can be a hint that you’re overwatering.
This may be a very valuable warning sign because it can crop up before root rot has actually set in. It could also mean your Monstera is lacking in nutrients, but always check for overwatering when you notice yellowing leaves.
You should also watch for brown and shriveled leaf tips. This is more commonly a sign of underwatering, but it might indicate that the Monstera is drying out because its roots are dying. If you see this symptom along with yellowing leaves, it’s especially likely that you’re dealing with root rot.
A Monstera that’s giving off a rotten or musty odor is a serious red flag. Foul odors can mean that the infection has spread through a large portion of the root system and begun to migrate up to the main body.
Similarly, visible rot on the leaves or stems of your Monstera can be the result of pathogens creeping up from the roots.
What Does Root Rot Look Like in Monstera Deliciosa?
Once you’ve spotted one of the warning indicators listed above, it’s time to get your Monstera out of its pot and take a look at the roots.
Don’t take chances with root rot! As we said above, Monsteras are hardy plants, so the stress of uprooting is unlikely to kill them. Untreated root rot, on the other hand, is always deadly. So inspect the roots early and often.
Grip your Monstera tightly at the base, and wiggle it loose from its container. Be gentle with the plant, as it’s entirely possible that it’s already sustained some damage, and you don’t want to make it worse.
Tilt the container on its side so you’re not fighting gravity. If it’s not coming loose easily, you can run a blunt knife or trowel around the inside of the planter to help pry out the mass of earth and roots.
Then clear away any soil that’s clinging to the roots as best you can. Running it under some warm water in your sink as you brush away the clods is often helpful. Again, be gentle with your Monstera’s roots to avoid damaging them further.
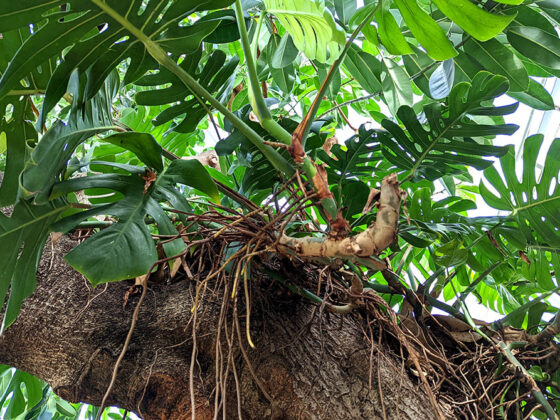
Once you can see the roots clearly, examine them closely. You’re looking for any signs of dark coloration, as well as a soft or slimy texture. Healthy Monstera roots are a white or beige color and have a firm, springy feel.
Root rot will give roots a gray, brown, or black appearance and will make the roots feel mushy and slick. They’ll also typically give off a foul odor.
The typical pattern for root rot is to start at the extremities and work its way inward. So the most advanced decay will probably be at the tips of infected roots, with any remaining healthy tissue closer to the base of the plant.
Rescuing an Overwatered Monstera
Now that you’ve got your diagnosis, it’s time to move on to treatment. How you proceed will depend on how severe the problem is.
If your plant is waterlogged but not yet showing signs of root rot, then all you need to do is clean the roots and repot the plant in an adequate container. If you do see rot, you’ll need to remove the infected potions of your Monstera.
You’ll want to gather a few things before you start:
A set of sharp scissors or pruning shears
Some sturdy gloves
A clean rag or cloth
A disinfectant solution – 70% isopropyl alcohol will do nicely, as will a mix of one part bleach to nine parts water
Some gentle soap
Fresh potting soil
A clean container with good drainage holes
Step 1: Wash The Roots
Handwashing helps to stop the spread of disease in humans, and the same principle applies to stopping the spread of rot between your Monstera’s roots. Soap kills bacteria, and anything you can do to reduce the strain on your plant’s immune system will be helpful.
You don’t need to use anything particularly fancy here. The same kind of soap you use to wash your hands should be acceptable.
As with the inspection, you should be gentle when washing. Lather your hands up and slowly massage your Monstera’s roots, then rinse off the soap. Don’t worry if a few roots fall off – that’s a sign that they weren’t particularly healthy anyway.
Step 2: Clear Away Unhealthy Leaves
You should remove dead or dying leaves from your Monstera as part of its routine care, but it’s especially important when the plant is suffering from stress or illness. Even withered leaves require some maintenance, which means they’re drawing energy away from the plant’s roots. Clearing them away lets your Monstera redirect that energy towards recovery.
Apply some disinfectant to your rag or cloth and use it to wipe down your pruning tool. Repeat this between cuts to avoid spreading any germs from one part of the plant to another.
Snip away each dead or dying stem just after it branches off from the nearest healthy growth. If you’ve confirmed that your Monstera’s roots are free of rot, then at this point, you can skip ahead to step 6 and begin replanting.
Step 3: Remove Any Rotted Roots
This is the critical step. The only cure for root rot is to cut it out completely. If any infected tissue remains, it will probably continue to spread once you get your Monstera back into the soil.
Just as you did when pruning the leaves, you should sterilize your shears or scissors between snips. Whenever possible, try to remove each root with a single clean cut. Ragged edges will be harder for your Monstera to heal.
Now the only question is how much to cut away. Remember how we told you to be gentle earlier? Well, now it’s time to be ruthless.

Anything that looks questionable has to go. Is there a patch that seems just a little bit gray and slightly squishy? Don’t take chances – prune it away.
“But won’t I risk killing my Monstera?” you might be asking. Yes, there is a risk – there’s no point in sugarcoating it. Root rot is a nasty disease, and if it’s extensive enough, your plant could be beyond saving.
But if there is any hope left for your Monstera, it is dependent upon you removing any and all infected material.
Step 4: Prune Any Rotted Stems and Leaves
If the decay has spread to the Monstera’s upper body, then it’s time to amputate. Take off any limbs or leaves that show signs of rot.
In some cases, this will mean actually splitting your Monstera in half as though you were going to propagate it by root division. In fact, if the plant is too rotted to rescue, starting fresh from a healthy cutting is one way to salvage a tiny bit from the wreck.
This stage is where you might want to use your gloves. Monstera deliciosa produces a mildly toxic sap that can cause skin irritation in some people.
Step 5: Consider Extensive Pruning
A severely stressed root system will have a hard time recovering if it has to support a substantial canopy. If you’ve had to remove more than one-third of your Monstera’s roots, then you should also prune some of the healthy foliage. In this case, we recommend cutting back one-third of your Monstera’s above-ground growth.
It should go without saying that when things get this drastic, there’s no guarantee the plant will survive. But it will have a much better shot if it can focus on rebuilding its root system rather than propping up its existing foliage.
Step 6: Clean Or Replace Your Pot
It’s almost time to get your Monstera back into the soil, but first, you’ll need to make sure it’s coming home to a clean vessel. The safest choice is to use a fresh pot because the bacteria and fungi that cause root rot could be lurking in the old one.
If you go this route, make sure the new pot has one or more drainage holes, and pay attention to the size of the container. If you’ve had to prune aggressively, you can probably use the same size pot as before. Otherwise, it’s probably a good idea to go a size up.
If you do want to reuse your old container, you’ll need to sterilize it. All of your hard work will be for nothing if the pot is still full of hungry microbes when your Monstera returns.
The same bleach solution we recommended for sterilizing your shears – one part bleach to nine parts water – should get the job done. Wipe down both the interior and exterior with this mixture.
It’s also worth considering whether your pot’s poor drainage contributed to the overwatering problem. If the container is made of plastic, you can easily drill a few more drainage holes. Ceramic is a little trickier, but there are specialized drill bits that can get the job done.
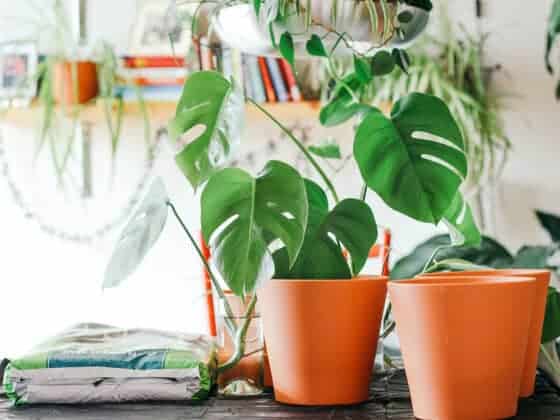
Step 7: Replant Your Monstera
Unlike your pot, there’s no way to salvage the old soil in cases of root rot. Don’t reuse it with this plant or any other. It’s all contaminated, so throw it away.
Add fresh potting soil to your container. If you’re concerned about drainage, you can also add a layer of stones at the bottom of the pot (do this in addition to a drainage hole – not instead of). Then place your Monstera inside and water it thoroughly.
For more detailed information on repotting a Monstera deliciosa, you can look through our handy guide.
After replanting, make sure your Monstera is in a good location. It’s going to have a tough enough time bouncing back even in ideal conditions. Monsteras appreciate plenty of bright, indirect light and good ventilation. Take care to keep it from getting stressed by significant shifts in temperature.
Be patient with your plant as it recovers – it will likely be a few months before it starts putting out any new growth. The healing has to happen below the surface first.
Avoid adding any fertilizer to your Monstera until it has bounced back from its ordeal. The new roots that it’s establishing can be hurt by chemical fertilizer. Give it a few months at least.
Get Started!
Slashing away big portions of your plant can seem daunting, but waiting to deal with root rot will do much more damage in the long run. So if you think your plant’s roots are infected, don’t delay! Acting quickly could save your Monstera’s life.