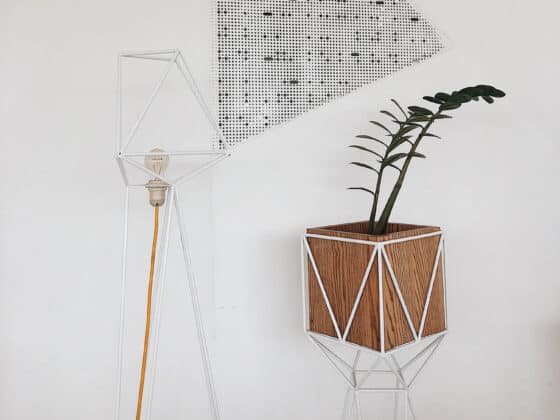
Zamioculcas Zamiifolia, commonly known as the ZZ Plant, is a variety of houseplant that is both beautiful and easy to grow. Since water propagation is an increasingly popular clean and convenient way to grow plants, ZZ lovers have been asking if Zamioculcas zamiifolia can be reproduced in water.
Can you root ZZ Plants in water? While ZZ Plants can be propagated in water, it’s not the best technique for the plant’s health. ZZs have a unique root system that grows better in soil, so its best to plant cuttings directly in soil from the start. However, some strategies can help fans of water propagation get good results from this method.
I love to propagate plants in water. It allows me to watch their roots grow without any mess or cleanup. If you’re like me, there are methods for rooting and propagating ZZs in water. With a little bit of insight, you’ll be on your way.
Can You Propagate ZZs in Water: The Short Answer
ZZs are known for being sturdy plants that can survive almost anything. If necessary, Zamioculcas Zamiifolia can grow in partial shade, with little or no fertilizer, and can even tolerate infrequent watering. Their ability to thrive without much water comes from their unique root system, which is adapted for dry, sandy environments.
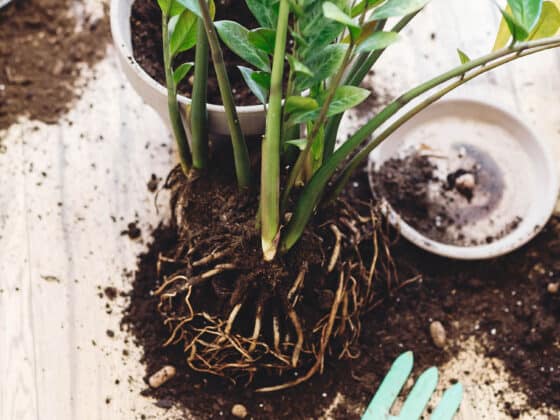
While most plant roots look like a bundle of threads, a ZZ Plant grows from a rounded, fleshy structure that looks like a potato called a rhizome. This rhizome helps to absorb and hold water for the plant, providing a water reserve to help it survive droughts.
But even though rhizomes are great at storing water, they can rot or mold if they are left sitting in water too long. This is because their fleshy, porous composition makes them more delicate than other types of roots, especially when developing. Constant dampness will soften the tissue and can cause it to detach from the plant.
This doesn’t mean that you can’t propagate a ZZ Plant in water or that the rhizome will automatically deteriorate. However, the process may take a bit more time, and may not produce plants that are as hardy as those propagated in soil.
ZZs can be propagated from stems or from single leaves. I’m going to walk you through the process for both options, as well as provide you with some of the pros and cons of water propagation.
Propagating ZZ Stems in Water
The quickest way to end up with a full looking ZZ is to start with larger pieces. For this reason, stems are always my preferred method of propagation. Taking stem cuttings is extremely simple, but to give your cuttings the best chance to thrive in water, you will want to pick the healthiest stems possible.
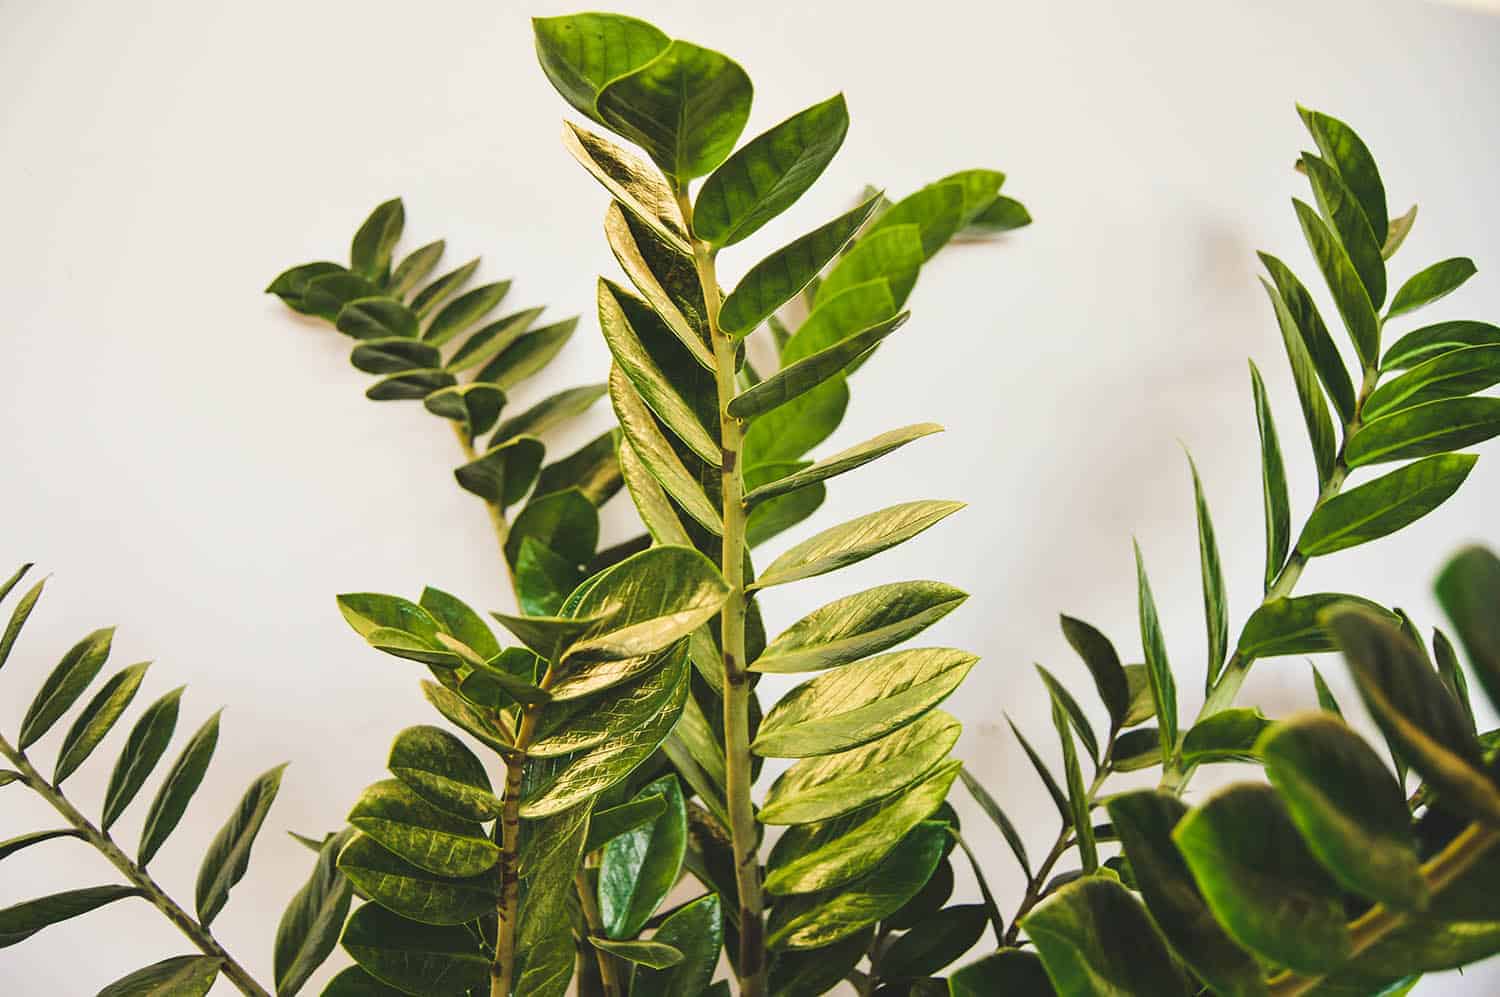
Look for stems that are mature, firm, and consistently colored – no signs of yellow or brown. You will also want to pick stems that are at least a few inches in length. Since stems with leaves seem to propagate a bit more quickly, look for stems with several healthy leaves.
Stems that have leaves with brown edges or traces of yellow should be avoided. Instead, choose stems with only dark green, glossy leaves.
Since propagating in water isn’t always as certain as propagating in soil, it would be a good idea to pick 2-3 healthy stems, if your “parent” plant can spare them. Having multiple stem cuttings will give you the best chance of successful propagation. Once you’ve picked your healthy stems, you’re ready to start cutting.
Make sure to wash your knife or scissors carefully before making any cuts. A dull or dirty blade can damage the stem, and you don’t want any bacteria to get into your cutting.
Note that since the fluid inside of a ZZ Plant can irritate your skin, you should wear gardening gloves during and after cutting the stem.
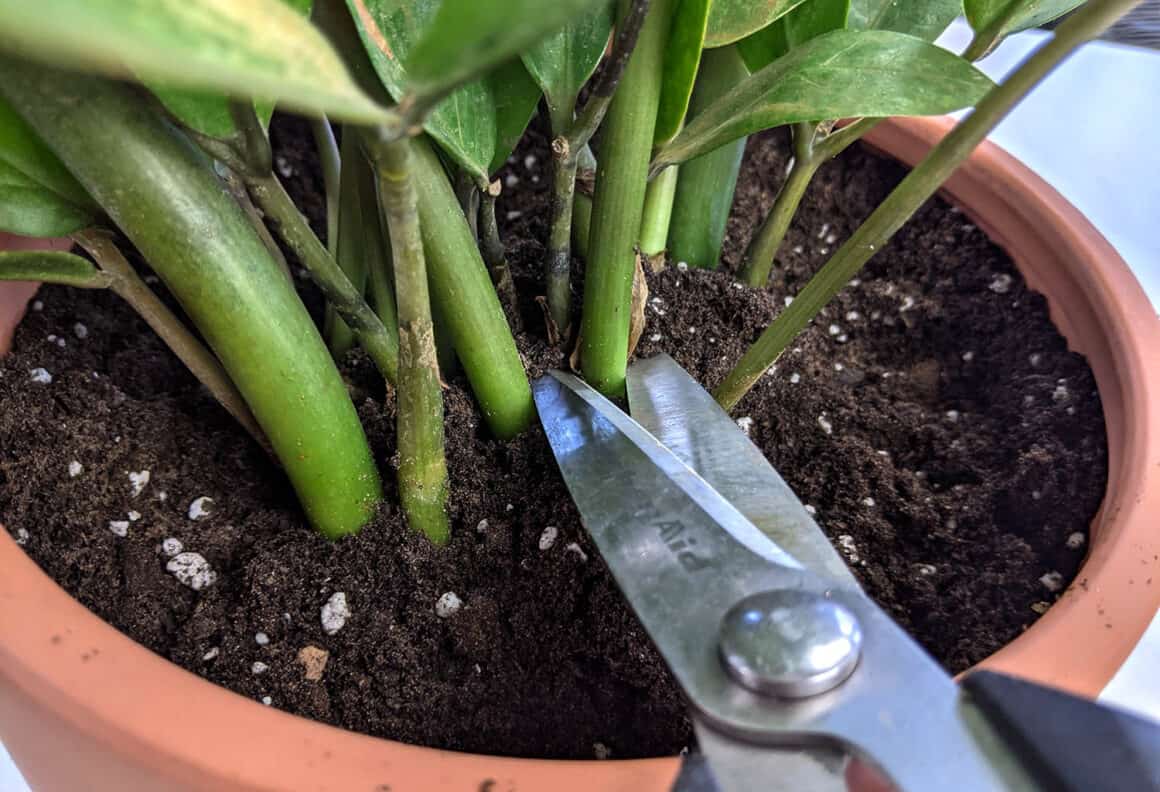
Cut at the base of the plant near the soil and make sure that you have at least 3″ of stem below the bottom leaves. If needed, you can remove the lower leaves to accomplish this. Repeat this step with your second and third cutting, and place the stems on a warm, dry surface for a few hours, until a callus forms at the end of each stem.
Don’t set the cuttings in direct sunlight as you wait for the calluses to develop. Direct sunlight isn’t healthy for the ZZ plant and can damage its leaves.
The cells that create the calluses will help grow new rhizomes from your stems, so this step will give your cuttings a head start in the rooting process. The callus also helps reduce the likelihood that your cutting will rot in the water.
If you choose not to propagate with stems, or if you lose a leaf in the cutting process, you should also know that Zamioculcas Zamiifolia can be regrown from leaves.
While growing from leaves can take longer than propagating from stems, it can be another fun way to reproduce ZZ Plants for your home or office.
Propagating ZZ Leaves in Water
You can propagate a ZZ Plant from a leaf that has fallen from your plant, or from leaves you choose. If you are using a fallen leaf, only use a healthy leaf that has just recently fallen, such as a leaf that became detached when moving the plant.
If the leaf has started to discolor or wrinkle, it may not be healthy enough to regrow. The same is true for a leaf that fell on a previous day and may be starting to dehydrate.
If you choose to propagate using leaves of your choosing, you will want to carefully select vibrant, healthy leaves, as you did with your ZZ stems.
Look over your plant until you find 3-4 mature leaves that are attached to firm, green stems. These leaves should be dark green and glossy, without any hints of brown. Wrinkling and curling can be signs of dehydration and should be avoided.
Using multiple leaves will give you the best chance of success when rooting in water, since they may not all survive. Once you have picked a few healthy leaves for propagating, you will want to approach the cutting as you did with the Zamioculcas Zamiifolia stems.
Ensure that your pruning shears or knife are sharp and clean and that you have well-fitting gloves to protect your skin from any irritation.
Wearing your gloves, hold your ZZ leaf in one hand, including a portion of the healthy stem, and make your cut. Proceed with your leaf cuttings until you have a few healthy leaves to propagate.
Next, set aside the cuttings to dry for a few hours, until calluses form, and the cuts no longer look visibly damp. Once this callused layer has formed, it’s time to root your leaf cutting!
Rooting ZZs in Water
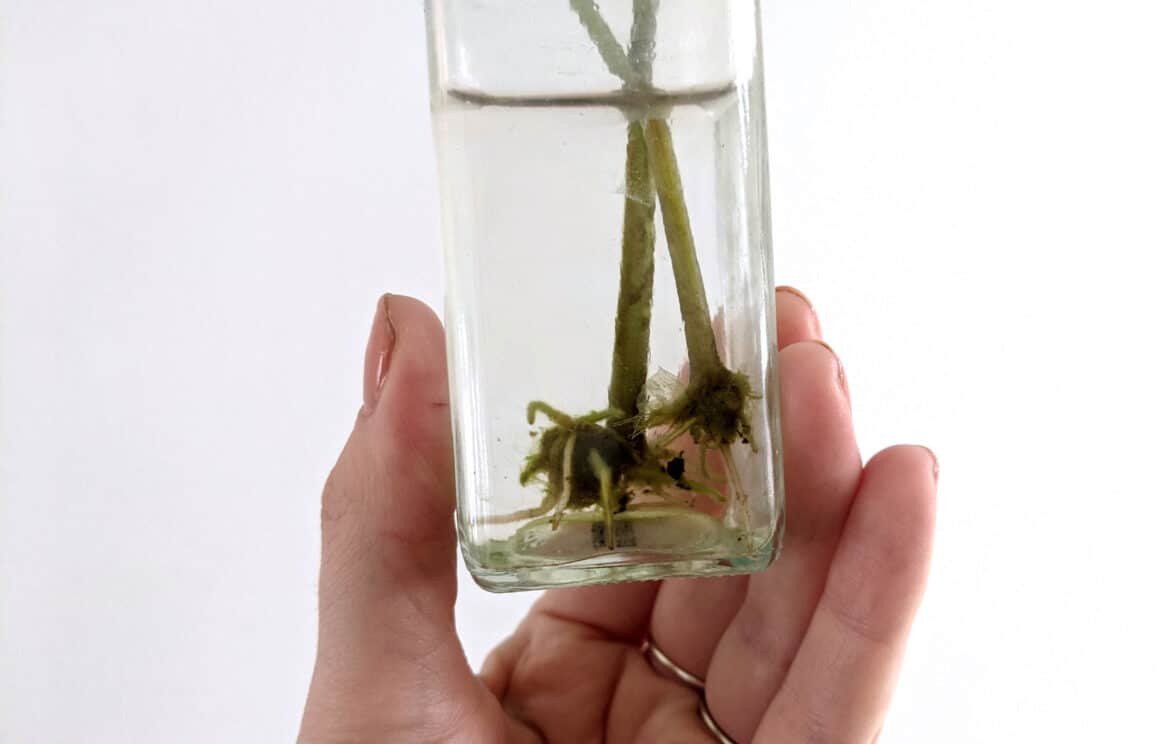
The term “rooting” refers to the part of the propagation process in which the new plant begins to develop its root system, or with ZZ Plants, its rhizomes.
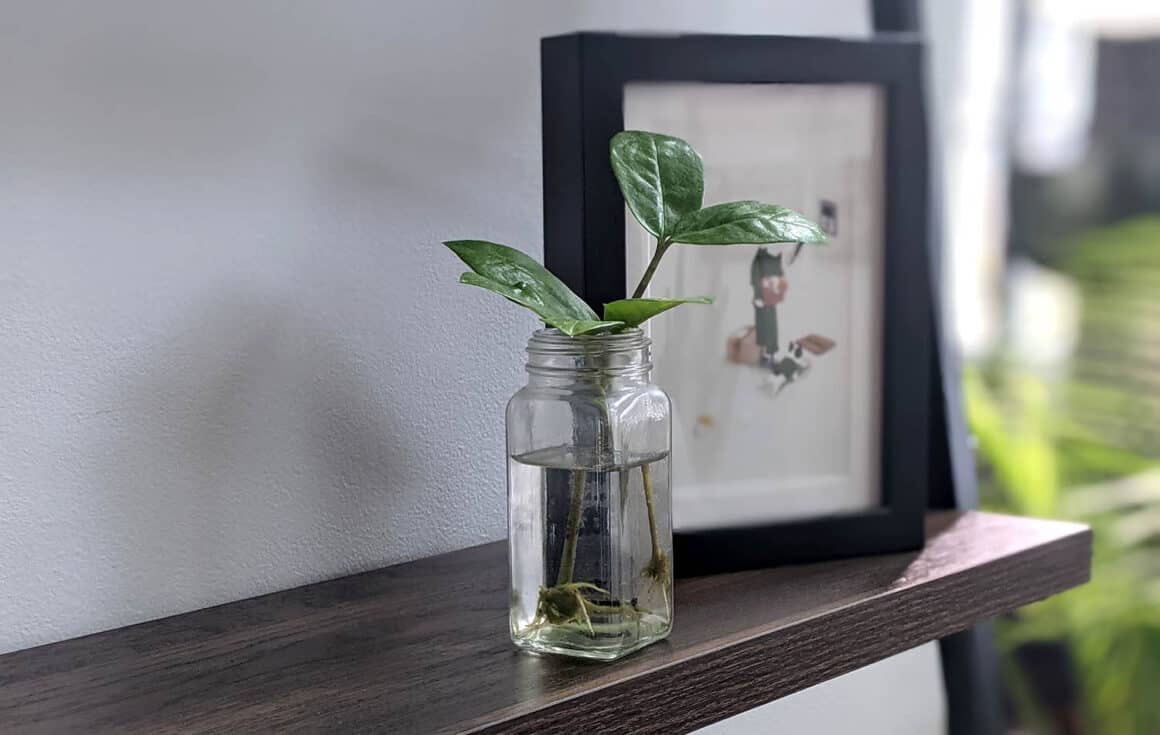
While you may see Zamioculcas Zamiifolia being rooted in pretty vases or other special containers, a plastic bottle works just as well. With bottles, the upper leaves of the plant can rest on the rim, protecting the plant’s length from slipping into the water.
If a bottle is not attractive enough for you to display, look for a vase with a small opening at the top. In addition to keeping most of your plant dry, this will help prevent dust and insects from getting into the water.
When propagating your ZZ plant in water, it is best to use fresh, clean water. Tap water can work, but since chemicals like fluoride are sometimes added to tap water, filtered water may be the safest choice for the plant.
Once you have placed your cutting in the water, move the bottle or vase to a warm, bright location with plenty of indirect light, and nature will begin to take its course.
Keep in mind that your plant will still need plenty of care as it begins to root, so your work is not done. Ensuring that your ZZ cuttings have the right conditions to grow will help you see rhizome development more quickly.
As your plant propagates, it will be important that you prevent direct sunlight from touching the plant’s leaves. Unfiltered sunlight can cause the leaves of your cutting to burn, which can kill your fragile ZZ sapling.
Even fresh, filtered water can become stagnant over time as it collects dust from the air and loses cells from your cutting. Soon the water will become cloudy, and if the water isn’t changed, your plant may wither and rot.
You should be prepared to change the water every week, gentling rinsing the bottom of the cutting to remove any slimy build-up that can harm the plant. Be careful as you rinse, since it may be easy to detach any growing rhizomes.
If weeks have passed and you’re feeling restless, remember that water propagation can take a long time for ZZ Plants. It may be six to nine months before the development of rhizomes becomes noticeable.
It’s common for Zamioculcas Zamiifolia lovers to worry that their plants are growing fast enough. To “help” their plant, these ZZ owners start over-fertilizing, using bright grow lights, and making other adjustments in order to see improvement.
But be patient!When it comes to plants, there can definitely be too much of a good thing. Too much fertilizer, too much light, too much heat, etc., can harm your Zamioculcas zamiifolia before it ever takes root.
Instead, stick to the care guidelines outlined above. As long as the leaves continue to look healthy, your plant is growing as it should. Be consistent, and you will see the results you want.
Pros of Water Propagation
Even though water propagation isn’t always the best strategy for your plant’s long-term health, there can be some advantages to this technique. Water propagation is often neater and cleaner, which can help those who live in small spaces or apartments with carpet.
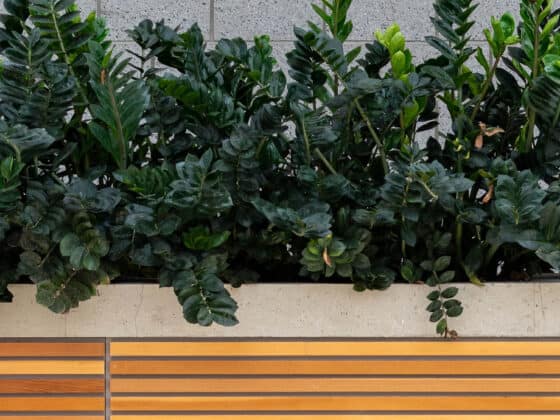
Also, because ZZs grow slowly in water, and are not likely to reach the 2-3’ height they can achieve in soil, water propagation can result in ZZs that are perfect as desk plants.
Another advantage of water propagation is that you can watch the development of the rhizomes. Watching the rhizomes develop can be a fun family activity, and can be helpful for those who want to transplant the ZZ into soil at a later date.
But remember, the rhizomes you see will be more fragile and subject to damage in transplantation than roots that are grown in soil.
Cons of Water Propagation
Some plants propagate quickly and easily in water. Unfortunately, that is not true for the ZZ Plant. Growing your ZZ in water is a labor of love, and it may not always turn out the way you hope.
It is not uncommon for ZZ cuttings that are propagated in water to wilt or die of natural causes before the rhizomes form.
Once the rhizomes do form, they will be more fragile than rhizomes grown in soil. That means that they will be more prone to detaching if eventually potted in soil, and the plant may never grow as fast or as tall as ZZ’s grown in soil.
Does this mean you shouldn’t propagate a ZZ in water? Not necessarily. If you have a good reason to choose this method and are ok with the risks, it can provide a fun experiment.
But if you are looking to develop a healthy collection of ZZ Plants to fill your home or office, soil propagation is probably the safest strategy for your plants.
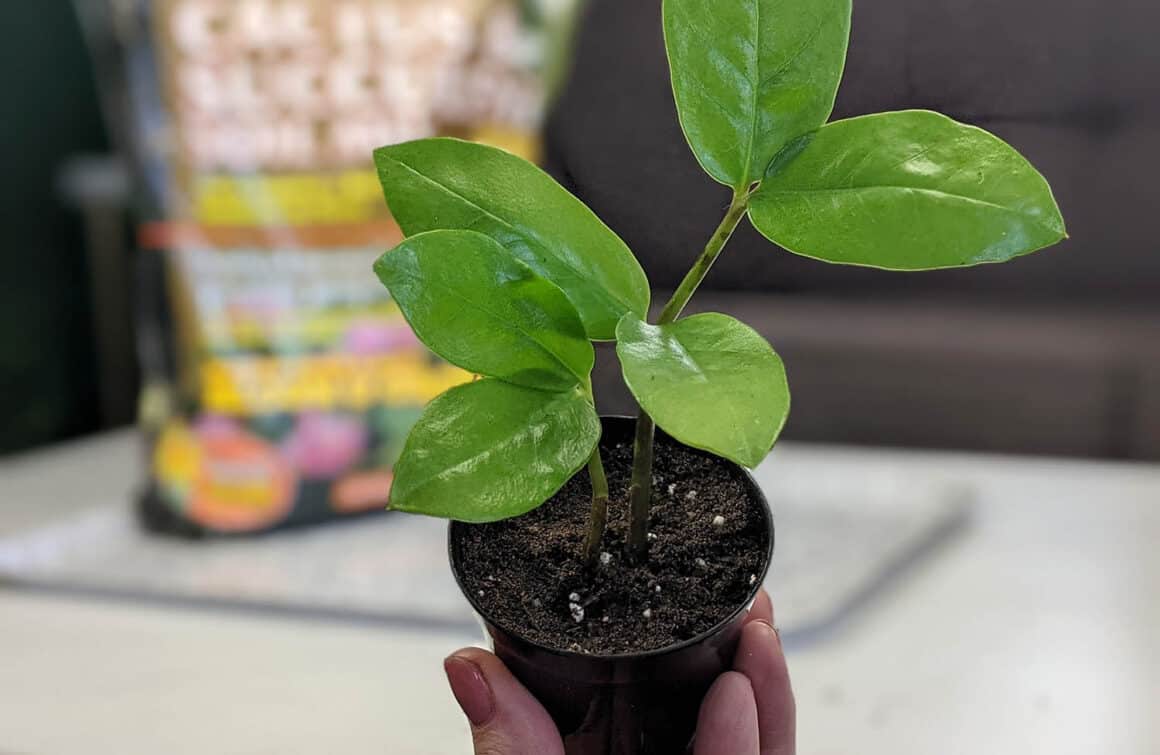
Soil Propagation
If you decide to propagate your Zamioculcas zamiifolia in soil, many of the steps will be the same. You will begin by taking stem or leaf cuttings of your plant, using a sharp and sanitized blade.
Even though soil propagation is more effective for ZZ Plants, it is still a good idea to take more than one cutting. This will make for a fuller-looking pot, as well as a better chance of a good outcome. Once your cuttings have developed a callus, you will be ready to plant them in soil.
Make sure that you have a container for your ZZ cuttings that has excellent drainage – ZZ Plants cannot be allowed to sit in soggy soil. Your pot should have at least one drainage hole in the bottom, and more if possible.
Fill the pot with a well-draining potting mix, such as one with perlite or vermiculite mixed in to give the blend a light, sandy texture. You can also use a blend intended for succulents since they also benefit from dryer soil.
Once you have your container and potting mix, it’s time to plant your cuttings. If you choose leaf cuttings, plant your ZZ leaves with the cut ends down, about 1 centimeter deep.
If you choose stem cuttings, use your finger or a pencil to make a hole toward the center of the pot for each of your stems. How deep you plant the cutting will depend on the height of the stem. You will need to plant it deep enough that the stem is upright and stable in the soil. If the stems tip over, it can tear any growing rhizomes.
Once planted, water the stems or leaves, making sure not to uncover the planted sections. Newly planted ZZ cuttings will grow quicker in warm, well-lit locations, so place the plant near a bright but curtained window. Temperatures should reach about 80 degrees Fahrenheit, if possible. Research suggests that a warmer environment can help inspire ZZPlants to grow extra fast.
Ideally, you could start to see rhizomes developing in a couple months, though it can take up to nine months for rhizomes to develop in typical indoor conditions.
Closing Thoughts
When it comes to propagating ZZs, as long as your leaves continue to appear healthy, the process is working. If the leaves or stems begin to yellow or wilt, it may be time to start again.
Whether you choose water or soil to regrow your ZZ Plant, it is important not to give up. Even experienced gardeners lose a plant to root rot or other issues.
With patience and practice, you will learn to grow ZZ Plants using different techniques, and you will see how fun and rewarding plant propagation can be!