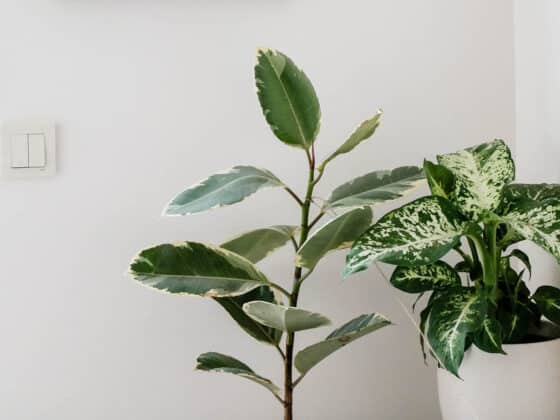
For most houseplant owners, more plants equate to added happiness, which is why we actively search out the best ways to turn one plant into many. In most cases, this means learning about propagation. Depending on the plant, various techniques can be used, but one of the most reliable methods is to take cuttings to root out. In the case of Rubber Tree plants (Ficus elastica), rooted cuttings are the simplest route to successfully propagating new plants.
How do you propagate Rubber Tree plants from cuttings? To propagate Rubber Trees this way, take cuttings of the stem tip or sections of a branch containing leaf nodes and root them out in water or soil. In a matter of months, you will have cuttings with new root growth, which you can then transplant to fully root out and begin pushing new stem and leaf growth.
If you do a quick search on the internet about taking Rubber Tree cuttings, you will find many different techniques and methods, all slightly different from one another. It can be a bit confusing because they all seem to claim they are the “best method,” which I suspect has more to do with search results than actual plant growth results.
However, as you dig through the articles and videos people have posted, there are some similarities throughout that I believe are the keys to successful propagation of Rubber Tree cuttings. In this article, I tried to compile all that variation, along with my personal experience with propagation, into one process that will result in the successful propagation of cuttings.
I will cover everything from what is needed to take cuttings, how to actually do it, and explain some different methods you can use to root the cuttings out. By the end, I hope you feel confident that you can propagate new Rubber Trees from cuttings you take at home.
Can You Grow a New Rubber Tree from a Cutting?
This may come as no surprise to you now that you’ve read the introduction of this article, but yes! You certainly can grow a new Rubber Tree from a cutting. Like many other houseplants or plants in general, Rubber Trees can be propagated from small portions of plant material that will root out and, eventually, push new growth.
As I mentioned, there are various ways to do this, but the gist of it is that, as long as you take cuttings that contain what is needed for the plant to root out and grow, and you are creating an environment for your cuttings that is conducive to growth, you should have very little trouble propagating from cuttings.
What is Needed for a Good Cutting?
For a Rubber Tree cutting to become an established plant, there are a few things a cutting should have. You can’t expect to take a small piece of any part of the plant and expect it to grow. Some plants can do just that, but in my experience, they’re usually the impossible to eradicate weeds out in my yard rather than beautiful tropical plants in my home.
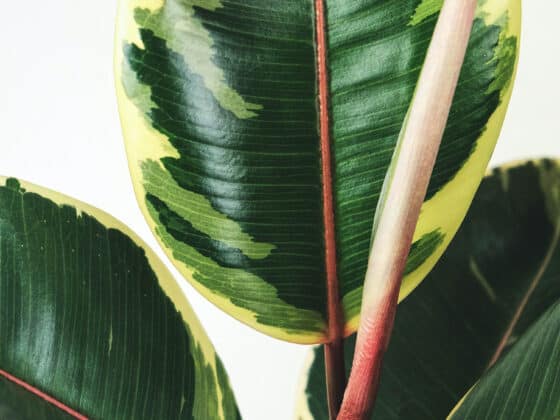
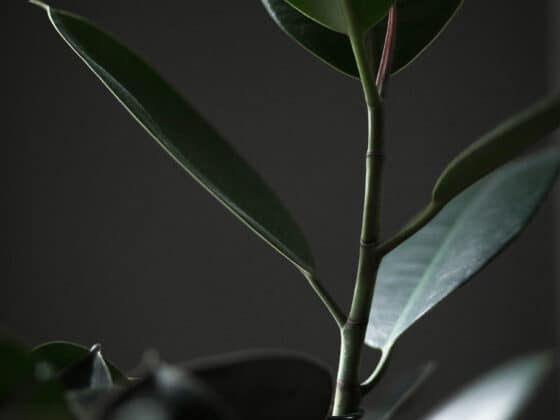
So, what does a good Rubber Tree cutting look like? For the most success, your cuttings should be comprised of a small piece of stem that contains at least one node and one leaf.
A node is a bundle of undifferentiated tissue that typically stays dormant until an event, like a cut or break, signals to the plant that a new growing tip needs to be produced. You can usually find these located right above where a leaf meets the stem.
The leaf isn’t 100% necessary to create an established, rooted cutting, but it can sure help. Having a leaf attached to your cutting will ensure that the small section of plant will still have essential functions like photosynthesis and gas exchange occurring as the plant works to produce new roots.
Depending on the exact method you are using, there can be slight variations on what the recommended cutting looks like, but generally, these are the important components for a good cutting.
Can You Propagate a New Rubber Tree from a Leaf?
As you do your research on propagating Rubber Trees, you’ll inevitably come across some articles about people trying to use just the leaves of the Rubber Tree to create entirely new plants. In many cases, they have gotten the leaves to root out and stay alive for months (or even years). Unfortunately, this is a waste of time.
You may very well get your Rubber Tree leaf to root out in soil or water, but that’s all it is ever going to do. Because there is no material for new plant tissue to grow from, you won’t ever see new stem or bud growth from a rooted leaf. If you want to learn more about why this is, you can read an article I wrote on the topic here.
Preparing to Take Cuttings from Your Rubber Tree
Alright, so you’re interested in propagating new plants from your Rubber Tree. Before you make any cuts, you will want to consider a few things that will impact how you go about this whole process.
Evaluate Your Plant’s Health
First thing’s first, make sure you are starting with a healthy plant. If your Rubber Tree is dropping leaves, has pest issues, or looks otherwise under the weather, consider waiting until you’ve fixed any health problems before moving forward. Making cuts to your plant does put it under stress. Healthy plants bounce back pretty fast, but if your plant is already suffering from a health or care issue, it’ll have a harder time rebounding after you trim it back.
Consider the Timing
The best time to take cuttings of most houseplants is between spring and early summer. This is because your plant will most likely be in its growing season, where plant functions are operating at full capacity, and any damage you create while harvesting cuttings can be healed quickly.
This timing also sets your cuttings up for the most success because they will have time during the growing season, which typically has warmer temperatures and higher light levels, to root out and get established in their new pots before the plant begins to naturally slow down during the winter.
You can, of course, trick your cuttings by creating warmer environments, using lamps, heating pads, and cloches, but it’s a little more involved and takes more monitoring on your part.
Usually, a perfect time to take cuttings on your Rubber Tree is to time it to coincide with a planned pruning. If you are taking some height off of your plant or are encouraging it to branch, any stems you trim off the plant can be used to propagate new ones.
Prepare Your Tools
If your plant is healthy and the timing is right, you’ll want to make sure you have everything you need to process your cuttings correctly. Regardless of how you go about it (more information on all of this below), there are a few things you’ll want to have ready.
Make sure you have clean, sharp gardening shears, scissors, or a knife. I, personally, like to use shears because I find they make the cleanest cut, regardless of the thickness of the branch I’m cutting. I also say “clean” because you want to minimize the damage you do to your plant and the cuttings, and dirty shears tend to be great at spreading disease. You can soak your shears in a diluted bleach bath for five minutes and then let them air dry before use.
You’ll want to have your rooting station set up with everything you need, including soil, pots or seedling trays, growth hormone (if you choose to use it), and a watering can.
You may also want to wear gardening gloves or rubber gloves. Rubber Tree sap can be mildly toxic and cause skin irritation, so protecting yourself while making cuts is a good option. It might be a good idea to have a few rags on hand to wipe away the sap from the cuts to keep your workspace clean and avoid sticky surfaces.
How to Take a Rubber Tree Cutting
Once you have your workspace prepared and the necessary tools at hand, you are ready to take your cuttings. There are a couple different techniques you can use, depending on how much you plan on trimming off and how many cuttings you are hoping for.
Stem Cuttings
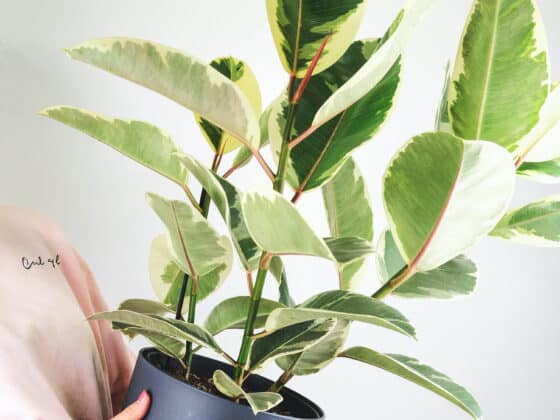
The first and easiest way to obtain cuttings from your Rubber Tree is to create stem cuttings from your plant. For this, you would be removing about six inches from the tips of the actively growing branches and using those pieces to propagate new plants.
The main benefit of using this method is that your cutting will already have leaves and a growing tip on it, so once it develops new roots, the plant will establish quickly and new growth will resume. It’s a pretty straightforward process that is great to use if you are already planning on cutting a main growth stem back to control your plant for height.
On the other hand, your Rubber Tree probably doesn’t have more than a few actively growing stems, so you are limited to how many cuttings of this type you can take at any one time. Also, you should consider the mother plant, as well. Any cuts you make on your original Rubber Tree will stimulate branching, so only take these cuttings if you are happy with your plant’s shape and height, and remember to consider how pruning might affect those things.
To take a stem cutting, locate the tip of a stem on your Rubber Tree plant and use your garden shears to make a clean, diagonal cut to the stem, so you are left with a piece about 5-8” in length, with about 4-6 leaves on it. You’ll want to make the cut from the branch just above a node to encourage your original Rubber Tree to branch at that location.
Wipe any sap away with a rag (the flow will slow eventually) and then remove the lowest leaves from your cutting, so you have a section a few inches long to set in water or soil, depending on how you plan to propagate. The cutting should still have about two or three leaves at the top.
Leaf Node Cuttings
Another method you can use to create more cuttings from one piece of stem is to create “leaf node cuttings” or “leaf bud cuttings.” This is essentially a small section of stem that has at least one leaf and one node on it.
These cuttings differ from the stem cutting described above because they won’t have a growing tip (or “apical meristem”) developed on them yet. This means it will take a little longer to propagate new plants using this method, but you’ll benefit from it because you can create many more cuttings from a single pruned branch.
To create these cuttings, you can start the same way, scanning your Rubber Tree for where you’d like to prune the stems. Make a cut the same way as above, clean and diagonal, right above a node. If you want to thin entire stems out of your Rubber Tree or create a single trunk from a multi-stemmed plant, you can make your cut down near the soil line and use the removed stem to create these cuttings.
Once you have a section of branch removed from your plant, you can take a stem cutting of the growing tip, removing the top six inches as described above. Then, with the remainder of the stem, you can create smaller leaf node cuttings.
To do this, inspect the branch and locate the “internode” areas, which are basically the spans of branch between the leaves. This is where you want to make your cuts. Nodes on Rubber Tree plants are typically located just above where a leaf meets the stem, so plan on making cuts about one inch above and below a leaf. This should provide you with enough stem length to sustain the cutting and ensure your leaf and node are undamaged by the shears.
Again, with each cut, your stem sections will weep out some of the latex sap, so be sure to wipe it away or gently rinse the cuttings in cool water.
How to Root a Rubber Tree Cutting
Now that you have either your stem cuttings, leaf node cuttings, or both, you are ready to root them out. At this juncture, you are faced with deciding whether to root them out in water or root them in soil.
Water Rooting vs. Soil Rooting
Both methods seem to work well to root out Rubber Tree cuttings, so you don’t have to worry much about which one you choose. Most often, it will probably depend on what supplies you have on hand or which one you are more comfortable with.
In my experience, I have found stem cuttings, while they easily root in water, do just as well, if not better, rooting out in soil. I like to do this because it saves me the added step of eventually transplanting a water-rooted cutting into soil.
As for leaf node cuttings, I find the opposite is true. Although I can root them out in soil just fine, I find it a bit easier to root them in water first and then transfer them to a soil medium where they establish much faster. It’s easy to disturb unrooted cuttings in soil, so by water rooting them first, I don’t have to be as careful with them once I transplant them.
However, both methods work for both types of cuttings, so feel free to experiment and find what works best for you.
Rooting in Water
Once you have your cuttings ready and you’ve decided you want to root in water, it’s time to get your propagation jars ready. Gather your assorted glassware up and fill each with clean, cool water.
For stem cuttings with an intact growth tip, all you need to do is stick the stem in the water, so the cut end is fully submerged. If possible, try to suspend the cut end a half-inch or so above the bottom of the container, as it can help protect any fragile root buds starting to form. Jars with narrow necks or old ketchup bottles are good for this.
For leaf node cuttings, you’ll need to find containers in which you can fully submerge the stem in water while the leaf remains sticking out in the air. I’ve seen people use special propagation test tubes that fit a single cutting or folks stacking their cuttings and shoving 3-5 into one larger cup of water.
It doesn’t really matter that much, as long as the stem portion with the cut ends are submerged and the leaf portion is out of the water. Find a bright window sill with lots of indirect light to leave your propagation jars and plan on changing the water weekly.
And then…you wait. Within six to eight weeks, you should start seeing white bumps appear near the cut ends of your cuttings. These are the beginning of new roots. You will want to wait until new root growth reaches about one to two inches before transplanting your rooted cuttings into a soil medium.
To encourage your baby roots to grow, you’ll want to use a soil mixture that is light and airy. You can use a seedling mix or cactus mix, both of which have great drainage and allow for the roots to quickly establish. I don’t always have those on hand but almost always have potting soil and perlite around, so a 50/50 mixture of those works great as a rooting medium, as well.
Gently moisten your soil and use a chopstick to poke a hole to stick your rooted stem cutting in. For your leaf node cuttings, gently bury the rooted, cut ends of the stem, allowing the leaf attached to them to stick straight out of the soil.
Keep the soil moist, and the temperature between 65-75 degrees until your new plants fully root out and can be transferred to larger pots. Over time, you’ll see stem cuttings resume new growth, and leaf node cuttings should begin producing a new growing stem that emerges from the surface of the soil.
Rooting in Soil
If you’ve decided you’d rather root your cuttings in soil, you just need to prepare your pots or seedling trays with moist soil. Again, seedling or cactus mix, and the 50/50 potting soil/perlite mix all are good choices for this. If any large chunks of bark are present in your mixture, pick them out. Water the soil into the container and ensure there is good drainage.
To plant your cuttings in the soil, make a small hole to press your stem cuttings into, or a slightly larger hole that you can gently bury the stem portion of your leaf node cuttings in. You can then water them into place, again allowing any excess liquid to drain from the container.
It is right before this point that I usually opt to use a growth hormone powder to help encourage faster root growth. Rooting hormone powder is a manmade product that mimics natural hormones found in plants (generally called “auxins”), which encourage the plant to produce roots.
A fully established plant easily creates these natural hormones, but small cuttings can use a little jump start. Rooting hormone powder is very easy to apply. You simply open the package and dip the cut end of your plant cutting to coat with powder. After that, you stick the coated end of the cutting into the soil medium.
With Rubber Trees, you don’t have to use a rooting hormone. They are typically just fine rooting out on their own, but I prefer to give them the added edge because I think they root out a bit faster. If you didn’t want to bother with hormone powder, you could also dip them in a diluted honey solution (1 tbsp. honey into 2 cups boiling water, cooled), which is said to have the same effect.
Regardless of whether you use rooting hormone powder or not, once you have your cuttings gently planted in the soil, the key to successfully rooting them out is to keep them warm and moist. You want to keep the temperature above 70 degrees, so a warm window sill without direct sunlight or even a seedling heating pad works well.
To keep moisture content high, you can either mist your plants two to three times a day, or better yet, use a plastic cover on a seedling tray or enclose your pots in Ziplock bags that are zipped about three quarters closed.
Find a spot that has bright, indirect light and where you can keep the temperature up. After about a month, you can remove any plastic bags or tray covers you are using. Within 4-5 weeks, your cuttings should start to begin producing roots.
After another month or so, you should find your starts have begun to establish in their pots. A gentle tug can help you determine if there is any resistance, which means roots are forming. Once fully established, you should see stem cuttings resume growth and leaf node cuttings begin to push a new growth tip from the soil.
Transferring Your Rubber Tree Rooted Cuttings
Regardless of whether you rooted your cuttings out in soil or first rooted them in water and then transferred them into soil, there will come a point when your new Rubber Tree plants are ready to be potted up to continue to encourage growth.
Up to this point, you may have your newly rooted plants still in small propagation pots or even a 4” round, which is great. However, once the plant is rooted out in these smaller pots, it’s best to move them into a larger size to provide plenty of room for the young root system to continue to spread.
Plus, this is an excellent opportunity to create a multi-stemmed Rubber Tree plant using your young plants. Potting up three to four rooted cuttings into one larger pot is a quick way to give the illusion of a bushy houseplant. All the plants will grow tall, and you can strategically prune to maintain whatever shape you are trying to achieve. Their root systems will become intertwined into one large root ball.
This process of transplanting your cuttings is no different than potting up any houseplant to a larger container. You’ll still need appropriately sized pots to allow room for growth, but not too much that the excess soil traps moisture and waterlogs the plant. Think about potting just to the next size up. If your plants are in a 4” pot, you’ll put them in a 6” pot next.
At this point, it is safe to transplant your cuttings into a regular potting soil mixture. You can always still add additional perlite to keep the soil light, but with Rubber Trees, it’s not totally necessary.
The most important thing to remember about transplanting your Rubber Tree rooted cuttings is to make sure they are fully rooted first. For the most success, it is best to wait until each cutting has a full network of roots throughout the soil in its propagation pot. You can gently remove the pot and check that you can see roots throughout the soil, or you can look at the bottom of the pot to see if any roots have started finding their way out of the drainage holes.
A cutting with a weak root system won’t benefit by being in a larger pot, so be sure they are fully rooted before transplanting.
How Long Does It Take to Root a Rubber Tree Cutting?
It may seem like it is taking FOREVER for your Rubber Tree cuttings to fully root out before they are ready to transplant, but try to remember that you’re basically creating a fully-functioning plant from scratch. Have patience!
It typically takes close to a full two months for new roots to develop on either a stem cutting or a leaf node cutting. After that, once the cuttings are placed in soil, it can, depending on the conditions you provide, take another 4-8 weeks to fully root out and show signs of new growth.
This may seem like a long time, but other than keeping the soil moist for the plants, there’s not a whole lot you need to actively do. Also, it helps to remember that as long as your cuttings look healthy and the leaves attached to them are still strong, good things are happening, even if you can’t see it. Often, if a cutting isn’t going to make it, you’ll see signs of rot and decay on the foliage.
Final Thoughts
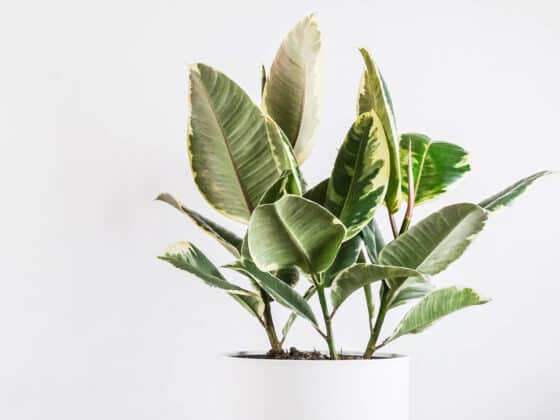
Rubber Trees are very vibrant and strong plants that often benefit from the occasional trim, so it’s an excellent specimen to try your hand at propagating using cuttings. Because they are perfectly happy rooting out in soil, Rubber Trees are pretty easy to care for as long as you set them up for success by providing a warm and moist environment for them to root out in.
Try rooting Rubber Trees in both soil and water and experiment with what works best for you and your home. With any luck, you may end up with so many plants that all your friends will be gifted a Rubber Tree by next year.