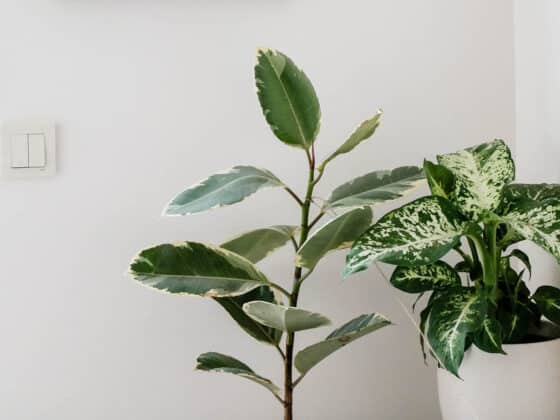
I’ve written a lot of articles touting the joys of having a Rubber Tree (Ficus elastica) in your home, mainly because it is such a stunning plant that doesn’t really have many care issues. Over time, however, these fast-growing plants will eventually outgrow their containers, leaving you with the task of repotting them. So, what’s the best way to do that?
Repotting Rubber Tree plants is an easy chore to do as long as you know what to expect. After gently removing the entire root ball from the existing container, transplant it to a new, larger pot (roughly 1/3 larger than the root ball) and fill it in with well-drained, porous soil. After repotting, be sure to water your Rubber Tree well, allowing any excess liquid to flow from the drainage hole.
In this article, I’ll cover why Rubber Trees need to be repotted and the signs that indicate it is time to transplant. I’ll also review step-by-step instructions on the entire process, offering tips and tricks I’ve learned doing this myself.
Why You Should Repot Rubber Tree Plants
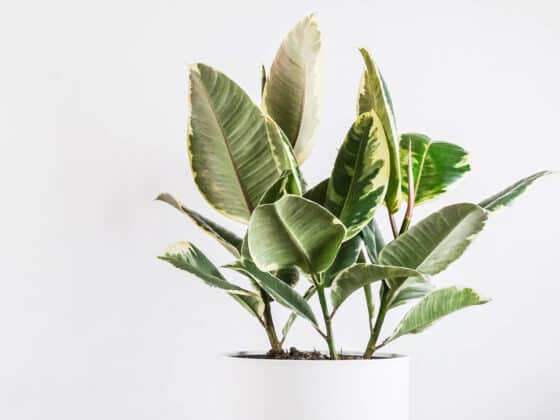
It’s no secret that Rubber Trees are fast-growers! One minute they’re a tabletop plant, and then suddenly they’re halfway towards the ceiling, bursting out of their pot. OK, so I may be exaggerating just a bit, but overall, the growth that a Rubber Tree can put on in one season is indicative of how often they can outgrow their pots quickly.
Just as the stems and foliage grow, your Rubber Tree is adding length and mass to its root structure under the soil. By always ensuring there’s still room in the container for the roots to continue to grow, you’ll also be encouraging the plant to put out new top growth, as well.
What happens when a Rubber Tree isn’t repotted often enough? Well, just like providing the additional space promotes growth, restricting it will do the opposite, and you’ll start to notice that the new growth on your Rubber Tree has significantly slowed or stopped altogether.
Any time the plant gets too rootbound or runs out of space, its ability to absorb water and nutrients is hindered and, therefore, there are fewer resources to put towards active growth.
Another reason it is wise to occasionally repot your Rubber Tree is that, as your plant becomes more rootbound, you may notice it gets harder and harder for the soil to retain moisture, causing the plant to dry out much faster. This requires you to water more often. An environment where the soil is cycling from very wet to very dry is not only a potential stressor on the plant but can create an environment where soil-borne diseases can thrive.
One other reason you might consider repotting your Rubber Tree has to do with nutrients. If your plant has been living in the same pot for a long period of time, you may notice it doesn’t look quite as vibrant as it used to. This could mean you are dealing with a nutrient deficiency.
Over time, the plant utilizes resources from the soil, which can end up getting very depleted. While additional fertilizer applications can help with this, sometimes it is beneficial to repot the entire plant in new soil to refresh the whole system.
Do Rubber Trees Like to Be Root Bound?
In my own research about how to care for my Rubber Trees, I’ve run across a few articles stating that Rubber Trees do, in fact, prefer to be root bound. While it is true that some plants seem to thrive in tight spaces, I would say that Rubber Trees only, at best, tolerate being root bound for short periods of time.
In my opinion, there are not many reasons to keep a Rubber Tree in a tight pot and plenty of reasons not to. I have mentioned utilizing a root bound pot as a temporary method of keeping your Rubber Tree small-ish, since the crowded plants tend to slow their growth substantially.
However, because there are ill effects like diminished water and nutrient absorption and the potential for an increase in root rot or disease, I prefer to keep my Rubber Trees in acceptably-sized pots, so they stay healthy, while keeping their growth controlled by strategic pruning sessions.
Another thing to keep in mind is that a severely root bound Rubber Tree might eventually crack your pottery depending on what it is planted in. I don’t know about you, but the price tag on some ceramics is high enough that the occasional chore of repotting is definitely worthwhile to me.
How Often Should You Repot a Rubber Tree
Since Rubber Trees are considered vigorous growers, it isn’t uncommon to see many inches of foliage growth in one season. The same is true for the roots. As the plant adds height and mass, the root system expands for structural support and securing resources.
Because of this, and depending on the growing conditions for your plant, you might need to repot your Rubber Tree once a year as it is growing to the height you prefer, before you start pruning. As the plant becomes established and you are actively shaping the plant to encourage branching or controlling for height, you may be able to extend the time between repotting to every couple of years.
However, going strictly off a calendar isn’t going to be the most accurate measure of when to repot your plant. A more precise way of determining when you should be repotting is by actually removing the plant from the container and checking on the root ball. If the roots are tightly wound and crowded against the sides of the pot, you’ll want to transplant it to a bigger container.
When to Replant Your Rubber Tree
The nice thing about Rubber Trees is that they are not particularly delicate, so you can really repot them any time that works for your schedule. However, they do have a growing season that typically lasts between early spring and summer, with winter being a time of slow growth or dormancy.
It’s a better practice to do any sort of repotting chores for your houseplants at a point when they will have some additional time to acclimate to their new container and start pushing new root growth before they go dormant. I always try to time repotting projects in the first part of the growing season, early spring to early summer.
Another thing you may want to consider is whether or not you want to do any propagation at the time of repotting. Some folks will trim their plants to make them easier to handle, or branches may get broken in the process of repotting. Those cut or broken stems can usually be used to propagate new plants, so timing your transplant early enough in the season will give you additional time to root cuttings and pot them up before winter.
Signs It’s Time to Repot Your Rubber Tree Plant
I’ve already mentioned a few of the signs that indicate you may need to repot your Rubber Tree, but let’s review.
First and foremost, if you notice that growth on your plant has slowed significantly or stopped completely, and you see no other health reason that might be the cause, you likely have a root bound plant that needs to be repotted.
If your Rubber Tree is looking less vibrant and glossy than usual, and again, you can’t pinpoint a specific health or care issue, this could be another sign that your plant needs to be repotted. Remember, as the root ball gets crowded in the pot, nutrient and water absorption becomes more difficult and you can start seeing issues that look like nutrient deficiencies in the foliage.
When considering the soil, if it is really old, compacted, or depleted, then repotting would be a good action regardless of how large the root system is. On the other hand, if you notice the soil isn’t holding water as well as it used to and your plant is drying out faster than usual, it is likely time to pot your plant up to the next container size.
Always remember, these signs can be difficult to spot and can easily be confused as different plant health issues, so you should still occasionally remove the plant from the pot to do a visual inspection of how much space the roots actually have.
A Quick Warning About Rubber Tree Sap
Before you get too far into the process of repotting, I did just want to touch briefly on the topic of Rubber Tree sap. (Read a full article about it here!)
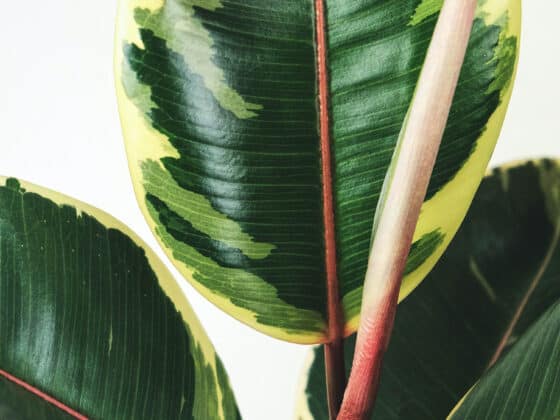
Rubber Trees all have a sap that contains latex, a substance known to be an irritant for many people. Contact with the sap can cause irritation, usually mild, but in severe cases can cause the skin to blister or peel. This sap is present in the leaves and stems of the plant and will flow freely from any cut or break in the plant’s bark.
Because you will be handling your Rubber Tree a lot throughout the process of repotting, if you suspect or know you have a latex sensitivity, wear a thick pair of gardening gloves, as well as some old clothes or an apron you can throw directly into the washing machine afterward.
Preparing to Repot
Once you’ve decided it is time to repot your Rubber Tree plant, the first thing you should do is make sure the plant is strong and healthy enough to be transplanted. Rubber Trees are pretty resilient, but you will be disrupting the plant’s root system and changing the environment it lives in, all of which can be stressors to the plant.
Evaluate your plant for any health-related issues. Make sure the stems and leaves are all strong and healthy and that your plant appears to be free of diseases or pests.
It’s a good idea to water your plant a few days before you plan to repot. Give it a thorough, deep watering and allow two or three days to pass for your plant to soak up any additional moisture it may need.
Gather Your Supplies
When you’re ready, you’ll want to have all your supplies on hand and a clean workspace with plenty of room.
You will obviously need the new pot you plan on transplanting your Rubber Tree to, as well as additional potting soil. You may want to have garden shears or a sharp florist’s knife handy if you plan on pruning any stray branches or you want to clean up a break that happens during the transplant.
In addition, you may want to have a small trowel to shovel soil and a butter knife to help remove your plant from its pot.
Again, if you have sensitivities to Rubber Tree sap, make sure you wear gloves and old clothing.
How to Choose a New Container for Rubber Trees
You don’t have to worry much about what container you choose for your Rubber Tree as long as it meets a few standards: proper size and proper drainage.
If you search for it, you can find many different points of view on what the absolute best container is for Rubber Trees and what material you should use. Although they may all sound equally convincing, the truth is your Rubber Tree just isn’t going to care.
Whether it’s made from plastic, terracotta, ceramic, stone, or metal, all you really need in a pot is for it to fit your plant and to allow proper drainage.
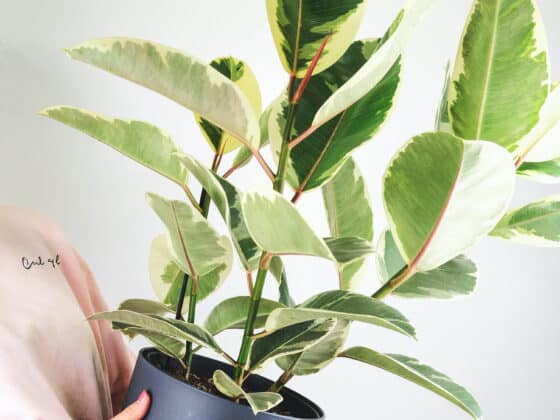
For the size, you want to select something that is about 1/3 larger than the entire root ball of the plant. This roughly equates to the plant having about one to two inches of space, on all sides, between the roots and the edge of the pot.
Why is this so important? Well, the whole point is to give your plant room to grow, so the larger size is obvious. However, you also don’t want a pot so large that there’s too much extra space. This requires more potting soil to properly secure the plant in the pot. When watered, that excess soil can hold on to too much moisture for long periods of time, easily leading to root rot issues down the road.
By aiming for that couple of inches of space on all sides, you’ll be sure you won’t have to pot up again in a matter of months but will also be protecting your plant from overwatering issues.
When it comes to drainage, I’m a big advocate for drainage holes in the bottom of your pot. I know, I know… it’s nice to have a pot that you can place in your home and water without worrying about overflow leaking onto your hardwoods, but when it comes to proper plant care, a drainage hole can make a world of difference.
Pots without drainage holes, even with gravel layered at the bottom, are too easy to overwater, keeping the soil too wet and the roots waterlogged. If you can, pick a container that has a drainage hole (or one you can drill one into).
Picking the Right Potting Soil
Another nice thing about Rubber Trees is that they are at home in a variety of different soil compositions. While some houseplants are finicky about the soil they live in, Rubber Trees tend to do just fine with just about any potting soil you can pick up at your local garden center.
Rubber Trees like living in perpetually damp soil, so you want a mixture that has excellent drainage but retains moisture well. In my experience, most premixed potting soils are absolutely sufficient for this. However, over time I have noticed that potting soil alone can sometimes compact enough that it makes watering tougher. It still retains water, but the topsoil can become hard and crusty, increasing the time it takes to absorb the water.
To help with that, I always recommend adding in additional pumice, perlite, or a super-porous premix like cactus or succulent mix. I find that one part of a porous additive to three parts potting soil helps keep the mixture light and aerated so water can continue to flow through it easily.
For more detailed information on the best soil for your Rubber tree, read: The Best Soil and Containers for Your Rubber Tree Houseplant.
Step by Step Instructions for Repotting Your Rubber Tree
Once you’ve gathered up your supplies and figured out which pot and soil you are using, you are ready to transplant your Rubber Tree.
Remove From the Old Pot
The best way to get your plant out of its old container is to gently tip the entire thing on its side, laying all the foliage gently on a countertop or the floor. You can work the root ball out of the pot by grabbing the base of the stem and gently rocking it back and forth.
If the root ball is stuck, you can use a butter knife or other thin, dull blade to run along the edges of the pot to loosen the soil. Severely root bound plants may sustain some damage during removal, but they should bounce back quickly.
Inspect the Root Ball
With the plant out of its container, this is a perfect time to inspect the root ball for any signs of rot or disease. Brush all the excess dirt from around the root ball. Don’t bother trying to remove all the dirt deep in the structure…the idea is just to see most of the roots. If you see any brown or black, mushy roots, use your knife or shears to clip them out of the root ball.
If there are a lot of thick roots that grew to the sides of the pot and then wrapped around the entire root ball, you can remove a few of those to create more space for the root system to expand.
Transplanting Your Rubber Tree Plant
Once the root ball has been cleaned up, you are now ready to move the plant to the new container. Place enough of your new soil mixture in the bottom of the pot so that the crown of the plant sits about an inch below the lip of the container when placed inside.
Center the plant within the new container, making sure there are a couple of inches on all sides before filling the excess space with more potting soil. Gently press the soil in with your fingers to hold the plant in position.
Once your Rubber Tree is properly planted in its new pot, give it a thorough watering, ensuring there aren’t any dry pockets of soil. Water deeply, so that it flows out the drainage hole.
Allow the pot to fully drain and then place your newly repotted Rubber Tree back in its regular spot in your home.
Caring for Your Newly Transplanted Tree
Your Rubber Tree shouldn’t have any issues acclimating to its new container, but it is a good idea to pay a little extra attention to it in the coming weeks, just to make sure.
Monitor your tree for any signs of stress. Getting transplanted can be a little shocking, and you may notice that your Rubber Tree drops a couple of leaves. This is a common response to stress but should not continue once your plant is fully acclimated to its new environment.
You can get your plant back on a regular watering routine right away, making sure that the top inch of soil is dried out before giving your plant any more.
I would suggest that you discontinue supplemental applications of fertilizer right after repotting. The refreshed potting soil, which typically comes charged with some slow-release feed anyway, should be enough to sustain your plant’s nutritional needs, and you don’t want to run the risk of burning your plant with excess fertilizer. You can continue after a few months when you know your Rubber Tree is fully established in the new container.
A Quick Note About Rubber Tree Propagation
As I noted earlier, sometimes repotting your Rubber Tree goes hand in hand with plant propagation, so choosing a time when you can accomplish both makes a lot of sense.
If you plan to trim your Rubber Tree to make it a little easier to handle during a transplant, I suggest you make your cuts a few days ahead of when you plan to repot. This allows you to mindfully consider the shape of your tree, make your cuts, and then allow the plant to start healing before you add the stress of a transplant.
This also gives you some time to process your cuttings right away, which will help them be more successful. And, as a bonus, if you wait a few days, the cut wounds will scale over, so you don’t have to deal with the flow of sap that accompanies any trimming while you’re trying to replant.
Even if you weren’t planning on trimming around the same time as your transplant, you might end up breaking a branch or two in the process. If this is the case, I’ll just remind you that Rubber Tree propagation is pretty straightforward, and you don’t have to let those broken stems go to waste.
Whether you utilize the broken stems or not, be sure to clean up those breaks by making clean cuts on the plant and to keep a close eye on it after the transplant to make sure it is recovering well.
If you want to learn more about the different methods of Rubber Tree propagation, you can read an article I wrote about them here.
Final Thoughts
Now that you know all the steps, hopefully, you feel confident deciding when is the right time to repot your Rubber Tree and doing it easily and efficiently. These are tough and resilient plants, so don’t be afraid to get your hands dirty!
By allowing your Rubber Tree the extra space to spread its toes, so to speak, you’ll be setting your plant up with everything it needs to become a truly stunning showpiece in your home.