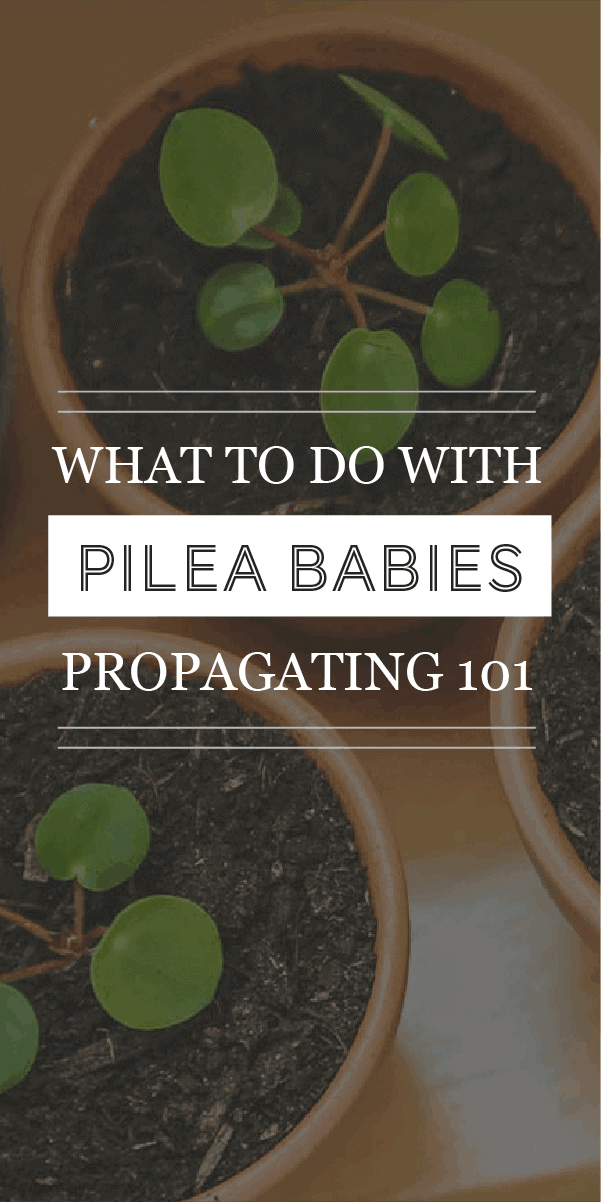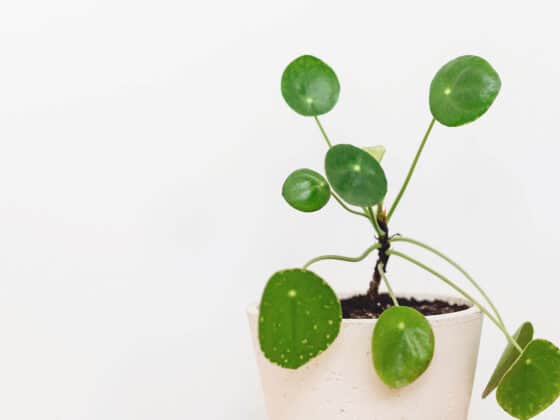
Pilea Peperomioides, also known as Chinese Money Plant, are one of the simplest plants to propagate. With very little effort you can turn your one Pilea into two, three, four, or even twenty! A healthy Pilea continues to produce babies for its entire life, which is extremely exciting. But if this is your first time propagating a Pilea, you might have some questions about the process.
What do you do with Pilea babies? To propagate a new plantlet from your mother Pilea, you must first remove the plantlet from the mother. Once the plant is separated, you need to root it in a small bottle of water. Then, when the plant has 1-2” long roots, it is ready to be planted in soil.
Pilea babies are very simple to care for and can be transplanted to their own containers easily. In time, they will become mature plants and will eventually start to have babies of their own. If you have questions about the process or want more specific details on taking care of these small plantlets step by step, read on!
What Are Pilea Babies?
Pileas reproduce themselves by producing new plantlets. These small plants are known by many names but are most commonly called Pilea babies or Pilea pups. Pileas produce pups in two different ways and how you remove the pups depends on the type.
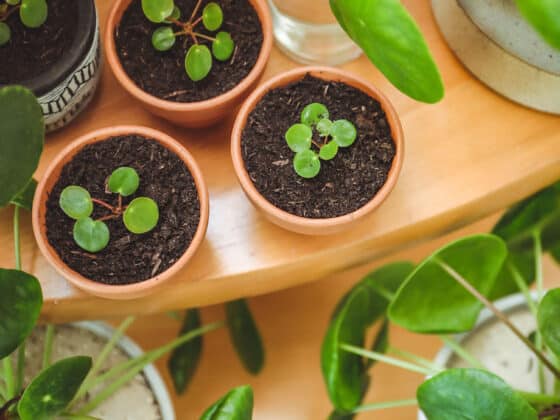
Offshoot babies are what we call the new plantlets that emerge from the central stalk of your existing mother Pilea. These pups have no root systems of their own and are completely dependent on the mother for all nutrients and water.
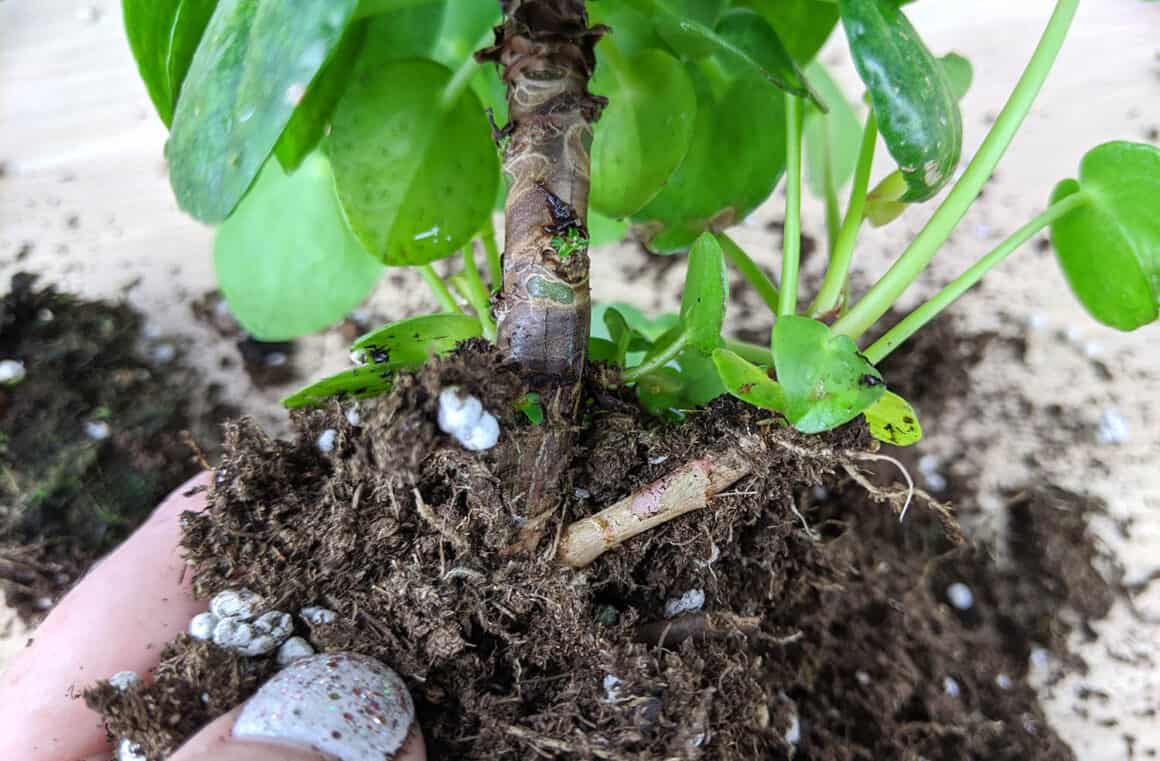
Rhizome babies are the new plantlets that pop up in the soil, near the mother plant. These plants do have a small root system, but they receive most of their nutrients through a rhizome under the soil that connects the mother to the baby, similar to an umbilical cord.
How Big Should the Baby Be Before You Remove it from the Mother Pilea?
Once you start to see new pups emerging from the stem or soil of your Pilea, you may immediately want to propagate them and move them to their own container. However, just like with other species, the baby needs to stay with the mother until it is big and strong enough to take care of itself.
Pilea pups should only be removed once they are 2-3” tall. At that point, the plant will be big enough that it can handle the transition from one container to the next. When you are in doubt over whether your Pilea baby is ready to move, wait a bit longer. The larger the new plantlet is, the better chance it has to survive on its own.
Are Certain Times of Year Best for Removing Pilea Pups?
Yes, removing Pilea babies from their mothers can be more successful during your Pileas growing season. All plants, including Pileas, have a growing season, or a part of the year where they grow more quickly and easily. Harvesting babies will have better results if you wait until your plant is in a state of active growth.
Growing season for plants takes place during the warmest months of the year, which for most of us is from spring through early fall. During the colder months, plants become dormant and growth is slowed down dramatically. Your new Pileas will have a better chance at survival if they are in growing season and have the energy they need to grow quickly.
How to Remove Pilea Pups
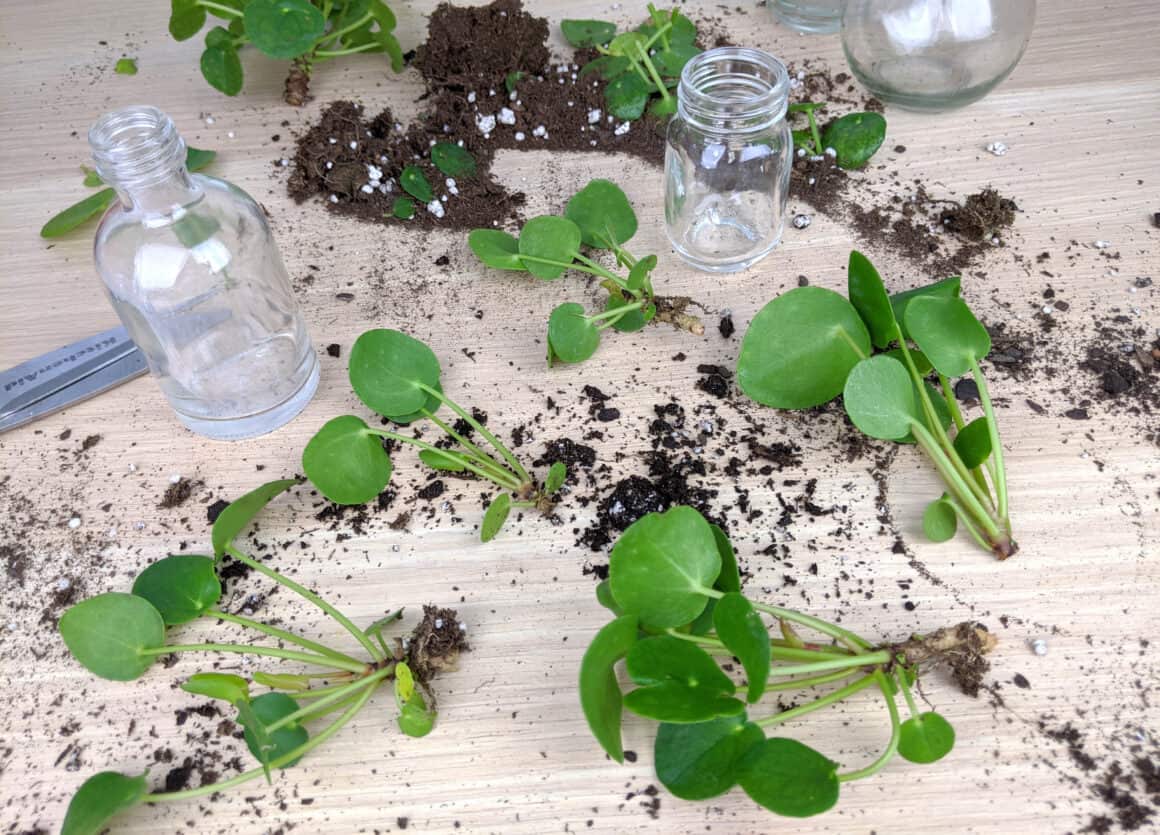
Harvesting Pilea pups is a simple process and varies slightly depending on which type of baby you are dealing with. Offshoot babies that spring from the mother stem have to be removed differently than the rhizome babies that pop up from underneath the soil.
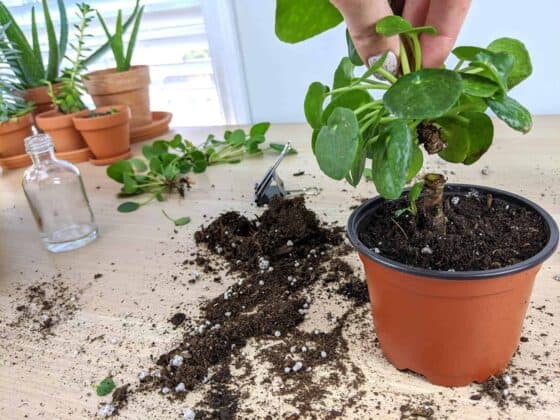
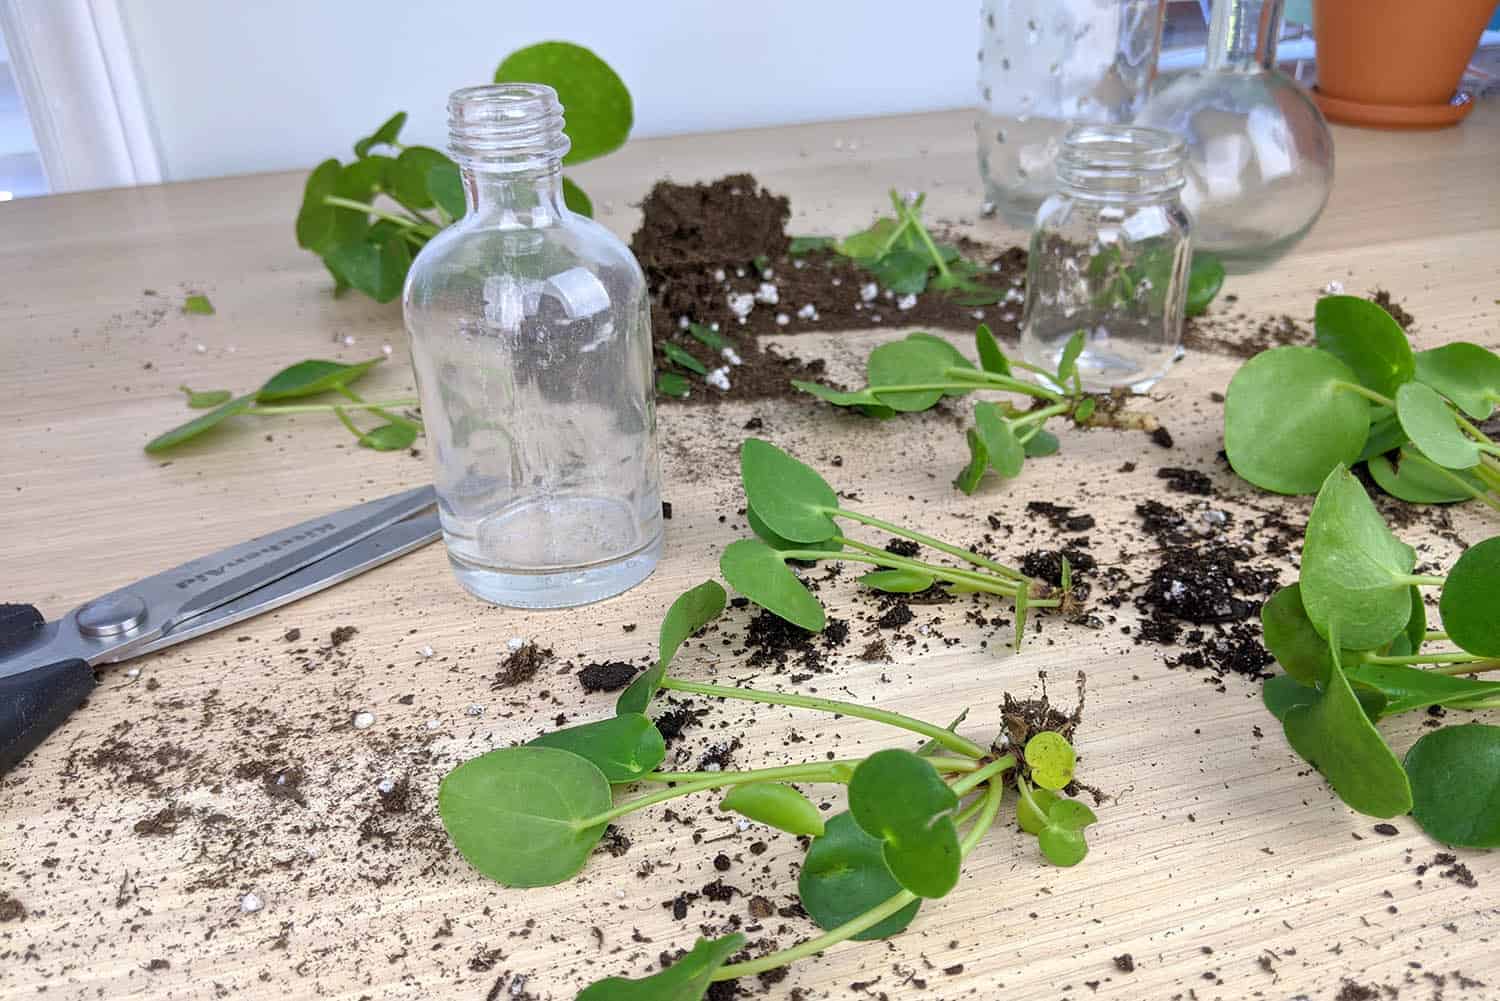
To take either type of cutting you will need a set of sharp scissors or knife. It is important that the tool you use is both sharp and clean as making cuts on a plant has the potential to expose the inside of the plant to fungus and other pathogens.
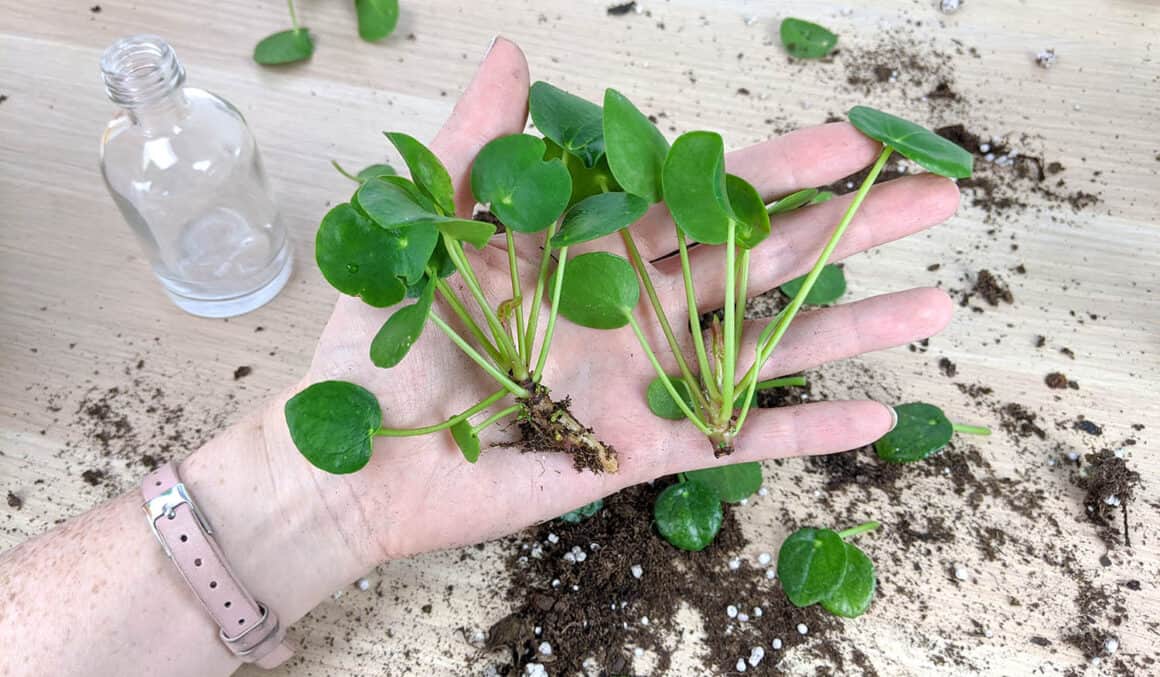
When an offshoot baby from your mother’s stem has grown to be 2-3” tall it is ready to be removed from the main plant. Use your sharp and clean scissors or knife and follow the plantlet all the way back to the mother stem. Once you’ve located the base, simply clip the new plantlet at the base and set it aside. This plantlet will not have any roots yet, this is where the next step of rooting in water comes in.
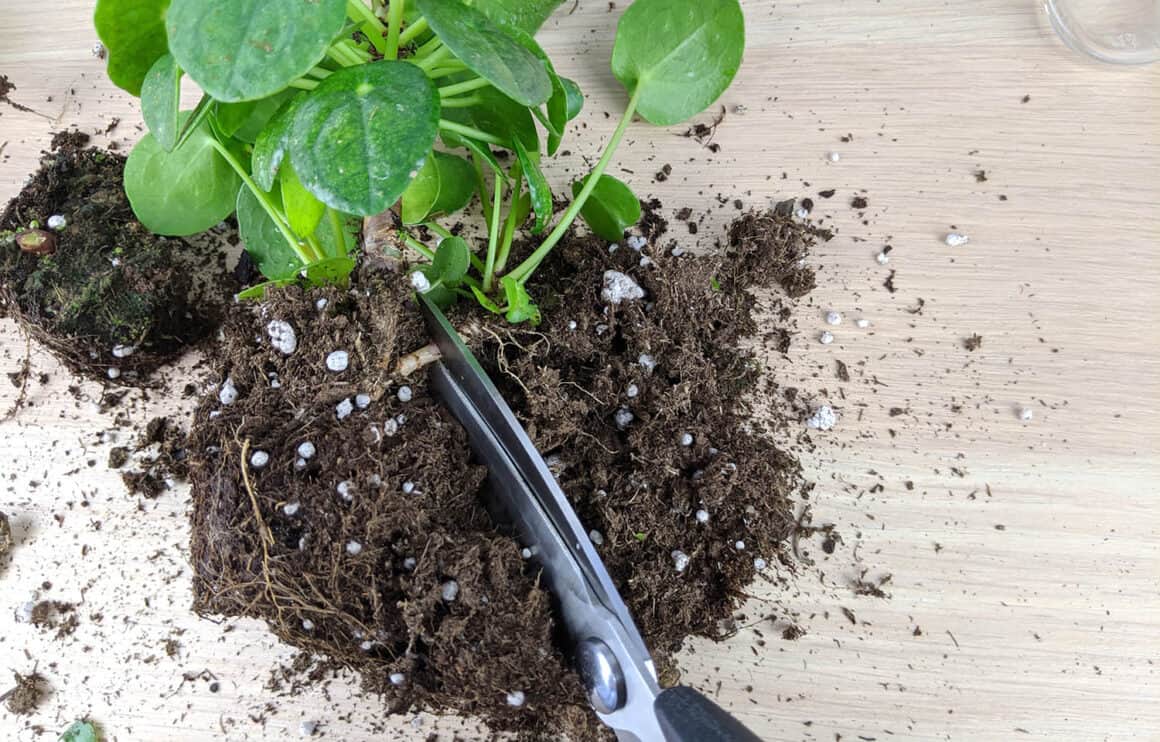
For rhizome babies that pop up from the soil near your mother Pilea, clipping is equally as simple. You can either choose to try to get some roots with your clipping or clip the stem and root in water afterward.
If you are planning to root in water, you can just follow the stem of the new plantlet down about an inch below its lowest leaf and clip the whole stem and set aside.
To try to maintain part of the root system, use your fingers to gently push the soil away at the base and dig up the small plantlet. You can use a small spray bottle to gently clear away some soil from the roots or use your fingers to do so. Once the plant is mostly removed from the soil, you will have to snip the rhizome, similar to an umbilical cord, that connects the baby to the mother Pilea.
If you are nervous about damaging the roots to the mother Pilea, you don’t need to fear. If you follow the steps above with a gentle hand, both mother and baby should be just fine.
What to Use to Remove Pilea Pups
I like to think of cutting plants like surgery. I always tell people that you wouldn’t want your doctor operating on you with something they found in their junk drawer, and your Pilea won’t be happy if you do the same to it.
To take a cutting from your Pilea, you will need a set of sharp scissors or a very sharp knife. It is important that the tool you use is both sharp and clean because making cuts on a plant can potentially expose the inside to disease and fungal infections. Clean cuts are always healthier for your plant.
To clean the scissors or knife you use to take cuttings, simply wash the tool in hot soapy water, being sure to remove all residue from the blade. If you want to be extra careful, wash it in a diluted mixture of 1 parts bleach and 10 parts hot water.
Getting Your Pilea Pup to Grow Roots
The process of getting your Pilea plantlet to grow roots is quite simple and usually very quick. To root your Pilea, simply place the cutting into a small bottle of water. Be sure that only the base of the stem is in the water. Do not submerge any of the leaves. Then all you have to do is wait and watch your roots start to grow.
The type of bottle you use is up to you. I recently purchased some small, pretty bud vases that look like test tubes and beakers from my local Michaels craft store for my Pileas, but I have used old spice jars and small plastic water bottles in the past. The most important thing is to make sure that you can place your Pilea pup so that only the roots will reach into the water. To cut down on the chance of algae growing in your water, you can use a darker colored glass like amber or dark blue.
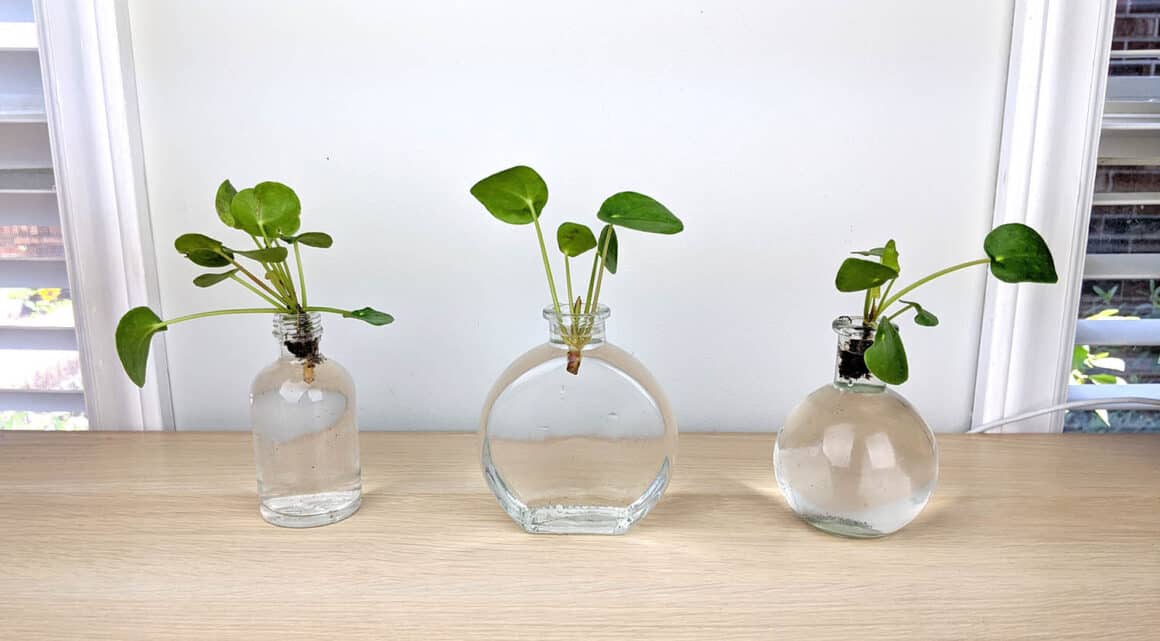
Once your new Pileas are in their water bottles, place them in an area of your home that gets bright, indirect light. Pileas cannot tolerate sunlight directly on their leaves and a new plantlet is at a higher risk for being scorched by the elements. I like to put my baby Pileas on a table that sits about 3 feet from a bright, south-facing window.
It is important to regularly change your water. It should be changed at least once a week, or when you notice it looks dirty. Be gentle with your plantlet while changing out the water as the small roots that grow will be delicate.
If your plant is in its growing season, a new Pilea pup should start to take root in a couple of weeks. If the plant is dormant in the colder months of the year, this could take a month or two.
What Soil is Best for Pilea Babies?
The most important factor in ideal soil for Pileas is drainage. Pileas hate to sit in soggy, so a well-draining, quick-drying soil is key. There are two options for finding the right soil for your Pilea. The first is purchasing a store-bought option that is ready for your Pilea. The second is to adjust something you have at home so it is ideal for Pilea Peperomioides.
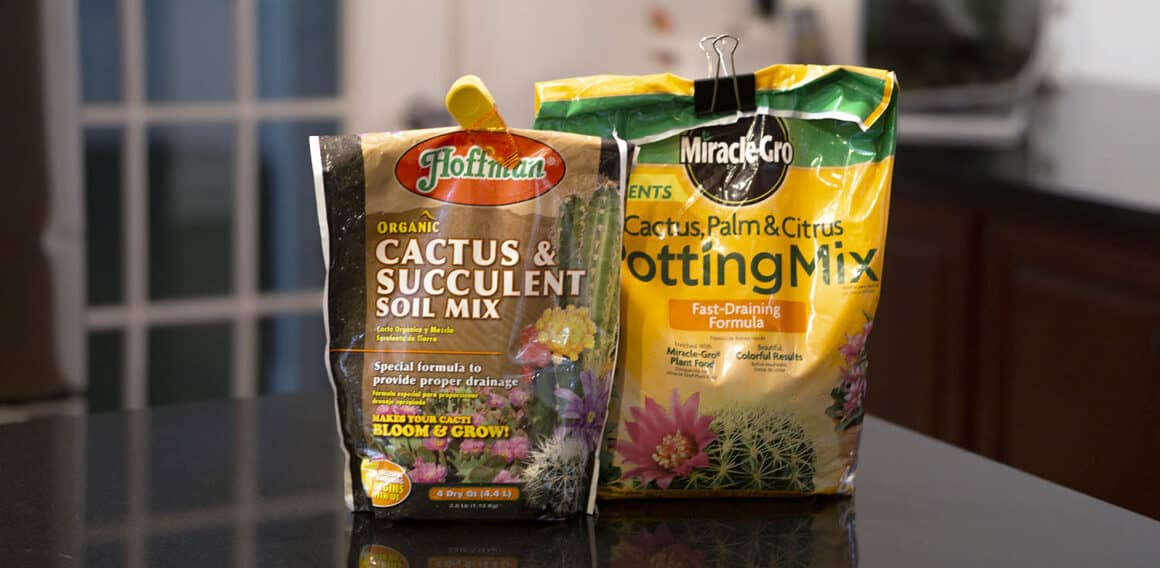
There are a lot of potting mixes available in most local garden shops. If you would like to buy a mix you can take directly off the shelf and immediately plant your Pileas into, you’ll want to get a cactus and succulent mix. This will ensure that the soil you’ve selected won’t retain too much water and will drain quickly.
If you prefer a more hands on or DIY solution to Pilea soil mixtures, you can create your own potting soil by using the potting soil you already have at home and adding in some perlite or pumice to improve the drainage needed for your Pilea. I like a mixture of 4 parts soil to 1 part perlite or pumice. Whether you choose perlite or pumice will depend on what is available to you and won’t make a lot of difference.
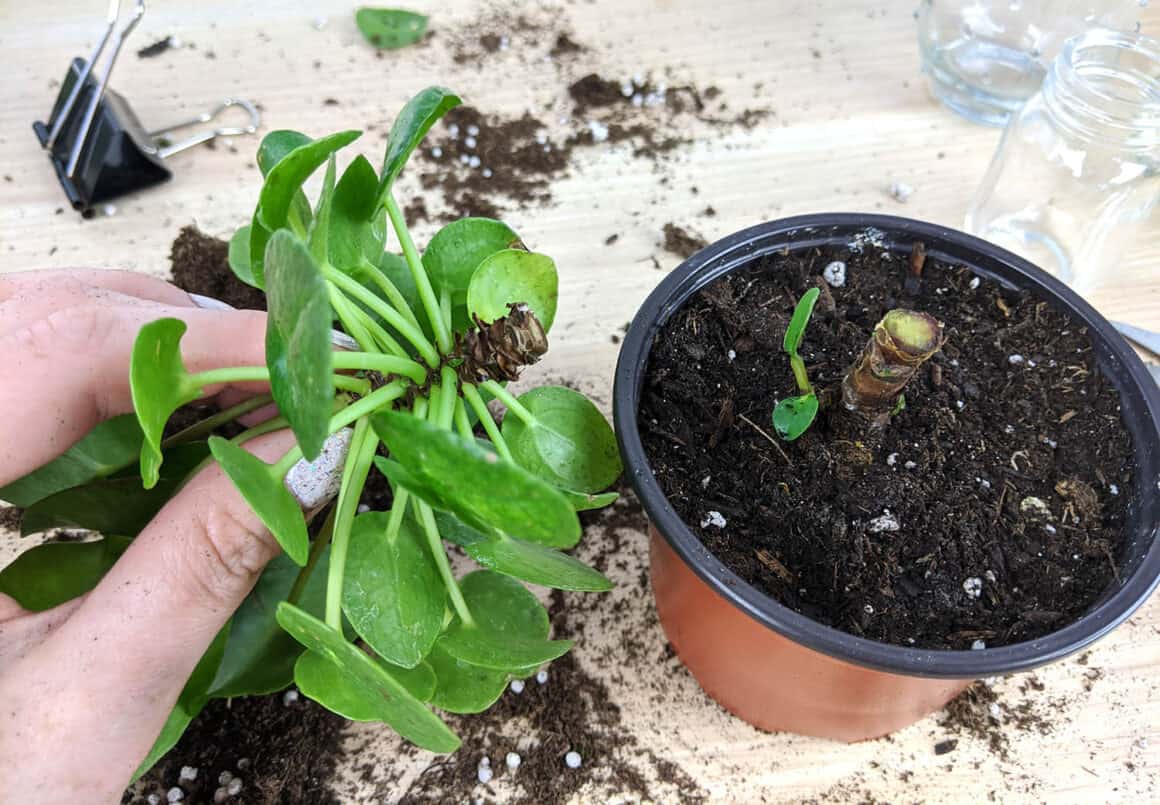
How To Repot Pilea Babies
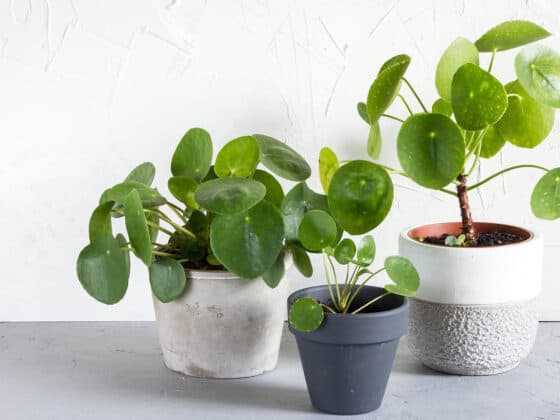
Once you have the soil for your new Pilea, you’ll need to pick out a pot for the plant as well. Because Pileas don’t like to sit in wet soil, you’ll need to choose an option that has a drainage hole in the bottom. This will allow the water to run through the plant, wet the soil, and flow out the bottom.
It is also important to choose a container that is small, like your new Pilea. When a plant is placed into a container that is much too large for it, it can cause the soil to stay wet for too long. For small Pileas, I recommend pots that are no more than 3” wide, and preferably closer to 2”.
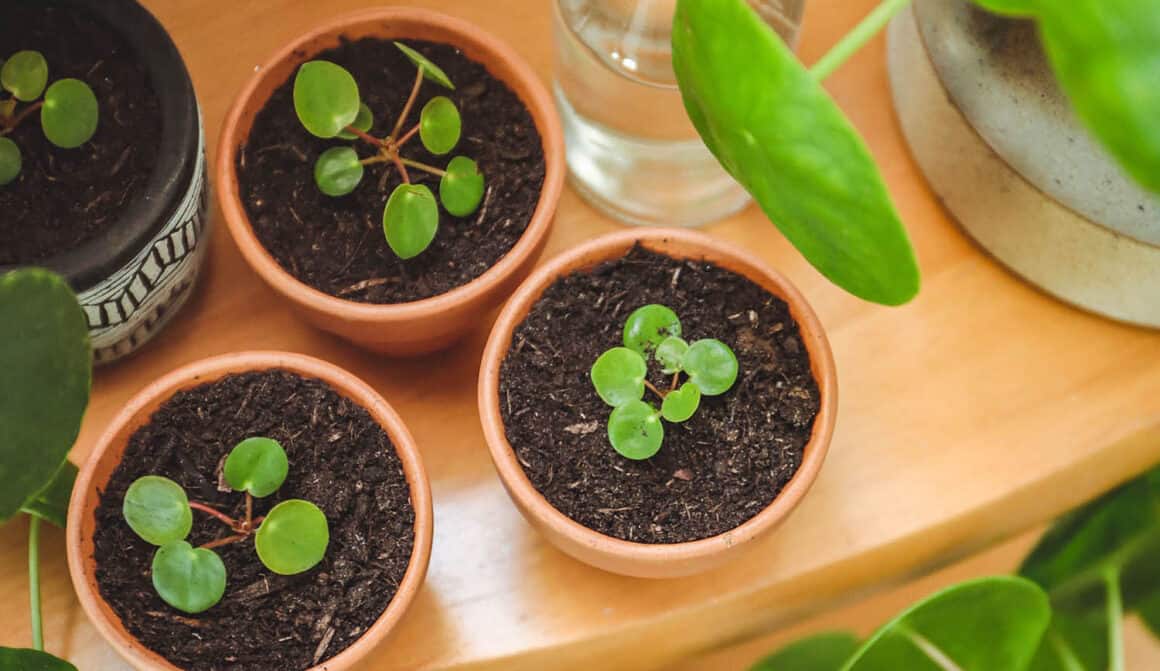
When the roots on your Pilea reach about 2” in length, your new plant is ready to be repotted. To do this, simply use a fast-draining soil, like a succulent blend, and your new container to gently relocate your Pilea. I like to water as soon as I replant a plantlet and then leave it to dry out for a week or so before rewatering.
For step by step instructions on repotting Pileas, click here.
Terracotta Pots and Pileas
When trying to find a container for your new Pilea, you may want to consider planting in a terracotta pot. Terracotta is cheap and readily available at all garden shops and big box stores, like Walmart or Target, and can be found in many different sizes.
The reason I recommend this is that terracotta pots are ideal for plants like Pileas who prefer dry soil. The porous nature of the material helps to draw moisture out of the soil and will keep your plant from sitting in damp soil, minimizing the risk for root rot and other fungal issues.
If you have been known to overwater your houseplants in the past, consider planting your Pilea in terracotta as it will be more forgiving than plastic or ceramic pots.
How to Care for Pilea Babies
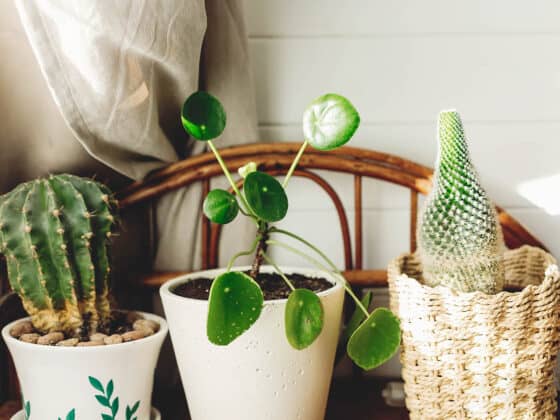
Pileas are well known to be hardy plants, but the babies are a bit more sensitive than their mothers to things like overwatering and direct light. Something that wouldn’t hurt the mom, may kill the baby.
Your new Pilea should be placed in an area of your home where it has the most access to bright, indirect light. Pileas love bright light, but cannot tolerate it directly on their leaves as they are prone to the plant equivalent of sunburn.
The plant should also be placed out of the way of harsh drafts of hot or cold. All plants are sensitive to drastic changes in temperature and should be kept a safe distance away from drafty doors and windows as well as heating and cooling vents.
Just like your mother Pilea, your new baby will only need to be watered when the top inch of soil has dried out. The time it takes for this to happen will vary depending on your location and the size of the pot it is planted in. It is always best to wait a little longer if you’re unsure that your plant needs more water. Underwatering is much better than overwatering.
Help! I Just Received a Plant Cutting From a Friend, Now What!?
If you’ve come to this article because you just received a Pilea baby from a friend and you are completely confused on what your next steps are, you may find this whole article a bit overwhelming. Here are the basics of what you need to know.
If your Pilea cutting has 1-2” long roots, you can simply plant it in soil and set it in a bright area of your home where it will have access to lots of indirect sunlight. When planting your new cutting, be sure to choose a container with a drainage hole, as it is important for Pilea soil to be able to drain quickly after watering.
If your Pilea cutting has no roots or very small roots, the first step you need is to root it in water. This is very simple and only involves you placing the tip of the cutting into water and leaving it for a few weeks. Be sure when you place the plant into the water that only the end of it is in water and that none of the leaves are submerged. Once your Pilea has long enough roots, plant it as directed in the paragraph above.
How Long Will It Take a Plant to Produce Pups?
There is no hard and fast rule that says a Pilea will start to reproduce when it reaches a certain age. Each Pilea plant acts differently and whether or not it produces pups can be influenced by many things, such as the plant’s access to sun, water, nutrients, and energy.
A good rule of thumb is that a Pilea starts to reproduce after it is about one year old. However, some Pileas will start earlier and some won’t for several years. It really depends on the plant.
If you have had a Pilea for a year or two with no pups, try moving it to a sunnier location with bright, indirect light and fertilize it with a 10-10-10 mixture diluted to half strength once per month. Also remember that if the plant is dormant, or not in its growing season, it will not produce any pups. Most Pileas are dormant from late fall through winter.
Encouraging Your Mother Pilea to Produce Babies
If you are reading this and you are ready to start propagating Pilea but your plant has yet to reproduce, there are a few things you can do to potentially speed up the process. It is important to note that a plant will have to become mature before it will start producing babies. But if you believe you have a mature Pilea, try some of the tips below.
To encourage your Pilea to produce pups there are a few things you can do. The best options are to increase its access to nutrients, light, or energy.
To increase your Pilea’s access to nutrients, you can fertilize the plant once per month during its growing season. However, it is worth noting that overfeeding a Pilea can be very harmful for your plant. For this reason, I use a balanced 10-10-10 fertilizer diluted to half strength. For more information read this article all about fertilizing Pileas.
If your Pilea is slow growing it may not have enough access to bright light. Pileas adore bright, bright areas and thrive best when placed a few feet away from a south-facing window that receives light all day long. If you do not have a location in your home that meets those requirements, consider purchasing a grow light and exposing your Pilea to that additional light for 12 hours each day. To see my recommendations on grow lights, read this article.
Lastly, Pileas can be encouraged to produce more pups when they have the energy they need to do so. Plants are constantly pushing energy out in every direction, through their stems and roots and out to each leaf. Removing old, dying leaves from the bottom of your Pilea can free up some of the energy needed to create new growth in the form of pups.
For a more extreme option, you can cut the top off of your mature Pilea, root it in water, and replant it. This is a way that lots of people use to turn one unhealthy, slow-growing Pilea into two, new healthy plants. Lots of times, the bottom and top portions of your Pilea will start to produce pups after they have been separated and replanted.
Should I Remove the Pups from My Pilea?
Whether or not you should remove the pups from your mother Pilea is a decision you’ll have to make for yourself, but I can help by giving you some pros and cons for removing pups from their mother.
PROS FOR REMOVING PUPS FROM THE MOTHER PILEA
Some people call Pileas the “Pass It On Plant” because of how easily it can be shared with others through propagation. I like to gift my fellow houseplant lovers with something I grew and cared for, and Pilea pups are always a hit. The major pro to removing a Pilea baby is that it can be shared with those you love.
The second pro for removing pups from your Pilea is that it keeps your plant looking clean and sleek, instead of cluttered and messy. If you want a Pilea with one central stalk and a round, dome-like shape where the leaves are growing out evenly, Pilea pups will take away from this.
Lastly, removing Pilea pups will help to push energy back into your mother plant to help her grow taller and faster. Like human babies, Pilea babies take a lot of energy from their mothers. When a pup is removed and transplanted to its own container, it frees the mother back up to focus on her own growth.
CONS FOR REMOVING PUPS FROM THE MOTHER PILEA
The main con I see with removing Pilea pups from the mother is that it can leave your plant looking a bit sparse. Naturally, as a Pilea ages, the bottom leaves will start to droop and eventually fall off. If your plant is only one central stalk in a container, eventually the bottom will start to look very sparse.
Also, I prefer to leave the pups on some of my Pileas because I love the way it makes my plant look so much fuller. Pileas which have not had their pups removed look a little wilder and unkempt than a pruned Pilea, but I actually prefer the look.
Personally, I have several Pileas that I treat differently. For some of them, I remove the babies when they are tall enough and pass them along to my friends and family. But for others, I leave them and let the plant grow bushy and full altogether in a single container. There is no wrong answer here. Whatever you decide to do will depend on what look you want from your Pilea.
Final Thoughts
If your Pilea is reproducing and putting out lots of babies, you may find yourself intimidated or confused about what to do with them. I hope that this article will give you some peace of mind and the confidence you need to start propagating your Pilea today.
For more information on propagating Pileas, you can read this article 16 Common Questions About Propagating Pileas Answered.