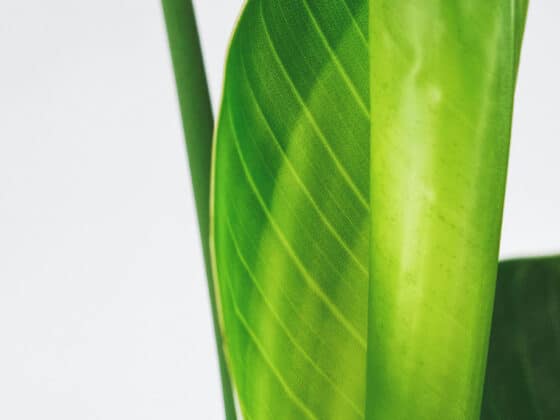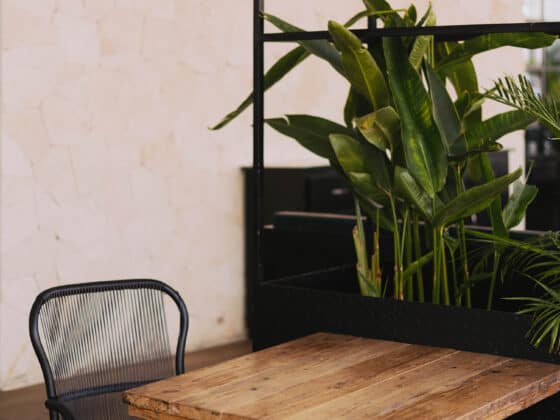
Bird of Paradises, also known as Strelitzias, are subtropical plants native to South Africa. Well-loved for their beautiful leaves, these gorgeous plants are susceptible to the same ailments as other popular houseplants. The most serious of them, root rot, can kill even the healthiest plant. So, what is root rot, and what can you do about it?
Root rot happens when a Bird of Paradise is left to sit in soil that is too wet for too long. Over time, the roots will completely rot away and the plant will die. To save a Bird of Paradise from root rot, you’ll need to clean your plant’s roots, remove the infected parts, and replant your Bird of Paradise in fresh soil and a sterilized container.
If you believe that your Bird of Paradise has root rot, this article will answer any questions you might have. It will also explain how to stop root rot and help your plant recover.
What Is Root Rot and Why Does It Happen?
Root rot is exactly what it sounds like: rotting roots. It is almost always a result of overwatering your Bird of Paradise, and if left unchecked, will send it to an early grave. Unfortunately, sometimes a Bird of Paradise suffering from root rot cannot be saved. Because the first symptoms are happening underneath the soil, most of us don’t even check for the issue until it has become a significant problem, and by then it may be too late.
Root rot is caused by constant overwatering. Fungi can lie dormant in your soil for a long time, and once the plant has been overwatered once or twice, the fungi come to life, taking over the root system of your Bird of Paradise. This leads to the rotting of your plant’s roots and will kill your plant if not addressed.
Why Too Much Water Is Bad for Your Bird of Paradise
Plants need three basic things to survive: light, oxygen, and water. However, too much of any of those components can harm your plant, with overwatering definitely being the most common cause of problems.
When you give your Bird of Paradise too much water, the soil stays wet all the time and essentially drowns the root system. Even though they are under the ground, roots still need oxygen and airflow to work correctly. Once they’ve become damaged, roots won’t send water and nutrients to the rest of the plant efficiently. If not corrected quickly, your plant will die.
This is why it’s essential to water your Bird of Paradise properly. These plants don’t want to dry out completely, but soggy soil is an even bigger problem. Instead of watering on a set schedule, check the soil before adding more water to your Bird of Paradise. If the top inch or two of soil is dry, it is time to add more water. If not, wait a few days and check again.
Besides encouraging root rot, overly wet soil can promote mold growth and invite pesky fungus gnats. If left untreated, these tiny flies will infect all of your nearby plants. Fungus gnats aren’t necessarily a huge problem, but their larvae can hurt healthy roots, and I find the adults incredibly annoying.
Above Ground Signs of Root Rot
As I said before, root rot can be tricky to catch quickly, as the real damage is being done underneath the soil. But luckily, there are a few things above ground that can point to a root rot issue and tip you off to the underlying problem.
If you find it hard to believe that you’ve overwatered your plant, you may have contributed to the excess water in an indirect way. Is your Bird of Paradise planted in a container without a drainage hole? Is anything blocking that hole? Have you let your plant sit in a saucer of standing water? Each of these is the same as adding too much water to your plant too frequently.
All signs of overwatering, including yellow or brown foliage, droopy leaves, and mushy stems, can be signs of root rot. Brown foliage signifies that your Bird of Paradise’s roots cannot send water and nutrients out to the whole plant. Sometimes brown foliage is due to underwatering, but it may also be the result of overwatering. Plants with brown leaves are often in a more serious stage of root rot.
The last above-ground sign of an underground root rot problem is found with your nose instead of your eyes. Have you noticed a musty or foul smell coming from your plant? Often those smells are a result of rotten organic material under the soil.
To determine if the issues above are resulting from overwatering, check your soil. If your soil is still wet, days after you watered it, your plant is overwatered. Now it is time to slip your Bird of Paradise from its planter to determine the severity of the problem.
Below Ground Signs of Root Rot
If an above-ground sign has tipped you off to an overwatering issue, your Bird of Paradise’s roots must be examined. If you believe that your plant may have root rot, go ahead and slide it out of its container carefully to get a better look.
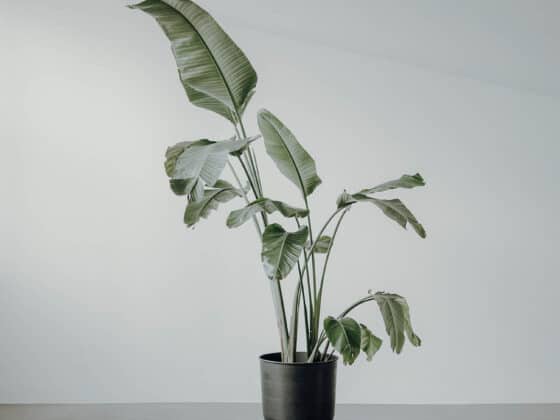
Healthy roots are white and crisp. Rotten roots are brown, grey, or black and are often slimy or mushy. If your Bird of Paradise roots look less than healthy, you’ve got a root rot problem. The same goes for the rhizome. If you see a mushy or brown rhizome, it’s time to take action.
Here again, you can use your nose to investigate. If you didn’t notice a smell before, but now that you’re more up close and personal with your Bird of Paradise’s roots, you are detecting a musty smell, rotten roots are nearby.
How to Check Your Bird of Paradise for Root Rot
To check your Bird of Paradise for root rot, you need to remove it from its pot. Tip your container over on its side and gently wiggle the plant back and forth to release it. If it won’t budge, run a butter knife along the inside of the container and try again. Be gentle. Remember, there is a decent chance the roots are already damaged, so be careful when disturbing them.
After you’ve removed your Strelitzia, brush as much soil as you can gently from its roots. Again, try not to damage the roots by brushing too vigorously. These don’t have to be perfectly clean; you only need to be able to see the condition of the roots.
Once you’ve brushed the roots, you can evaluate how they’re doing. Healthy roots are white and firm. They can be bent without breaking or turning to mush. They tend to taper at the ends, getting smaller the further they are from the main root stem.
A Bird of Paradise with root rot will have brown and mushy roots. In the early stages, they may just be brown but still firm. The longer that the plant’s roots are allowed to rot, the worse they will look.
Steps To Recovery For Root Rotted Plants
The first step to stopping the spread of root rot is to quit watering your Bird of Paradise until it has had time to properly dry out. If your overwatering problem hasn’t made it all the way to root rot, this is usually all it takes. But for plants with visibly rotten roots, you’ll need to do quite a bit more.
You’ll need to gather a few supplies before getting started:
- A tarp or drop cloth
- Shears
- A sanitizing agent (bleach, rubbing alcohol, or hydrogen peroxide)
- Paper towels or clean rags
- Fresh soil
- A clean planter
- A fungicide
Step #1: Remove the Bird of Paradise from Its Pot
Before you can really do any diagnostics or start the process of rehabilitating your Bird of Paradise, you need to remove it from its planter. Exposing the root ball will allow you to clean and remove any rotting or dead roots. Do this over a tarp or drop cloth to aid in clean-up.
Once you’ve removed it from its pot, you’ll need to wash the soil from your Strelitzia’s roots. You can do this in a shower or sink. Be careful when rinsing the soil from the roots. Try to avoid damaging them. This can be difficult, especially in cases of root rot, but aggravating the roots can cause more damage. Less is more here, so don’t focus on cleaning them too much.
Once you’ve rinsed them, pat them down with a paper towel or clean rag. The roots don’t need to be bone-dry but reducing the amount of moisture will help prevent further rotting.
Step #2: Trim Off the Rotten Roots
Once you’ve carefully cleaned and dried your Bird of Paradise’s roots, it’s time to trim off the rotten roots. These aren’t always easy to identify, especially if you aren’t sure how roots should look. Remember, you’re looking for roots that are brown, grey, black, slimy, or mushy; only the healthy, white, crisp ones get to stay.
Using sterilized shears, begin trimming off any unhealthy roots. Sanitize the shears after each cut as shears can easily transport the fungi infecting your Strelitzia’s roots to other parts of the plant. This can be done with rubbing alcohol or a diluted 10:1 water and bleach solution.
Step #3: Remove the Unhealthy Parts of the Plant
Once you’ve trimmed off the dying roots, sanitize your shears again. Next, you’ll want to remove the parts of the plant above the soil that are showing signs of decay. Any stems that are brown or mushy need to go. Yellowed and browned leaves will also need to be removed.
These parts can be removed the same way that you would prune a plant. Use sterilized shears and make quick, firm cuts. Generally, you can remove up to 1/3 of the plant without risking too much harm. However, in severe cases of root rot, your plant is likely to die anyway, so go ahead and cut out everything that is rotting.
Step #4: Repot the Bird of Paradise
After all rotten portions of the plant have been pruned away, it is time to replant your Bird of Paradise. This must be done with fresh, dry soil and a clean planter. Do not reuse soil that has housed a plant with root rot.
You may also want to consider treating your Strelitzia with a fungicide. These can be purchased at garden centers or online. Look for the ingredient benzimidazole, as this is well-known to combat root rot.
Replant your Bird of Paradise the way you usually would, taking care to not disturb the roots any more than you must. Immediately dispose of the contaminated soil and keep the used planter away from any other plants until thoroughly cleaned. For more information on repotting a Bird of Paradise, read this article.
Step #5: Watch for Signs of Distress
Once you’ve removed the rotten sections and repotted your Bird of Paradise, put it back in its original location. Changing its environment too much can stress your plant out even more and isn’t good for a Bird of Paradise recovering from serious pruning.
Look for signs that your Bird of Paradise is struggling. Wilting, yellowing leaves are the most common indication. Try to keep your plant safe from hot or cold drafts and consider moving it back slightly from its bright, direct light source. Your plant is most likely in a very precarious state right now.
Step #6: Adjust Your Watering Schedule
The most important part of this process is to make sure your Bird of Paradise isn’t overwatered again. To avoid this, always always always check your soil before adding water.
A Strelitzia should only be watered when the first 1-2 inches of soil have dried out. If you’re unsure, it’s always best to let the plant continue to dry instead of watering it. Underwatering won’t encourage growth, but it will prevent another outbreak of root rot.
To check if your Bird of Paradise needs to be watered, simply poke your finger down into the soil and check for moisture. If the top two inches are still moist, wait a few days and then check again. If the top two inches are dry, give your Bird of Paradise a thorough watering, allowing the excess to flow out through the drainage hole in the bottom.
Remember, regional differences and the time of year may require you to water more or less often. You can read more about when and how to water your Strelitzia here.
Caring for Your Bird of Paradise After Taking Steps to Remedy Root Rot
Your Bird of Paradise won’t require much special care after you’ve undertaken the task of fixing its root rot. Mostly you’ll just need to watch it for symptoms of distress or ongoing root rot. This usually presents itself in the leaves, which may change color, droop, or die off.
If you notice any of these signs, try not to panic. Some plants undergo shock when they’ve been pruned; your Bird of Paradise may bounce back. Wilting is usually the most common sign of shock and often clears up in time. However, if you notice further yellowing on healthy leaves, it may have been too late to reverse the effects of root rot on your Bird of Paradise.
Don’t plan to fertilize your Strelitzia anytime soon. The root system of your Bird of Paradise is in a delicate state right now. Fertilizer can burn the roots of a healthy plant, and those recovering from root rot can be seriously harmed.
How to Know If Your Bird of Paradise Is Going to Bounce Back
Root rot for any plant is bad news. For a Bird of Paradise, it can stop healthy blooms in their tracks and cripple the stability of a well-cared-for plant. While it can be reversed, it takes time and care.
Reduce how often you water your plants. Make sure that their planters have proper drainage holes and only water when the top two inches of soil are dry. And remember, don’t add fertilizer or anything else that will cause the plant to stress.
Once you see your plant put up new growth in the forms of leaves or flowers, you’ll know that it has recovered. Birds of Paradise are notoriously slow growers, so this may take time, and just because you don’t see new growth above the surface doesn’t mean it isn’t working to rebuild its root system underground.
Be patient and care for your Bird of Paradise carefully. With a bit of luck, and better watering habits, your plant may start to put out new leaves or stems within a few months. Generally, once you see that new growth, you know you’re in the clear.