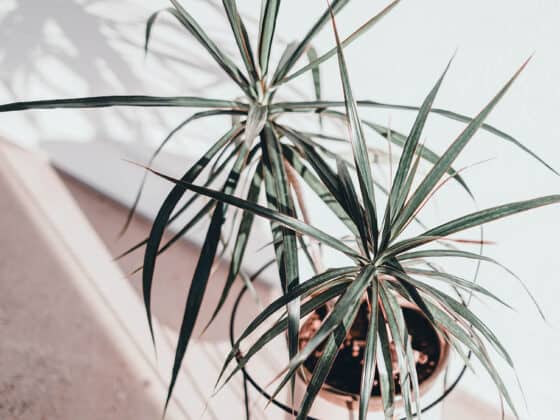
Dracaena fans love growing these plants because of their architectural appearance and adaptability. Plus, they are hardy plants and easily propagated! That means that you can expand your collection by taking cuttings from your healthy Dracaenas easily. So, how do you propagate Dracaeanas?
The easiest and most popular methods of propagating Dracaenas are by rooting a stem cutting in water or soil. The process starts with taking a proper cutting from the plant and then providing that cutting with the conditions that will allow it to develop roots.
Once you have had a Dracaena for a while, it might outgrow the space it’s in, or it could start to look unkempt and less attractive. That’s the perfect time to strike a cutting and grow another Dracaena! You can also propagate a cutting as a way to save a dying or damaged Dracaena. This article will walk through all the steps to strike a Dracaena cutting, from when and how to prune to successfully caring for the cuttings until they are established as new plants.
When To Propagate Dracaenas
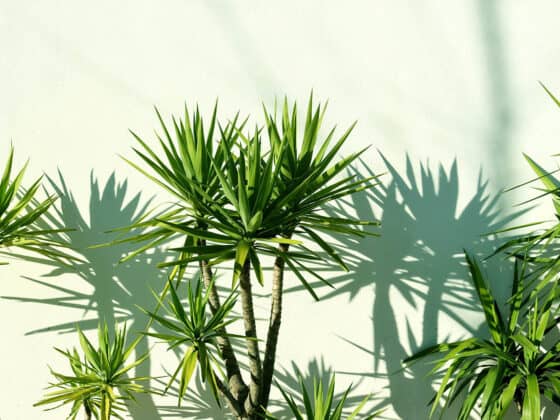
Is your Dracaena getting too tall for the space it resides in? Propagating is the perfect solution! Certain varieties such as Dracaena marginata can get too tall for indoor spaces–they are trees, after all! And some Dracaenas start to look spindly over time since their foliage is located at the top end of the stem. Other specimens can get top-heavy and lean or fall over if they aren’t cut back. Any time you need to prune your Dracaena, you can propagate the cuttings.
In order to maximize the plant’s ability to spring back from being pruned, it is best to take cuttings before the main growing season. Spring or early summer is the ideal time to do this, both for the cuttings to thrive and for the original plant to recover. Though, in a pinch, cuttings taken later in the year will usually survive as well.
How Long Does It Take to Propagate a Dracaena?
Dracaenas are slow-growers in general, and that is no different when it comes to propagating cuttings. The amount of time it takes for your Dracaena cutting to root will vary depending on the conditions you give it, but you can expect it to be slower than many other houseplants.
In general, you should see a good root system and possibly new growth from your Dracaena cutting in 1-2 months. You can speed up the process by using a rooting hormone, providing plenty of indirect light, and keeping the propagations at a stable, warm temperature in a humid envirornment.
How to Propagate a Dracaena, Step-by-Step
Thankfully, propagating Dracaens is pretty straightforward. Whether you’re a propagation pro or this is your first time trying the process, Dracaenas are generally easy to work with! Below you’ll find the step-by-step process of cutting, rooting, and repotting Dracaenas for propagation.
Prepare Your Supplies
You will need a few simple items to strike a cutting that results in a new Dracaena plant. First, prepare the container that will hold your cutting and the growing medium (water or soil). You’ll need a cutting tool such as garden shears or a pruning knife, which should be sterilized before you use it on any plant.
There are a few optional items to make your propagation easier and more likely to be successful. You might want to wear gardening gloves to protect your hands and perhaps a rooting hormone to speed up the root development. If you use a rooting hormone, choose one that is designed specifically for woody plants. This will give you a better chance of success than one that is made for softwood plants.
Taking the Cutting
Whether you choose to use water or soil propagation, you’ll need to understand how to take a proper cutting, so your new Dracaena can grow roots. To successfully create a new Dracaena plant from a cutting, that cutting must contain at least one node.
A node is a part of a plant that contains the required tissues to develop into new growth, such as roots, leaves, and stems. In the case of Dracaenas, any node can produce roots, which is one of the traits that makes them easy to propagate. Dracaenas also tend to have a lot of nodes on each stem, so you have a high chance of finding one, even if it is your first time propagating a plant.
Looking at the stem of your Dracaena, you’ll probably see rings around the stems that are slightly thicker than the surrounding area. Those rings indicate the location of a node. Nodes are generally light brown in color, and some of them may have additional stems or leaves emerging from them.
For a reliable cutting that can produce enough roots to support a new Dracaena plant, your cutting should include at least one (and preferably more than two) complete nodes. This will give the cutting the best chance of being successfully propagated.
Healthy cuttings have a higher probability of growing into a new plant, so avoid trying to propagate any parts of the stem that feel mushy or have turned a dark color. It is better to try to propagate a short but healthy section of the stem than a longer piece that is in bad shape.
Dracaena stems can be very thick and woody, so you need a cutting tool that’s up to the job. Be careful not to crush or saw through the node when you cut through the stem. For a large Dracaena, a pruning knife is probably the better option. You want to make all cuts quick and clean to reduce the possibility of infection.
Once you have removed the cutting from the original plant, remove any leaves from the bottom part of the stem. Allow the cuts to dry out slightly (this just takes a couple of minutes) before moving them into the propagating medium.
Can You Propagate a Dracaena Cutting Without a Leaf?
Yes! Some Dracaenas can grow very long stalks with foliage only at the top, so you may want to take multiple cuttings from the same stem. To do this, you’ll just cut down your long stem into pieces so that each piece is about 6-8 inches long. Be sure you pay attention to which side goes down, so you won’t plant your cutting upside-down.
Your leafless stem cutting may take a bit longer to strike, and cuttings with foliage are more likely to survive than those without. But it’s definitely possible to propagate a new plant from just a piece of Dracaena stem.
After you have your cuttings prepared, it is time to put them in either soil or water to root.
Rooting Option 1: Root Cuttings in Water
It is easy to root Dracaenas in water, and if you have tried water propagation for other plants, you will be familiar with the process. You’ll need a watertight container with a narrow enough neck to keep your cutting upright. A jar or vase is excellent for this, but any kind of container can be used.
You will use enough water to submerge the lowest nodes on the base of the cutting. You should have already removed any leaves or other material from the lower part of the cutting, leaving behind a bare stem with a few leaves at the top. Any leaves that end up submerged will die off and dissolve into the water, so be sure there is nothing left behind on the stem.
If possible, it is great to root cuttings in rainwater. Rainwater contains beneficial nutrients that your cuttings can use, and it does not have the added chemicals like fluoride and chlorine found in tap water. However, not everyone has a reliable source of rainwater, so you can use distilled water, filtered water, or just whatever you have on hand.
Change out the water in your container every few days to keep it fresh and oxygenated. Don’t allow the water to get stagnant or cloudy, as that can slow down the production of roots from your Dracaena cutting.
The first roots should start to emerge from the lower nodes on the cutting within a few weeks. Note that these water roots will be finer and more delicate than the roots that develop in soil, and this is normal. Once you move the cutting from the water propagation into your potting mix, the larger soil roots will develop shortly after.
Rooting Option 2: Root Cuttings in Soil
I generally like water-rooting for most plants, but when it comes to tough and woody plants like Dracaenas, I prefer rooting them directly in the soil. It seems to be faster than propagating in water, although both methods work perfectly well.
The process of rooting a Dracaena cutting in soil is very simple. Prepare a container with fresh potting medium, and water it so it’s moist but not wet. The pot you use should have at least one drainage hole to ensure any excess water doesn’t get trapped inside and cause the roots to rot. You can use a plastic nursery pot with holes inside a decorative cachepot if you prefer the look of it.
Use a bit of rooting hormone on the end of the cutting to encourage quicker root development, or simply stick the cane directly into the potting medium, about ½ to 1 inch deep. Be sure at least one node is completely covered by the potting mix.
Depending on how long or top-heavy your cutting is, you may want to use something to stake it up while it’s rooting. It’s just a temporary measure while the roots establish themselves enough to keep the plant from falling over, so you can use whatever you have handy.
You will not be able to see what is happening below the soil’s surface, but you’ll know that the plant has formed roots because it will start to put out new leaves. This can take a couple of months, so be patient! A lot is going on below the surface during this time. Resist the urge to constantly tug at your new plant to check for roots as this can stress out a young Dracaena.
Move Your Rooted Cutting to Soil
After your water-propagated cuttings have a few inches of roots, you can move them to a more permanent home in a pot with soil. Dracaenas prefer to be planted in potting soil that’s airy and drains well, so choose one that isn’t too dense or heavy.
Moisten the potting medium before planting your cuttings, but don’t let it get soggy. This will help the plant to remain stable and upright. Inspect the roots before placing them in the soil to make sure they all look firm and healthy. If any roots have turned brown or black, or are soft or slimy, be sure you trim these off before planting the cutting.
Create a hollow in the middle of the pot and place the cutting into it, then gently press the potting medium around the base of the plant to keep it in place. The goal is for the cutting to stay upright but avoid compacting the soil too much in the process. If the cutting doesn’t stand up easily, use a stake to keep it vertical.
Caring for Your Newly Propagated Dracaena
Dracaenas are hardy in general, and the care needed for propagations isn’t much different from how you care for a mature Dracaena. However, newly propagated cuttings will appreciate a bit of extra attention to help them establish a root system quickly and start obtaining nutrients and moisture from the potting medium.
Newly propagated cuttings should be kept in a warm location, away from temperature extremes, drafts, and direct sunlight. If you have a terrarium available, you could place your cuttings inside for extra humidity and protection until they have settled in, or create a similar environment by covering them with a clear plastic bag (just make sure the leaves aren’t touching the sides).
Newly propagated cuttings shouldn’t be allowed to dry out as much as a mature Dracaena. Keep an eye on moisture levels and try to maintain consistently moist but not wet soil. When the plant starts to generate new leaves, you can consider the roots established enough to transition to normal watering.
Final Thoughts
Propagating a Dracaena is an easy process that can be quite rewarding. Whether you’re trying to increase the number of plants in your collection or salvage a Dracaena that is struggling, soil or water propagation should provide a simple solution. If you haven’t propagated a plant before, Dracaenas are a great place to start!
The most important steps are to take a proper cutting, including a node, and provide that cutting with favorable conditions as it develops into a new plant. While there is never a guarantee of success when it comes to striking a cutting, Dracaenas are more forgiving than most. With a little effort and some patience, you should soon see your Dracaena cuttings flourish and grow!