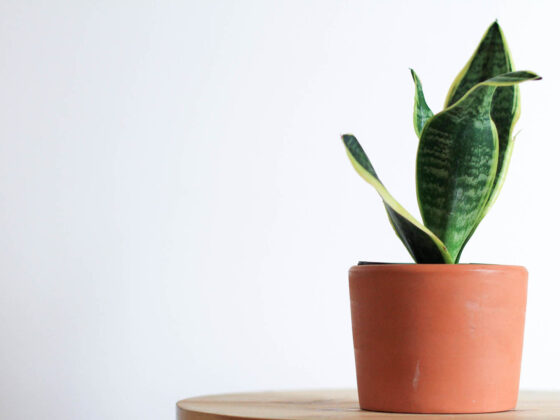
A note on names: In scientific circles, Snake Plants are now considered part of the Dracaena genus, and the name Sansevieria has been retired. However, many people still know these plants by their former name, so we’ll sometimes refer to them as Sansevierias. We have an article on the subject here.
Just the words “root rot” will send a shiver down the spine of a longtime Snake Plant owner. This terrible disease can take a plant from healthy to death’s door in a matter of days, and Sansevierias are especially susceptible. However, don’t abandon hope if your Snake Plant has root rot – by following the steps below, you have a good chance to rescue your beloved plant.
Root rot can’t be cured, but it can be removed. Take your Snake Plant out of the soil and look for any roots that are squishy, slimy, discolored, or giving off a foul odor, and cut them off with a set of disinfected scissors. Then put your Snake Plant in a clean pot with all-new potting mix.
Root rot comes from soggy soil, so in the future, be careful not to water your Snake Plant when the upper layers of the pot are still damp. You can also reduce the risk of rot by choosing a coarse, loose growing medium that won’t hold on to lots of moisture. Keep reading for our detailed guide on treating a Snake Plant with root rot.
Why is Your Snake Plant Rotting?
Root rot happens when the soil in your Snake Plant’s pot gets too damp for too long. Though the plant’s roots do need to take in water, they also need oxygen, and soil that’s marshy and wet cuts off their air supply. The roots get weaker the longer they’re unable to breathe.
As if that wasn’t bad enough, a sludgy, airless pot is a paradise for certain kinds of bacteria and fungi. Ordinarily, these microbes are present in the soil in relatively small numbers – but they start to reproduce rapidly when conditions get swampy. And your Snake Plant’s roots, already weakened by lack of oxygen, can’t defend themselves against the growing swarm of microorganisms.
Soon, these teeming microbes find their way into your Snake Plant’s root system and start to consume it from the inside out. That’s root rot. It spreads rapidly unless you take quick action to stop it, and it can easily kill a plant in just a few weeks.
Sansevierias are especially prone to root rot because they’re easy to overwater. These plants are built to survive droughts, not floods – they absorb and release moisture very slowly thanks to their thick, waxy foliage. So it’s easy to underestimate how long it will take their soil to dry out.
On top of that, Snake Plant root systems tend to be shallow, so they can be colonized very quickly by pathogens. It’s important to monitor any kind of houseplant for root rot, but Sansevierias deserve a bit of extra caution.
How to Identify Root Rot in Your Snake Plant
So what exactly should you be looking out for? That’s a little tricky to answer because the earliest signs of root rot are located – brace yourself – in the roots. You probably won’t notice anything is wrong with your Snake Plant until it starts to impact the foliage.
At first, the leaves will react the same way they do to lots of other stressors: they’ll wilt, curl up, and become discolored. Yellowing is particularly suggestive of overwatering, especially when you notice it creeping upward from the base of the leaves.
However, none of these signs is a smoking gun for root rot. Any or all of the above symptoms can be caused by underwatering as well as overwatering. The next step is to check whether the potting mix is wet or dry.
Poking the soil with your finger isn’t enough; there could be liquid trapped near the bottom of the pot even if the surface is dry. Get all the way to the base of the container using a soil moisture meter (in a pinch, a wooden chopstick will make a decent low-tech alternative). If the soil is still wet, there’s a good chance your Snake Plant has root rot.
Sadly, the soil test isn’t foolproof. Once rot sets in, it may persist even after the growing medium dries out. Additional symptoms to look for include:
- Limp, squishy leaves
- Brown spots on the foliage
- Leaves flopping over (if they’re normally vertical – this depends on the variety of Snake Plant you have)
- Large numbers of fungus gnats in the pot
- Nasty smells coming from the soil
These problems usually mean that your Snake Plant’s infection has gotten pretty bad. Try not to let it go this far – as soon as you have a reasonable suspicion that your plant is overwatered, you should start the process we’ve outlined below. The treatment might stress out your Sansevieria, but waiting too long could kill it.
Treating Root Rot in a Snake Plant
Bad news: any part of your Snake Plant that’s already rotting is done for. There’s no way to reverse the disease; all you can do is cut it away and let the plant grow back what it’s lost. Here’s how:
Step 1: Get Your Tools Ready
Good prep work can make all the difference. Make sure you have everything you’ll need for this operation ready to go. If you’re lucky, you might not need everything on this list, but you should have it all on hand just to be safe:
- Scissors. This set is purpose-built for precision plant trimming, but you can make do with a sharp pair of kitchen scissors if you’re pressed for time.
- Hydrogen peroxide. Disinfecting your trimmers between cuts is a crucial part of this procedure. You can also use rubbing alcohol or a 10% bleach solution, but we recommend hydrogen peroxide because you can also water it down a bit and use it to rinse the roots.
- A clean rag or cloth. You’ll use this to apply the disinfectant to your scissors.
- Soap. Pick something that doesn’t have harsh additives like degreasers like this one.
- Potting mix. When you get your Snake Plant back into the pot after its treatment, you should completely replace the soil. It’s impossible to get all the pathogens out of the old stuff. Use a coarse mix that will drain quickly, as described in our article on Snake Plant soils.
A new pot might also be a good idea. If the current one is too big for your Snake Plant, it could be part of the reason your plant developed root rot in the first place. Sansevieria roots don’t usually reach down more than a few inches, so in a deep container, there may be a lot more soil than roots. This tends to slow down evaporation, increasing the risk of overwatering. A lack of drainage holes will have the same effect.
Step 2: Confirm Your Diagnosis
You can’t be certain that your Snake Plant has root rot until you get it out of the pot and see for yourself. Hold your plant near the base of the leaves, then tilt it over to slide it free.
Brush the soil away from the roots. Rinse them with water and a bit of gentle soap if necessary; you want to be able to see them as clearly as possible. Handle the plant gently, taking care not to break off any healthy roots. They’re under enough stress as it is!
When you’ve got the root ball clean enough, start checking for rot. Sansevieria roots should feel springy and firm, and their coloration should be white, tan, or orange. Root rot turns them dark and squishy, and it gives off a foul odor.
Don’t be alarmed if the root system seems a bit shallow – this is normal for Snake Plants. On the other hand, if there seem to be hardly any roots at all, it probably means that a severe infection has already chewed through them.
Sometimes you’ll catch a lucky break and find that all the roots are healthy. In that case, you can skip to Step 7. But if there’s any indication of root rot, continue to Step 3. You can’t afford to leave even the tiniest bit of infected tissue in place.
Step 3: Prune Away the Rot
This is the scariest part of the process: amputating the infected roots. Before you start cutting, remember to dunk your cloth in disinfectant and wipe off the blades.
Then remove everything that shows traces of root rot. Prune like your plant’s life depends on it, because it does. Your only hope is to get rid of every scrap of rot. If the infection has spread up into the foliage, snip off the rotting leaves as well.
Sanitize your trimmers again after each cut. Otherwise, you could be giving the microbes a free ride to the parts of your Snake Plant that are still healthy.
If you didn’t spot the warning signs early enough, the rot may have spread throughout the entire root mass. This is bad news, but it may not be the end of the road for your plant because Sansevierias can regrow from leaf cuttings. If even a small fragment of your plant is untouched by rot, you can plant it in a fresh batch of potting soil and try to revive it that way.
(There is one potential drawback to this strategy: new plants that grow from the cuttings don’t always have the same variegation as their parents. Still, we’d rather have a slightly less colorful Snake Plant than no Snake Plant at all!)
Step 5: Disinfect the Root Mass
As we stressed in step four, treating root rot will only succeed if you’re thorough. It’s often helpful to follow up your root trimming with a hydrogen peroxide rinse, flooding any nooks and crannies where nasty microbes might still be lurking.
Mix one part hydrogen peroxide (at the 3% strength you’d use to swab a skinned elbow) with three parts water. Dunk the remaining roots into this blend and hold them there for a few seconds.
Don’t have any hydrogen peroxide available? You can dust some powdered cinnamon over the roots instead. It’s not just a tasty spice – it’s also a natural fungicide!
Step 6: Trim the Foliage
This step isn’t always necessary, but if you had to take off ⅓ or more of your plant’s roots, it won’t have the energy reserves to support all of its leaves. Remove roughly the same fraction of the foliage that you took from the root mass.
We’ve said it before, but it bears repeating: disinfect your scissors first! The last thing you want is to introduce bacteria from the roots into a healthy patch of foliage.
Step 7: Replant Your Sansevieria
If you’ve decided to reuse your Snake Plant’s previous pot, throw away the old soil and wash the inside with soap and water. For good measure, go ahead and disinfect it with bleach or rubbing alcohol too. Then fill it ¾ of the way up with fresh potting mix.
You should sprinkle some water over the soil to get it a little bit damp (not soaking wet). Then bury whatever roots your plant has left. Don’t pack them down hard. It’s better to gently shake and sift the pot to let the soil settle over the root mass.
The procedure is basically the same if you’re using a leaf cutting, except that you’ll have to bury part of the leaf itself so that it stays upright.
Step 8: Nurse Your Snake Plant Back to Health
Although it’s necessary, the procedure above is rough on your Snake Plant. You’ll need to do everything you can to keep it comfortable while it’s getting back on its feet.
That means avoiding unnecessary stress. Keep the plant away from direct sunlight for the next few weeks. A healthy Snake Plant can handle some sun on its leaves, but not one that’s trying to bounce back after you’ve pruned its roots and repotted it. Water sparingly and don’t use any fertilizer. Your plant is extra-vulnerable to nutrition and moisture overdoses during this period.
By the way, this advice applies even if your Snake Plant wasn’t actually suffering from root rot. Any time you pull up and move a plant, it will need a couple of weeks to get over the transplant shock.
How to Prevent Root Rot in Snake Plants
Hopefully, you’ve now removed every trace of infection, and your plant is on its way to a full recovery. In that case, congratulations! But how can you help your Snake Plant avoid root rot in the future?
First, let’s talk soil quality. Avoid soil blends containing lots of fine particles, which will trap water in the lower reaches of the pot and make it much harder to water your Snake Plant correctly. Use a potting mix with lots of chunky ingredients, including a large proportion of inorganic elements like coarse-grain perlite. We have a more detailed article on the right soils for Snake Plants here.
Your choice of pot matters too. Always keep your Snake Plant in a container with holes at the base to let water escape. You might also want to use a pot made of unglazed terra cotta. This porous material allows moisture to evaporate right through the walls, drying the soil out more quickly.
And, of course, you’ll need to watch your watering habits. The best way to hydrate a Sansevieria is in large, infrequent doses. Soak the soil evenly until there’s water dripping from the bottom of the pot. Then wait until at least the top 2 inches of the potting mix are completely dry before watering again. If you’re ever in doubt about whether it’s been long enough since the last watering, give it another few days – trust us, your Snake Plant can take it. For more information on watering Snake Plants check out Snake Plant Watering 101: When, How, and How Much to Water Your Plant.
Final Thoughts
Root rot is a scary diagnosis, but your Snake Plant is a natural survivor. Even if you have to cut away everything but a few leaf tips, there’s an excellent chance that it will grow into a healthy plant once again. Keep our advice in mind, and remember that we’re rooting for you!*
*Yes, we feel great about that pun, thanks for asking!