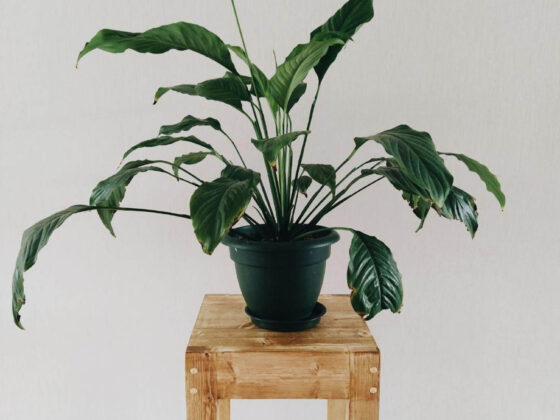
Given enough time, any healthy Spathiphyllum plant will outgrow its pot and it’s important to occasionally move your plant into a larger container. But you don’t want to mess with its roots for no reason. How do you tell when your Peace Lily needs repotting? We’ll outline the telltale indicators that your plant needs more room to grow.
It’s best to move your Peace Lily to a bigger pot every 2-3 years. You may need to repot more often if the plant gets lots of light. When the roots are low on space, they can start poking out of the pot, and the soil may fail to retain water. A badly root bound Peace Lily will become stunted and wilted.
Repotting is a good time to check your Peace Lily’s roots for signs of rot. Sometimes you can even save a dying plant by moving it into a mix with better aeration and drainage. This article will give you a full breakdown of how and when to repot your Peace Lily. Let’s start with the 6 main signs that you should give your plant a new pot:
#1: You Haven’t Repotted in a Few Years
Why wait until your plant is suffering to give it more space? If you leave your Peace Lily in the same pot for too long, it will get root bound. That means the roots wrap tightly around each other, packing together like sardines in a can.
It’s better to anticipate your Peace Lily’s needs and give it more room every 2 or 3 years. Of course, a Spathiphyllum’s growth rate varies depending on how much sun it receives. You might need to repot as often as once a year if your plant is in a very bright location.
Some articles disagree, claiming Peace Lilies “like to be root bound”. They recommend waiting until your plant starts showing signs of distress before relocating it. But this is bad for your Peace Lily’s long-term health. Repeated stress will weaken your plant, limit its growth potential, and make it vulnerable to pests and disease.
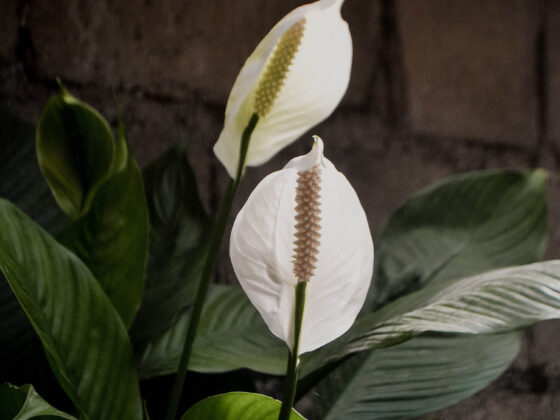
For the record, no plant enjoys being root bound. This is a misunderstanding that comes from two common observations about houseplants. First, a plant that’s a bit too big for its pot is less likely to get root rot. That’s because there’s not much room for the damp soil that shelters harmful microbes. Second, plants may produce flowers when they’re under stress from cramped roots.
There are better ways to get both of these benefits, though. You can prevent root rot with proper watering and a good potting mix. And you can usually get a healthy Spathiphyllum to flower like a champ by providing lots of indirect light. There’s no need to deprive its roots of space.
#2: Your Peace Lily Isn’t Growing
One clue that a Peace Lily is too large for its pot is that it’s not getting any larger. Foliage growth depends on root growth. If a Peace Lily can’t expand in its pot, its development above the soil will also be limited.
A Spathiphyllum in good conditions gets a few inches bigger and sends out a few good-sized new leaves every year. A root bound plant, on the other hand, may seem dormant. Or, if it does produce new leaves, they may be smaller than normal.
Remember that slow growth can also be caused by inadequate sunlight, water, or nutrients. When you notice that your Peace Lily is stunted, ask yourself:
- How long has it been since you repotted it?
- Is the plant getting at least 6 hours of indirect sun per day?
- Are you watering too much or too little?
- Have you given it any fertilizer this growing season?
If you’re confident that your Peace Lily has the resources for growth, but it’s not growing, there’s a good chance it’s root bound.
#3: The Container Isn’t Holding Water
As your Peace Lily’s roots fill up the pot, they crowd out the soil. Rocky or woody bits can remain wedged between the roots, but spongy organic materials get forced out or absorbed. Eventually, there’s almost nothing left in the pot that can soak up water.
This leads to one of the most telling signs of a severely root bound Peace Lily. You’ll pour water into the pot, and it will start trickling out of the bottom almost immediately. There’s no pause as the soil slowly gets saturated – because there’s hardly any soil left.
Once your plant reaches this point, health problems from being root bound aren’t far behind.
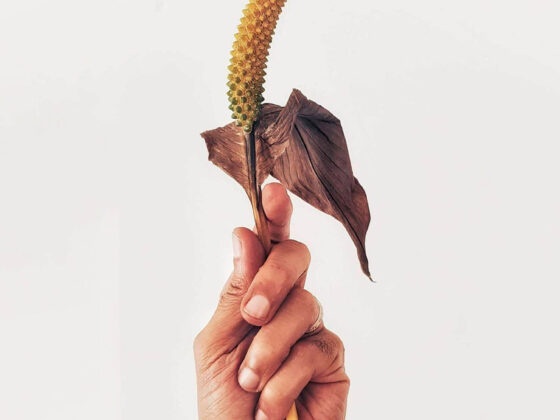
#4: Your Peace Lily’s Leaves Are Dehydrated
When your Peace Lily’s pot is too full of roots to hold water, the results are predictable. The foliage tends to slump dramatically when it’s deprived of water. Many of the leaves will also probably turn brown and crispy, beginning at the tips and edges. Some of them might also grow deformed and ragged as a result of nutrient deprivation.
Even if you water every day, you’ll still probably see some damage. The roots are simply too crowded. They can’t absorb enough water and nutrients to keep all the leaves healthy.
As always, you should consider alternate possibilities. Insufficient watering, sun scorch, and fertilizer burn can cause very similar symptoms. Make sure these issues aren’t in play before you repot your Peace Lily.
#5: The Roots Are Running Wild
When a Peace Lily’s roots have nowhere else to go, they may try for a jailbreak. You might see roots poking up through the surface of the soil, or winding out through the drainage holes.
Keep in mind that the latter sign can also come from bottom watering your Spathiphyllum or leaving the pot sitting on a wet saucer. Roots tend to grow toward water sources. If there’s moisture just outside the pot, your plant may reach through the drainage holes to get to it.
#6: The Soil is Always Soggy
The last few symptoms we mentioned are signs of a root bound Peace Lily. This one points to a different reason for repotting: poor drainage.
Though a Spathiphyllum likes its roots a little damp, it won’t do well in totally waterlogged soil. Your plant is in trouble if the potting mix remains wet for more than 4 or 5 days after watering. That excess water keeps the roots from taking in oxygen. And dank soil nurtures harmful fungi and bacteria. This leads to root rot, which can be fatal for your Peace Lily.
You can reduce this risk by watering only when the upper inch or two of soil dries out. But a dense enough potting mix makes it a lot harder to avoid smothering your Peace Lily’s roots.
We’d advise repotting your plant in a coarse, soilless growing medium, as described below. And if the container doesn’t have drainage holes, you should definitely swap it for one that does.
Should You Divide or Repot Your Overgrown Peace Lily?
When your Peace Lily gets too big, moving it to a larger pot isn’t your only option. You could also split it apart at the roots, creating two or more small plants. This is the simplest and most common way to propagate a Spathiphyllum.
The choice mostly comes down to your personal preference. Repotting is better if you’re interested in growing a big, bushy Peace Lily. If you’d rather keep your plant compact, you can divide it. Then you can sell, trade, give away, or keep the extra plants as you please.
You might also want to propagate your Peace Lily if you’ve had it a long time and it’s not flowering much anymore. Older plants often enter a stage called senescence and stop blooming. Dividing the plant at the roots can restore its youthful enthusiasm. To learn how to divide your Peace Lily read this article about propagating Peace Lilies.
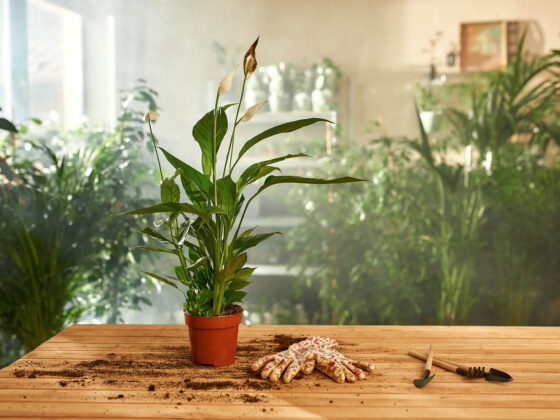
Preparing to Repot Your Peace Lily
Successfully repotting your Peace Lily depends mostly on choosing the right supplies. Here’s what you need:
Soil
This is the most important thing to get right when you’re repotting your Peace Lily. It’s literally and figuratively the foundation of your plant’s growth.
Peace Lily soil should be primarily comprised of large-grained ingredients that don’t decay very fast. These gritty elements create spaces within the mix to help aeration and drainage. Squishy organic matter should make up a smaller but still significant fraction. It retains a little bit of water to keep your Peace Lily’s roots from drying out.
If you’re mixing your own soil, try this blend:
- 3 parts #3 perlite
- 3 parts orchid bark chunks
- 3 parts coconut coir
- 1 part worm castings
Don’t want the hassle of mixing your own soil? We recommend choosing a blend intended for aroids – the plant family to which Spathiphyllum belongs. We like this one, but there are lots of others out there. In a pinch, you could also try a 50-50 mix of succulent soil and African Violet mix.
Pots
Next on the list is the container or containers. If you’re potting up, choose a vessel that’s about 2 inches bigger in diameter than the old one. Don’t increase the size more than that. When you put a Peace Lily in a pot that’s too big for it, it’s much easier to overwater. The extra soil in the container makes it dry out more slowly.
If you’re dividing your Peace Lily, you’ll obviously need a pot for each clone you’re planning to split off. Their sizes will depend on how large the baby plants will be. You can plan ahead by looking for the different clusters of foliage within your Peace Lily. You’ll divide the plant at the junctions between these clumps, which are known as crowns. Decide in advance which crowns you want to break off, then get pots that will fit them.
Make sure all of your containers have drainage holes in the base. The material isn’t as important, but be aware that terra cotta pots dry out faster. The porous clay lets moisture in the soil escape through the walls of the container.
Tools and Materials
Here are a few other supplies you’ll need when repotting a Peace Lily:
- Shears. Keep these on hand in case you need to trim or split the roots.
- Garden knife. If your Peace Lily is extremely cramped, you might want to saw off part of the root ball. The serrated edge of a Hori Hori knife is great for this.
- Disinfectant. Whenever you’re cutting your plant, you should sanitize your knife first. Rubbing alcohol, hydrogen peroxide, or a 10% solution of bleach are good options.
- Gloves. Maybe not strictly necessary, but you’ll probably be glad to have them.
- Old towels, newspapers, etc. You’re going to be moving a lot of soil around. If you’re doing that indoors, you should lay something down to limit the mess!
How to Repot Your Peace Lily
The best time to repot a Spathiphyllum is in the early spring. That gives it a full growing season to settle in and recover from the shock to its roots.
- Water your plant the day before you move it. You want to make sure it has a full tank since its roots won’t be at their best for a while.
- Trim off any leaves or blooms that are already getting yellow, brown, and shriveled from age. They’re not long for this world anyway. Removing them lets your plant redirect its energy toward recovering from the transplant.
- Hold your Peace Lily at the base and tip it out of its pot. Sometimes it helps to loosen up the roots by running your knife around the inner rim. Smacking the bottom of the pot can also do the trick.
- Clear away most of the soil, rinsing the plant if necessary. Look for any roots that are squishy, slimy, black, or brown. If you see any, they’re rotting, and you should cut them off. Disinfect your clippers between cuts.
- If you’re planning to divide your Peace Lily, now’s the time. (If not, skip to Step 6.) Find a place where two crowns branch off from the roots and grip the stems on either side. Slowly tug the two halves apart until they separate. Repeat until you’ve split off as many clones as you want.
- Spread the root mass out a bit with your fingers, working them in gently and firmly. This helps the roots to grow outward instead of cinching tighter.
- If your Peace Lily is seriously pot bound, with multiple long roots encircling the others, you should do a little pruning. Disinfect your shears or your knife first. Then you can snip around the sides, cut off the bottom ¼ of the root ball, or both. This always feels a little wrong, but as long as you leave at least ⅔ of your Peace Lily’s root mass, it will be fine.
- Fill the bottom third of each pot with lightly moistened soil. Place each Peace Lily into its new container. Then cover the roots with potting mix. You can shake or tap the pot to help settle the soil, but don’t pack it tight.
Caring For a Peace Lily After Repotting
No matter how gentle you are, uprooting and replanting a houseplant will stress it out. So if you’re concerned because your Peace Lily is drooping after a repotting, you can relax. It’s normal for the plant to be in rough shape for a little while. As the roots recover from their shock, your Peace Lily should revive.
The best thing you can do for your plant is avoid adding to its worries. That means:
- Be careful about overwatering. Until your Peace Lily’s root system is back to full strength, it can’t absorb as much water. It’s also more susceptible to infection. Together, those factors mean that root rot is an even bigger danger than usual. Always wait until the top 1-2 inches of soil feel dry before watering.
- Don’t use any fertilizer. Your Peace Lily is in no shape to grow. It won’t be able to use any nutrients you add, meaning they’ll just accumulate in the potting mix. This puts it at risk of fertilizer burn.
- Avoid direct sunlight. A robust Spathiphyllum plant can soak up a couple of hours of direct sunlight per day. A freshly repotted one is likely to get burned. Keep your plant out of sunbeams (but give it plenty of indirect light).
- Keep it humid. High humidity is always good for a Peace Lily, but it’s particularly helpful when the plant is repairing its roots. Try to maintain humidity above 60%, supplementing with a humidifier if necessary. Placing a plastic bag or some other clear container over the foliage also helps, just make sure it isn’t directly touching the leaves.
You should keep up these precautions for at least a month, though sometimes it’s necessary to go longer. When your Peace Lily starts pushing out new leaves again, you’ll know it’s gotten over the transplant shock.
Final Thoughts
When your plant is stunted, wilting, and failing to hold water, there’s a good chance it needs more space. But if you repot your Peace Lily every couple of years, you may never see those danger signs! We hope our guide has left you feeling confident about moving your Spathiphyllum into a spacious new home.