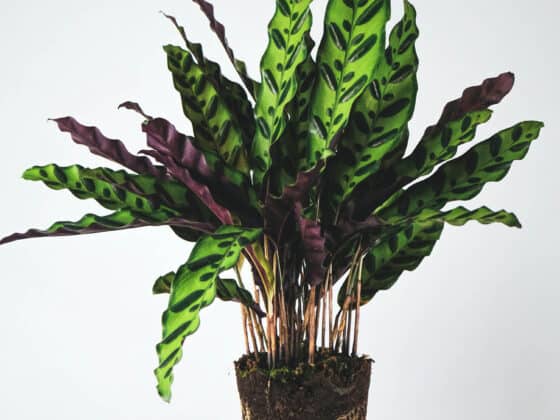
A healthy Calathea’s foliage is an impressive sight to behold, thanks to its eye-popping patterns and contrasting hues of dark green, silvery-white, and maroon. So it’s always discouraging when the effect is spoiled by crispy brown patches creeping over the leaves. What’s making your Calathea’s foliage wither? And how can you fix it?
Calathea leaves get crispy when their cells lose water faster than they can replace it. This can happen because the air around them is too hot or dry, causing rapid evaporation from the leaf pores. It can also occur when they’re not being watered enough, or when some kind of problem in the soil keeps the roots from absorbing moisture fast enough.
You can stop the problem in its tracks by returning your Calathea to the conditions under which these plants thrive. That means humidity above 60%, indirect sunlight, and roots that are slightly damp rather than completely drenched. We’ll go over several issues that can lead to crispy edges in Calatheas and explain how you can correct each one.
Why Do Calathea Leaves Get Crispy?
In the end, every problem that causes your Calathea to turn crispy boils down to a lack of moisture. For whatever reason, the leaf cells don’t have enough water to sustain the basic functions of life, so they shrivel up and die. The result is patches of brittle, papery tissue instead of healthy green foliage.
The issue might not be the leaves themselves, though. Your plant is a whole system, not a series of disconnected parts, so you’ll need to consider every aspect of its environment to discover why it’s in distress.
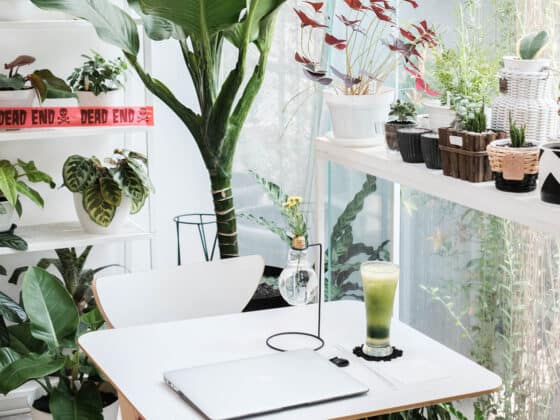
Low Humidity and Crispy Leaves
Calatheas hail from the steamy jungles of the tropics, and it can be a challenge to provide enough humidity to keep them happy. The drier the air, the more quickly it wicks water away from the stomata – the tiny pores that release moisture from a plant’s foliage. And Calathea leaves are pretty thin, so they don’t have much moisture to spare.
When the local humidity drops below 60% or so, the cells in Calathea leaves find it hard to hold onto enough water to remain plump and healthy. They start to dry out and get crispy. The process often begins at the edges, where the leaves are thinnest and therefore most vulnerable.
Fixing Humidity Issues for Calatheas
There are a number of different strategies you can use to enhance the amount of humidity around your Calathea. The simplest option is to keep it in a bathroom or perhaps a kitchen – these tend to be the steamiest rooms in a typical home. Even if you can’t move it there permanently, you can provide a bit of a boost by setting your Calathea in the bathroom for a few hours after every shower you take.
If you have several tropical plants, let them keep each other company. The moisture they release creates a slightly damper microclimate, so they’ll all benefit. Don’t let your plants actually touch because a bit of air circulation is also good for their health, and make sure none of them are infested with mites or other pests before you try this.
You can also place your plant on a low tray or dish filled with pebbles and keep a little water in the base of the dish. It will evaporate slowly, creating a bit of extra humidity around the plant, while the rocks keep your Calathea’s pot from actually sitting in the water (which could cause root rot – more on that later).
Finally, there’s the most dependable tool for keeping your Calathea moisturized: a humidifier. Advanced models can switch between warm and cool mist, giving you some temperature control as well, but even a more affordable humidifier will usually make your plant much perkier.

Sunlight and Crispy Leaves
In their native habitat, Calatheas are fed by sunlight that trickles down through a leafy rainforest canopy. They’re not cut out for sustained, direct sun. Sitting in broad daylight for more than a few hours at a stretch can cause their leaves to crisp up in a condition called sun scorch.
This works a lot like the humidity problems mentioned above; hot, bright sunlight makes Calatheas release water from their stomata more rapidly, causing dehydration. You can often tell that your plant is sunburned because the crunchy patches are concentrated on the side of the plant that’s getting the most light. Sun exposure may also cause your Calathea’s foliage to become faded and pale.
Fixing Lighting Problems in Calatheas
Rescuing your Calathea from sun scorch is simple: move it out of the light. Don’t place it in a totally dim room, but do set it at least 4-6 inches back from any windows for a few weeks. You could also hang some wispy curtains to reduce the intensity of the light entering the room.
After your Calathea begins producing healthy new foliage, you can start to allow it some direct sun – but no more than 2-3 hours a day, and never during the hot period between midafternoon and early evening. An east-facing window is an excellent location for a Calathea, because it will only admit direct sunlight during the cool morning hours.
Temperature and Crispy Leaves
As you might have gathered from the section on sunlight, excessive heat can also contribute to scorched edges on your Calathea’s leaves. When the thermometer rises above 85 degrees, your plant may perspire too fast to replace the moisture it’s losing. This problem goes hand in hand with sun scorch, and both issues feed into each other – high temperatures make your Calathea more vulnerable to sunburn.
Fixing Your Calathea’s Temperature Problems
This is another snag that can be resolved by simply taking the plant out of the danger zone. Find a spot in your home that’s not so hot and move your Calathea there.
Check for heat sources that may not have occurred to you when you were choosing your Calathea’s location the first time. If you bought your plant during the summertime, you might not have thought twice about setting it near a radiator or a heating vent, but once the heat kicks on in the winter, it can quickly fry the leaves.
Water and Crispy Leaves
We’ve examined some of the problems that can affect a Calathea’s leaves directly – now it’s time to look a little lower down. Your plant could be turning brown and crispy because its roots aren’t absorbing enough water.
The simplest explanation? You’re not watering it enough. Calatheas do best when they can sip moisture steadily from the soil. If the potting mix around the roots dries out completely, they start to get cranky, and this often shows itself as dry and crumbly leaves.
Be careful, though – soil that’s too wet can be just as bad. Roots need oxygen as well as water to do their thing, and when their environment is entirely waterlogged, they lose access to the tiny pockets of air that let them breathe.
Root dysfunction often turns the tips of the leaves crispy before anything else; they’re the furthest part of the plant from the roots, and they tend to run out of water first. Other symptoms include drooping, wilting, and yellowing – the foliage slowly turning yellow from the bottom up is particularly suggestive of overwatering.
When overwatering continues for long enough, it can also lead to root rot, meaning that fungi or bacteria multiply rapidly in the soil and invade your Calathea’s roots. Nasty smells coming from the potting mix and stems turning dark and squishy are urgent indicators of root rot.
Fixing Watering Problems in Calatheas
Both underwatering and overwatering result from the same mistake: lack of attention to the condition of the soil. If you keep a close eye on your Calathea’s potting mix, you should be able to water it precisely when it needs water – no more and no less.
The simplest method is to test the top inch or two of the soil with your finger every 3-5 days. If it feels dry, water your Calathea. If it’s still damp, wait another day or two and check again.
For more precision, you can sink a thin wooden skewer or chopstick all the way down to the roots. Leave it there for a few minutes before pulling it out and checking the tip. If it’s soaked through, it’s not yet time to water; if it’s only faintly damp, you can give your plant a drink. This is especially handy with deeper pots, where the large size makes it harder to gauge conditions in the base based on how dry the upper layers are.
When you’re watering your Calathea, let it drink deeply. Soak the soil all around the base of the plant, and keep going until water starts draining out of the pot. That’s your signal that it’s permeated all the way down to the roots.
Treating Root Rot in Your Calathea
If you discover that you’ve been overwatering your plant, you should check immediately for signs of root rot. Gently slide it out of its pot, gripping the stems around the base, and look for any roots that have turned black, gray, soft, or slimy.
Prune away all roots that show any signs of infection. Disinfect your pruning scissors between cuts to avoid spreading bacteria to any healthy parts of the root system. You can use bleach, diluting it to 10% strength first, or ordinary rubbing alcohol.
If you have to remove more than ⅓ of the root mass, you should also trim away the least healthy third of the foliage – this will help your Calathea conserve energy while it rebuilds its roots.
Root rot is no joke, and even with these drastic measures, your plant may not survive its ordeal. Take a look at our post on handling root rot in Calatheas to learn how you can give your plant the best possible shot at recovery.
Water Quality and Crispy Leaves
With Calatheas, it’s not enough to provide the right amount of water – it also needs to be the right kind. These plants are very fussy about the mineral content of their water. Since tap water in many regions has fairly high levels of elements like calcium and magnesium, you can sometimes turn your Calathea crispy just by watering it from the faucet.
Some of the dissolved salts in each watering leach into the soil instead of being absorbed by the plant or draining out of the pot. As they build up, their concentration can become high enough to affect the root system’s ability to soak up moisture. The result is the brown, brittle leaf tips and edges that frustrate so many Calathea owners.
Fixing Water Quality Issues for Calatheas
Try laying off the tap water and giving your Calathea only water that’s been distilled, filtered, or purified by reverse osmosis. This might be enough to stop the crunchy spots from spreading.
It’s also sometimes helpful to do a soil flush. This basically means drenching your Calathea’s pot so thoroughly that the excess water dissolves the minerals in the potting mix and drains them away. You’ll need to use about 3-4 times the total volume of your plant’s container, pouring it slowly and steadily into the pot and letting it wash out the drainage holes.
Fertilizer and Crispy Leaves
The risk of salty soil is even greater if you’re giving your Calathea regular doses of fertilizer. We’re not saying you should never fertilize – every houseplant needs some nutritional support sooner or later – but it’s best to be sparing. Just as you can throw off your system by taking too many vitamins, you can mess with your plant by providing more nutrients than it needs.
Fertilizer burn produces very similar symptoms to those you get from underwatering or using the wrong kind of water. The foliage runs out of moisture and gets crispy, wilted, and brown, usually starting at the edges and tips of the leaves.
Fixing Fertilizer Problems in Calatheas
The first thing you can do to reduce your Calathea’s nutrient overload is to perform a soil flush, just as we described in the Water Quality section. In fact, if you’re supplementing your Calathea with liquid fertilizer, it’s a good idea to do this every month or two as a preventative measure.
Moving forward, you should try stepping down the amount of fertilizer you’re providing. Reduce it to ¼ of the current dose and see if the problem goes away. If your Calathea’s leaves no longer look torched, and the plant doesn’t seem to be suffering from malnutrition, you were probably using too much fertilizer.
It’s also best to avoid adding fertilizer any time your Calathea isn’t actively growing. In temperate climates, that means the fall and winter, when the plant doesn’t have enough light, warmth, and humidity to get bigger. Any fertilizer your plant can’t use to make new leaves and stems will stay in the soil and pose a risk to the roots.
Should You Trim Crispy Calathea Leaves?
Correcting whatever problem is behind your Calathea’s crumpling leaves will prevent the symptoms from worsening. It won’t fix the brown patches that have already formed on the leaves, though. Sadly, those spots are dead, and they won’t be coming back. So should you get rid of them?
It’s a good idea to prune away any leaves that have completely withered. They’re just dead weight at this point, draining your Calathea’s energy reserves without contributing to photosynthesis. As always, disinfect your cutting tools before you start snipping.
What about leaves that only have some crusty edges or brown spots? Well, the parts of the leaf that are still healthy will continue to do their job and supply your plant with energy, so it’s best to leave them alone. But you can trim off the dried-out portions if they’re spoiling the plant’s appearance. You’ll just have to decide whether you think the leaf will look better with a haircut.
Soil Quality and Leaf Health
You can do a lot to reduce the risk of crispy leaves by getting your Calathea’s growing medium right. An aerated soil with good drainage reduces the risk of overwatering, since it’s much less likely to stay soggy over long stretches. It also makes dissolved salts more likely to wash out of the pot instead of accumulating and interfering with root function.
Try a blend of 40% coarse perlite, 40% cocopeat, and 20% African Violet potting soil. This should create a loose mix that still holds enough water to keep your Calathea’s roots from drying out completely. Our article on pots and soils for Calatheas has more information.