Multiplying your houseplants — AKA propagation — can be a fun and illuminating hobby no matter what you’re growing. With Bromeliads, though, it’s practically a necessity, unless you want to keep buying new plants over and over. These tropical beauties flower just once in their lives and then die. If you want to keep your collection going, it’s crucial to know how to propagate your Bromeliad.
There are two methods you can use to propagate your Bromeliad. The most common way is to separate and repot the clones or “pups” that grow at the edges of an aging plant. If you have two or more Bromeliads, you can also cross-pollinate them and raise new plants from seed.
Both of these propagation methods have pros and cons. Propagating pups is much easier and faster, but it may not yield as many plants. Growing Bromeliads from seed allows you to hybridize different varieties to create new and exciting combinations, but there’s no guarantee that you’ll like the results. We’ll discuss both of these options in detail so that you can choose for yourself how to propagate your Bromeliad.
Sexual vs. Vegetative Bromeliad Propagation
One of the fascinating things about plants is that almost all of them can multiply in two different ways. Like humans, they can reproduce via sexual reproduction, though in plants, this involves pollen and seeds rather than Netflix and chill. However, they can also branch off to create copies of themselves — copies that can survive and continue growing even if they’re divided from the main plant. This second strategy is known as vegetative or asexual reproduction.
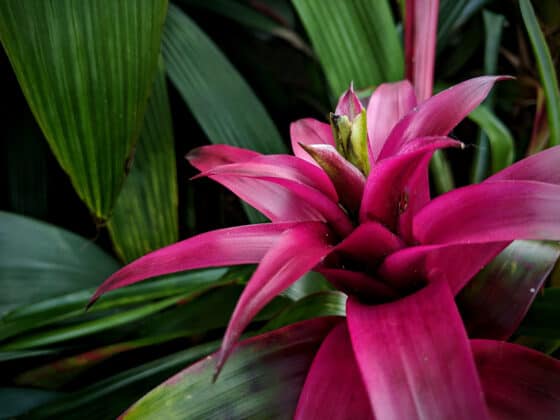
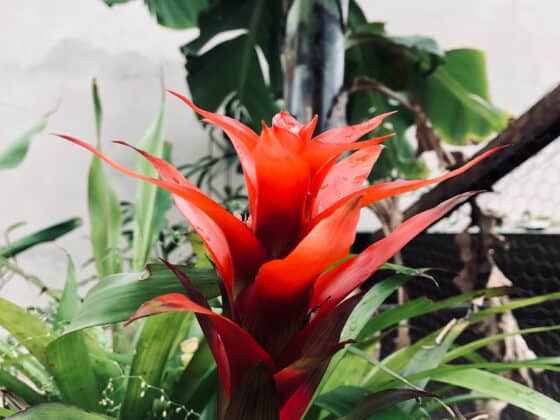
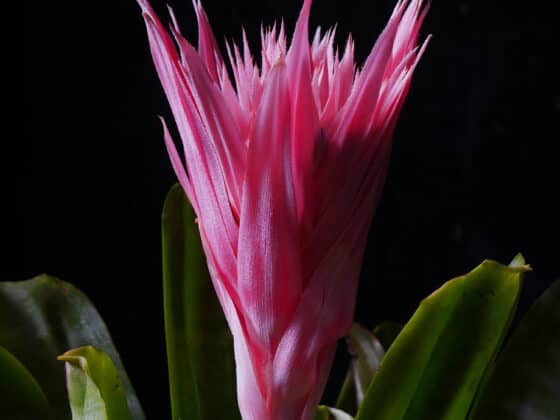
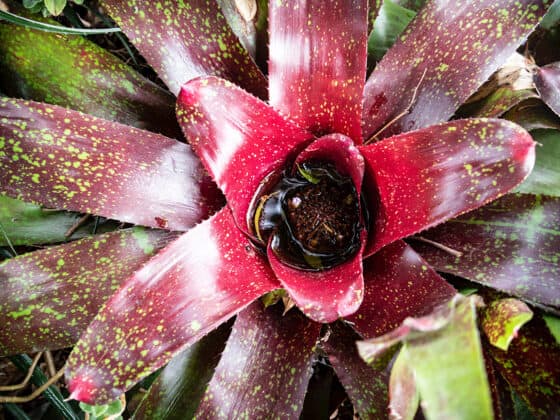
Bromeliads can employ both of these methods. They produce clusters of flowers, often extravagantly beautiful ones, that can be pollinated and bear seeds. In addition, they sprout small offsets or “pups” that can grow into full-sized Bromeliads in time.
But which method should you use to propagate your Bromeliad? The answer will depend on your priorities.
Propagate Pups to Copy Your Bromeliad
You can think of vegetative propagation as the safe, reliable option. If it were a car, it would be a minivan; in a romantic comedy, it would be the clean-cut boy next door.
Compared to producing flowers and seeds, generating pups costs your Bromeliad very little energy. It also reproduces the plant’s genes more or less perfectly. By the time a pup becomes a full-grown Bromeliad, it will look very much like its parent plant. The color, shape, and patterning of its foliage will be the same, and it will produce the same kinds of flowers.
So if your main goal is to keep your Bromeliad going after it’s flowered and exhausted its growth potential, raising pups is the way to go. You’ll technically have a new plant, but after a year or two, you’ll hardly be able to tell the difference.
The other advantage of propagating Bromeliads by division is that it’s a lot simpler. Growing these plants from seed involves many more steps, not to mention plenty of waiting around for flowers to bloom and seeds to ripen.
Pollinate Your Bromeliad to Grow Something New
In contrast to the safety and predictability of vegetative propagation, sexual reproduction is exciting and risky. If it were a car, it would be a Lamborghini; in a romantic comedy, it would be the dangerous bad boy with the smoldering eyes.
When you propagate your Bromeliad from seed, you don’t know what you’re going to get. Traits from the two parents — and their ancestors — will be combined at random, often creating offspring that look very different from your existing plants.
Sometimes, this can result in startlingly beautiful creations. Many of the most highly prized Bromeliad varieties are the result of this kind of hybridization. It’s also perfectly possible to end up with unattractive “duds”, of course. You should only try propagating Bromeliads from seed if you’re willing to roll those dice.
Another advantage of seed propagation: it’s cool! There’s something fascinating about tending a plant through its entire cycle of flowering, fruiting, and germination.
Yield size is another benefit of sexual reproduction. A single Bromeliad might only grow two or three pups, but it can generate hundreds of viable seeds. While there’s no guarantee you’ll be able to germinate them all successfully, you should be able to get a significantly larger crop than you would from vegetative propagation.
How to Propagate Bromeliad Pups
You should see pups forming once your Bromeliad has produced a large, healthy flower stalk. They can grow at other times, but this is rare.
Look for the pups at the outer edges of the rosette (the plant’s spiraling ring of foliage). These tufts of foliage are smaller and narrower than the main plant, but they’re otherwise identical. You can divide your Bromeliad once the pups are at least ⅓ the size of the parent plant. Or you can wait until they’re half-size or bigger to give them an even better chance to survive and thrive.
When you’ve decided that the pups are big enough, get your pots and growing medium ready. Containers with a 4-6 inch diameter are usually big enough for Bromeliad pups. Make sure they have drainage holes in the bottom.
Fill them with a loose, airy, soilless potting mix — we like to recommend ⅓ perlite, ⅓ coconut coir, and ⅓ orchid bark. Moisten the potting mix lightly before putting it into the pots.
Now uproot your Bromeliad, slice off the pups with a disinfected knife, and move them into their new pots. Bury only the roots and the stubby stem, with the leaves aboveground. You may have to surround the pups with small stakes to prop them up since Bromeliads tend to be pretty top-heavy.
After transplanting, put your plants in a warm location with plenty of indirect sunlight. Keep the relative humidity around 60-70% if possible, but don’t sweat it too much. As long as it’s above 50%, your Bromeliad pups should be fine. Once they start producing new leaves, you can feel pretty confident that they’ve taken root.
[Want more detailed instructions on what we’ve outlined above? We have a whole article on how to propagate your Bromeliad from pups!]Can You Propagate Your Bromeliad Pups in Water?
When dividing and propagating houseplants, many indoor gardeners like to pop their cuttings in water to let them grow roots. That way, the plant can start its growth in a high-humidity, mostly microbe-free environment with a consistent moisture level. Unfortunately, this rarely works out well for Bromeliads.
The problem is that these plants typically have very shallow root systems and virtually no stems. New leaves emerge from the base of the plant instead of branching off from a longer stalk. There’s no way to grow Bromeliads in a jar of water without soaking the leaves and risking rot, unless you can rig up some kind of a suspension system to keep them out of harm’s way. It’s much simpler and less risky to grow your pups in potting mix.
You could also go for a middle ground: propagate your Bromeliad in a semi-hydroponic medium. To do this, place the plant in a jar or vase filled with a porous substrate like perlite, pumice, or LECA. Then, fill the bottom third of the vessel with water, letting the substrate wick moisture up to the plant. See this article for more details.
Can You Propagate a Bromeliad From Leaf Cuttings?
While splitting off pups is a very effective way to propagate your Bromeliad, slicing off and planting individual leaves is not. This trick can work with some plants, especially succulents, but not with members of the Bromeliaceae family.
The reason has to do with the location of the apical meristem — the cluster of plant “stem cells” that produce new leaves. In Bromeliads, this structure is at the very base of the central spray of foliage. If you slice off an individual leaf, you’re separating it from the meristem. It might be able to grow roots in moist soil, but it won’t have the cells needed to create new leaves, blooms, or pups.
How to Propagate Your Bromeliad From Seeds
Reproducing your Bromeliads from seed usually requires more than one plant. Only around 5% of all species in this family are capable of self-fertilization. The process is easiest if your plants are in bloom at roughly the same time, but if necessary, Bromeliad pollen can be stored in the freezer.
You can often induce flowering by exposing your plant to ethylene gas from a ripe fruit such as an apple, peach, or kiwi. Simply seal the fruit inside a transparent plastic bag along with your Bromeliad for 10-14 days. Take the bag off and wait two to four months for your plant to bloom. If you perform this procedure with a pair of Bromeliads at the same time, they should flower more or less in unison.
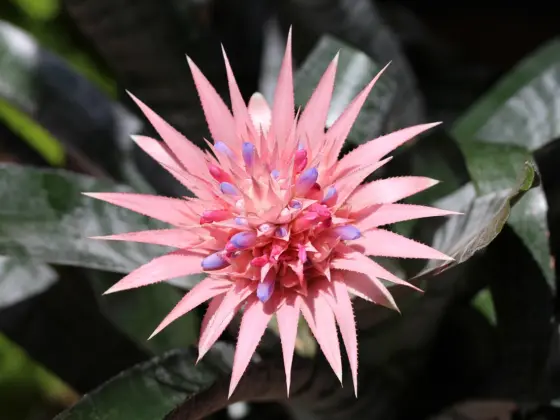
[Note that this only works with mature Bromeliads. Don’t bother trying it with newly propagated pups.]Each plant will generally produce a single inflorescence — the “bloom” of the Bromeliad. This large, complex structure contains many flower buds sheltered by specialized and often vividly colored leaves called bracts.
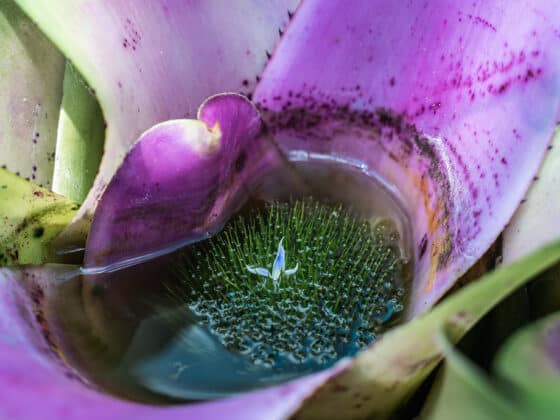
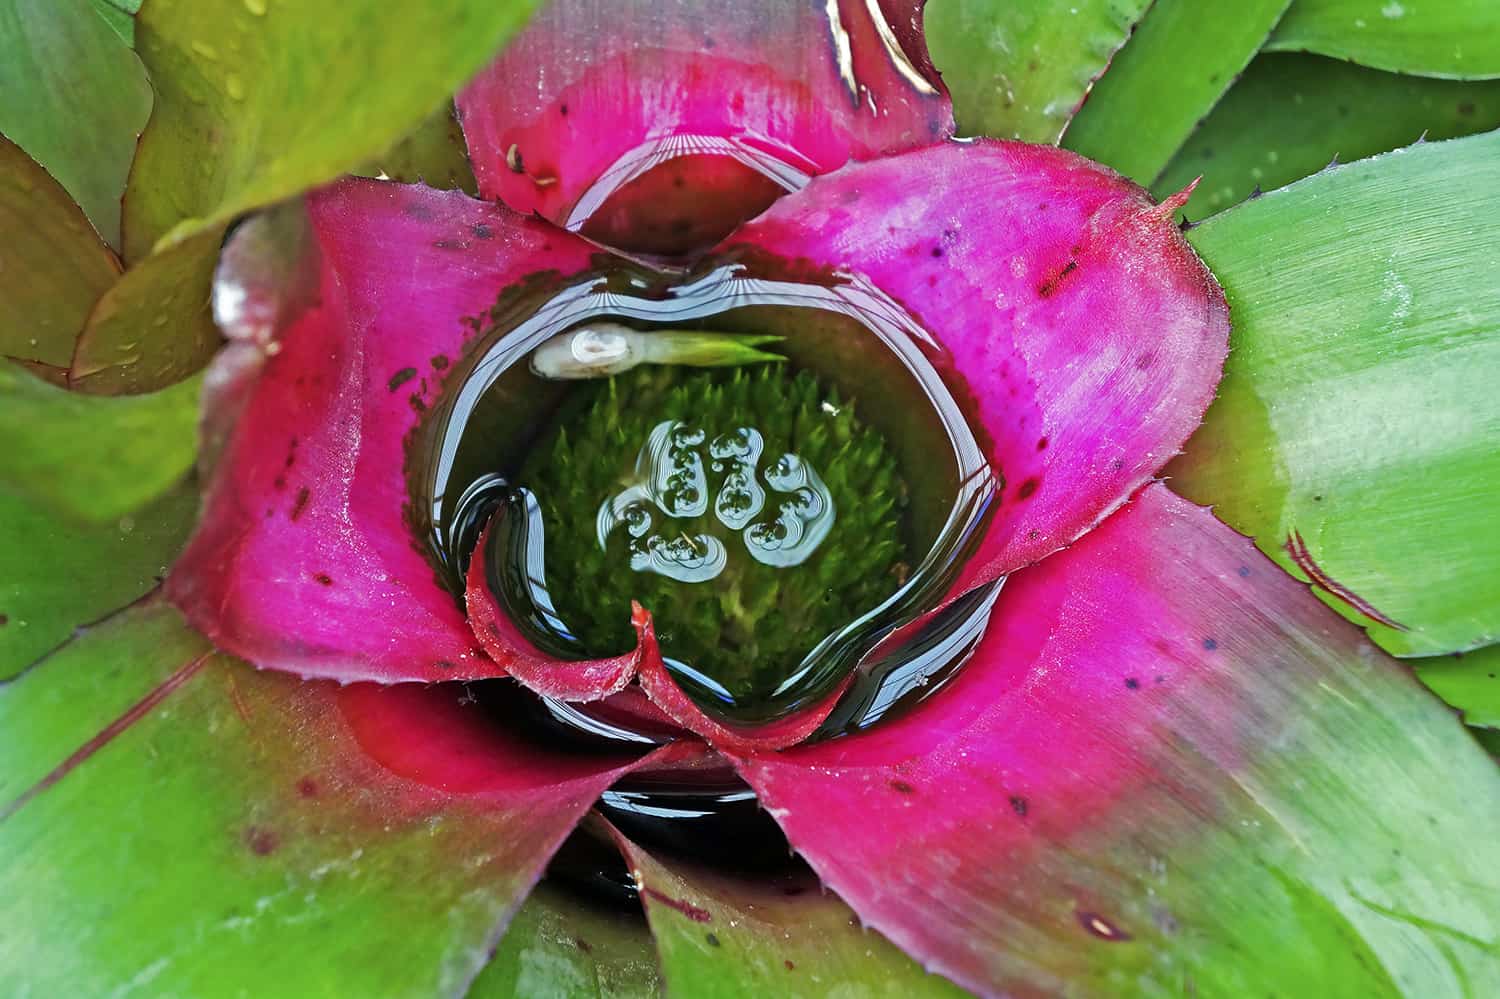
In most varieties, the inflorescence will sprout up on a tall stalk rising from the center of the plant. However, some types of Bromeliads, like Neoregelias, keep their blooms down inside the “tanks” formed by their sloping leaves. If you water your Bromeliad by keeping the tank full, you should empty it a day or two before pollination.
Pollinating Your Bromeliad
The flowers of a Bromeliad won’t open all at once, and different species may unfurl at different times. Each blossom only persists for only a few hours, so you’ll need to act quickly. Observe your Bromeliad carefully to figure out when the florets open. This may require some late nights or early mornings — many of these species tend to open their flowers at night.
Look for the tiny blossoms unfurling from the gaps between the bracts — those are the flowers. They may be shaped like trumpets, butterflies, tulips, or simple tubes. Don’t be surprised if they’re less colorful than the vibrant bracts around them.
You might need a magnifying glass to get a clear look at the pollen-bearing stamens on Bromeliad florets. They look like slender threads tipped with yellow or white. There will generally be six stamens surrounding a larger central stalk — the stigma.
To pollinate your Bromeliad, simply transfer pollen from the stamen of one plant to the stigma of another. A stigma that’s ready to be fertilized will usually look moist and shiny. It’s often helpful to clip off the stamens of the receptive plant beforehand, to avoid contamination.
You have a few different options for pollinating your Bromeliad:
- Pick up and deposit pollen using an old paintbrush.
- Clip off the entire stamen with disinfected scissors, using tweezers to rub it against a stigma.
- Pluck off one entire flower and brush it against another — much easier, but less precise.
When you’re making crosses between species, labeling is your friend. Consider making some small paper tags to loop around the flower spike you’ve pollinated. This will make it a lot easier to remember what kind of hybrid you’re creating.
Note: Saving Bromeliad Pollen
When your plants aren’t blooming or opening their flowers at the same time, you might need to store some pollen for later. Cut off a flower or stamen and shake the pollen into a paper envelope, resealable plastic bag, or small jar. You may want to add some silica gel desiccant crystals to keep it dry.
Until you’re ready to use the pollen, you can store it in the freezer. Just try not to let it sit for too long. Although a fraction of what you’ve harvested may persist for a year or more, successful fertilization rates tend to drop off after 60-90 days in storage.
Collecting Seeds From Your Bromeliad
Assuming that your pollination procedure was successful, your Bromeliad should start forming seeds. Instead of withering away as usual, the flower stalk will stick around. The fertilized flower buds will begin to swell up at the base, forming small round or oval fruits with pointed ends. Many sources call these “berries”, and they do contain a pulpy juice, but in some species, they look more like seed pods.
It will take a few months for the fruits to ripen. They may vary in color between Bromeliad species — green, brown, red, white, and purple are all possible options. In many varieties, the berries are creamy and pale at the base but colorful at the tip.
You’ll know they’re ready for harvesting when you can pluck them off the plant with little resistance. Each fruit can contain dozens of Bromeliad seeds.
Boil some water, pour it into a glass jar, and let it cool until it’s only mildly warm. Mix in a drop of dish soap. Then, crack the berries open and squeeze the seeds into the water. Swirl them around to wash off the gooey gel, reducing the risk of fungal infections that could kill the seedlings.
Let the seeds soak for 24 hours. Then, strain them out of the water using cheesecloth or very fine mesh and place them on a paper towel to dry.
Germinating Bromeliad Seeds
Some growers like to sprout their Bromeliad seeds on a damp paper towel, sealed in a plastic bag. Others prefer to sow them directly onto potting mix. In either case, you should place the seeds directly onto the surface of your chosen medium — don’t cover them up.
You can use just about any sterile and moisture-retentive seed starting mix to start Bromeliad seedlings. A 50/50 mix of vermiculite and sphagnum peat moss should work well. The best way to sterilize the ingredients is to boil them, strain them, and then place them into a sealed container to cool off.
Bromeliad seeds will need warmth and light to sprout. Maintain an ambient temperature of 75-80℉, using an electric heating pad if necessary. A clear plastic tub with a locking lid makes a great container for germinating large batches of seeds. The sealed environment should keep out fungi and bacteria during the vulnerable germination phase. To allow ventilation while maintaining sterility, drill a hole in the lid and plug it with a wad of cotton.
Make sure your seedlings get plenty of light — 12 hours per day if possible. Direct sunlight may overheat them, though. You can hang some filmy curtains to diffuse the light or use grow lamps to provide gentler illumination.
If you see any fungal growth while your seedlings are germinating, move the container into direct sunlight and take the lid off. After about an hour, the medium should have dried up enough to kill off the fungus while leaving the seeds intact. You can then move your seeds back to their former spot.
Raising Bromeliads From Seedlings
After a few days, your Bromeliads seeds should begin to sprout tiny green leaves. Keep them in the container for now, but once they have three to four leaves, start removing the lid for an hour or so each day. Increase their exposure a little bit every few days until they’re comfortable in the open air — this process can take several months. You can also start introducing direct sunlight at a similar gradual pace.
After three to five months, your baby Bromeliads should be strong enough to pot up. You don’t have to do this all at once — start with a few of the biggest, healthiest seedlings. Pry them gently out of the germination mix with a toothpick and move them into small two to three inch pots.
You’ll want to use a much less moisture-retentive potting mix at this stage, like the one we recommended above for repotting pups. Whatever blend you use should be at least 50% large, chunky ingredients by volume to allow for drainage.
Always use pots with holes in the base! Overwatering is a notorious killer of Bromeliads.
Patience is a must if you plan to propagate your Bromeliad from seeds. It will often take at least three years before these slow-growing plants reach maturity and begin to flower. Luckily, they have plenty of beauty to offer before they start sending out the gorgeous blooms that have made them famous.
Final Thoughts
Knowing how to propagate your Bromeliads is an essential skill for those who want to grow them over the long term. Luckily, dividing and repotting pups is quite easy once you know what needs to be done. Growing Bromeliads from seed is more complicated, but it can be an extremely fun project for those who have mastered the basics. Between these two methods, you should be able to maintain and expand your trove of Bromeliads for years to come.