Like many beloved houseplants, including Snake Plants and African Violets, Bromeliads can reproduce by sprouting small offsets. If these growths are separated from the main plant, they can grow into fully formed adults. As long as you understand your plant’s life cycle and growing needs, this behavior offers an easy way to multiply your plants. Here’s our comprehensive guide to propagating Bromeliad pups.
Bromeliad pups can survive independently once they’re ⅓ to ½ the size of their parents. Uproot the plant and slice the clone away with a disinfected knife, then replant it in a moist growing medium. Propagating Bromeliad pups works best in a coarse, fast-draining substrate.
You have quite a few options when it comes to both separating and transplanting your Bromeliad clones. Should you slice them off early or let them grow large? Does potting mix or LECA work better? What kind of pots do Bromeliad pups like? We’ll explain how to think through all of these questions below.
What Are Bromeliad Pups?
When you begin researching Bromeliad care, it’s impossible not to notice one word that comes up again and again: “pups”. What exactly are Bromeliad pups, how do they form, and what can you do with them?
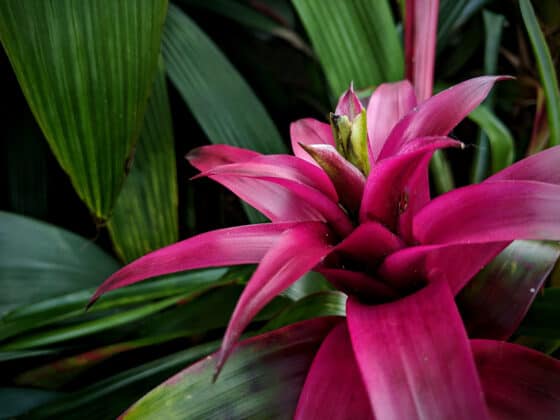
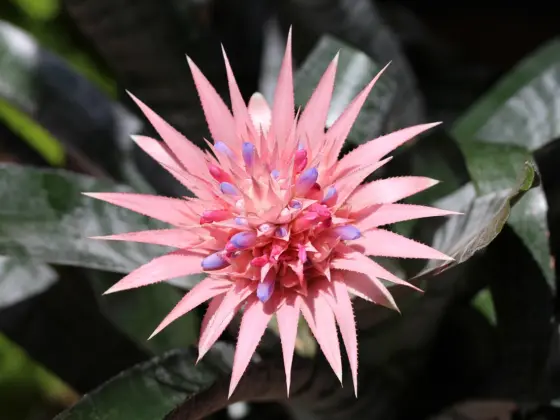
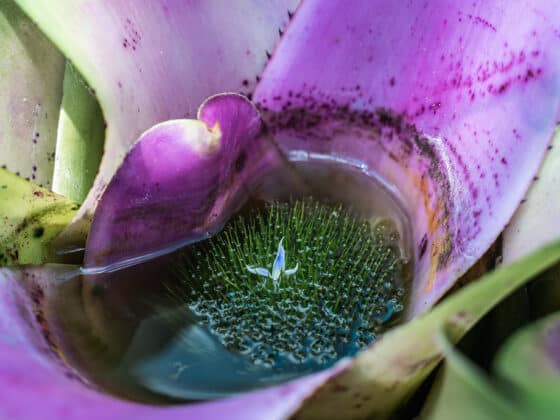
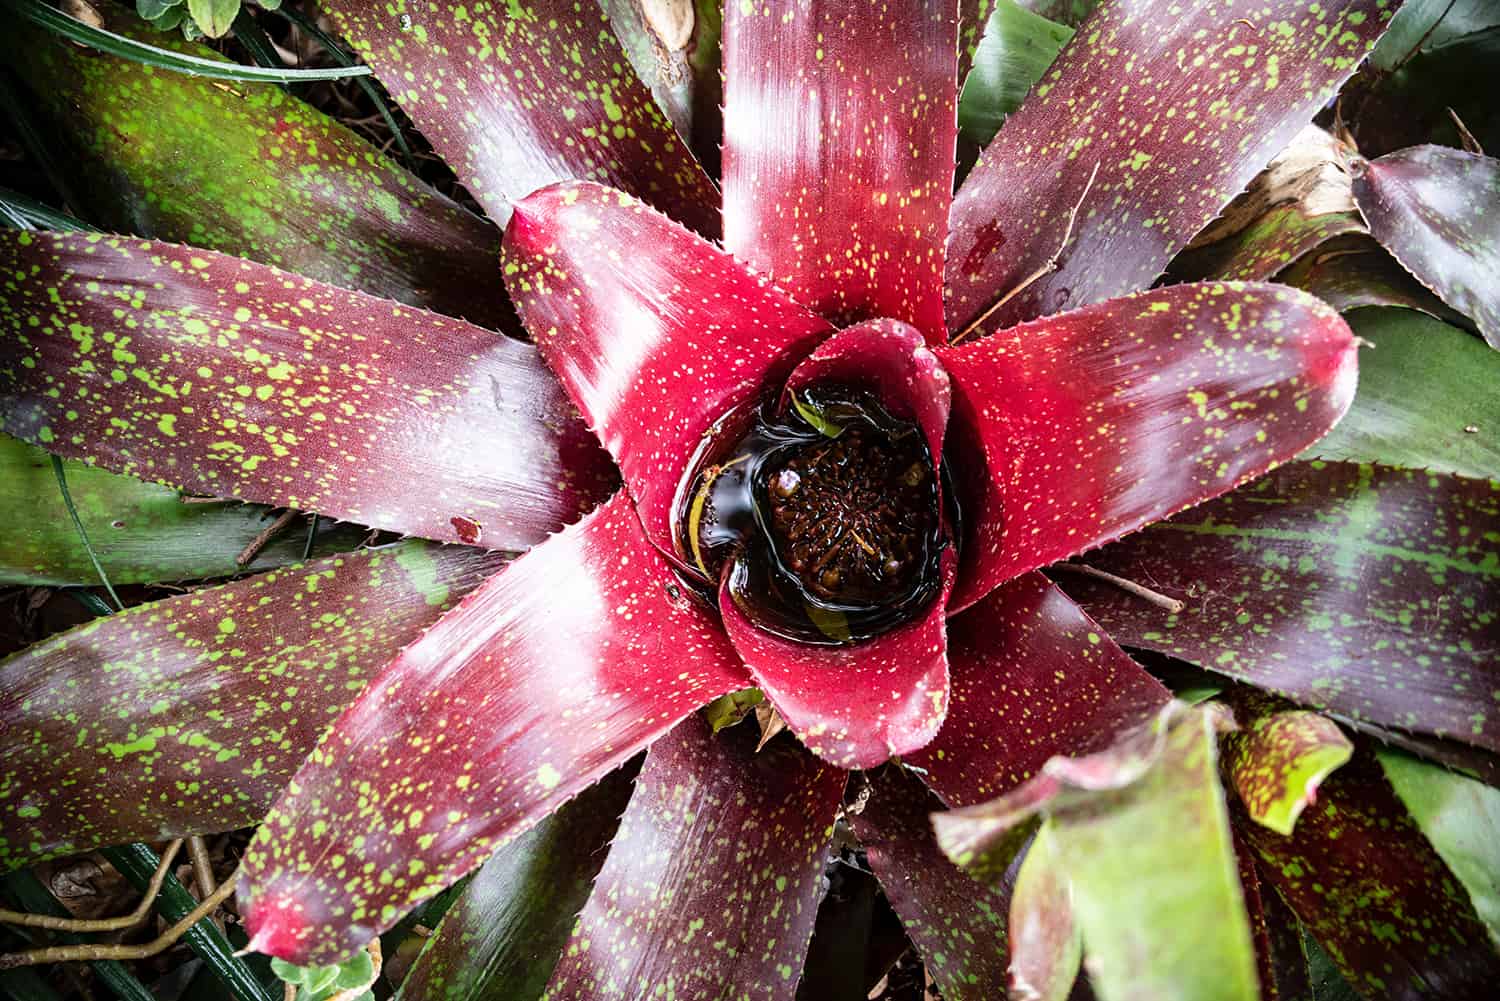
To understand pups, you need to know a bit about the structure of Bromeliads. While many other plants grow long stems with multiple foliage-bearing branches, most Bromeliads only have a single “crown” or “rosette” of foliage that grows directly from the shallow root mass. The leaves of this rosette emerge from the center in a spiral pattern. They’re usually long and relatively narrow. In many species, they slope down sharply toward the center to form a funnel at the middle, often called an “urn”, “tank”, or “vase”.
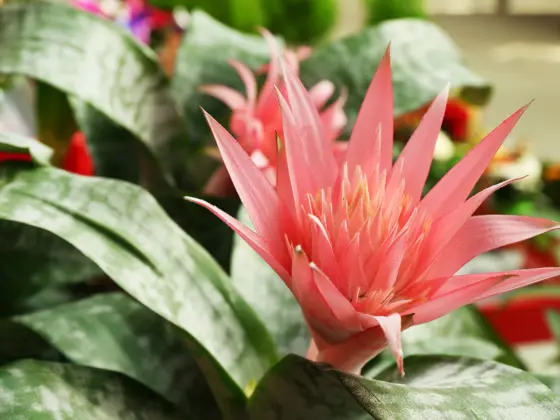
A Bromeliad pup is a new tuft of foliage that forms at the edge of the central rosette. It might also be called an offset. Each one can grow into a full-sized crown capable of surviving independently — in fact, that’s what it’s for. Pups are examples of vegetative propagation, an alternative to sexual reproduction through flowering.
In vegetative propagation, the offspring formed are genetically identical to the parent plant. In other words, Bromeliad pups are clones. Sexual reproduction through flowering and cross-pollinating with other Bromeliads offers more opportunities to evolve and adapt by reshuffling genes. However, it also requires a much greater investment of energy and nutrients.
Many plants, Bromeliads included, hedge their bets by using both methods of reproduction. When resources allow, they’ll flower and create seeds. But they’ll also spread by pupping to increase their chances of surviving droughts, diseases, and dangers of all kinds.
When and How Do Bromeliad Pups Form?
There’s a good chance that Bromeliad may already be forming offsets when you encounter it in the garden store. These plants are often sold in full bloom, and their pups usually emerge at the same time as their flowers.
Those pups are getting ready to carry on the plant’s legacy after it’s gone. The vast majority of Bromeliads have a fairly short life cycle: they bloom once, release any resulting seeds, then die. That’s why propagating Bromeliad pups is such a common practice. It’s often the only way to grow these plants without buying new ones over and over again.
It can take a year or so for the parent plant to wither away completely. During that time, at least a few offsets will generally sprout and grow big enough to survive on their own.
Identifying developing Bromeliad pups is usually very easy. New leaves normally appear in the center of the crown, but the clones emerge at the outer edges. They may be nestled directly under the older foliage or sprouting from the soil very close by. Each one begins as a tiny cluster of leaves, but as it grows, it will resemble a narrower, shorter version of the original plant.
Within a few months to a year, a Bromeliad offset can grow to half the size of the original plant or more. In nature, the pups remain more or less in place as the first plant dries up and dies, creating a rough circle of new leaf rosettes around the gap where their parent once stood. But most growers make a habit of dividing and propagating Bromeliad pups into new pots, giving them room to grow.
When to Propagate Bromeliad Pups
Deciding when to split off and replant Bromeliad pups involves a bit of a tradeoff. They’ll grow faster while attached to the main plant — repotting them will slow them down, at least temporarily. And the bigger they get, the better their odds of surviving the transition.
On the other hand, cutting the pups off sooner means a higher chance that the parent plant will produce more before it dies. Waiting longer might mean reducing your overall yield.
You’ll have to decide where your priorities lie. If you only want one or two new Bromeliads, you can wait until they’re good and ready before cutting the pups off. If you want lots of clones to grow, sell, or give away, you might want to divide them while they’re still relatively small. This might also be a good approach if you want to experiment with a few different potting mixes or containers.
Bromeliad pups will usually be well-equipped to survive the repotting process by the time they’re at least ⅓ the size of the main plant. Splitting them off sooner is a bit riskier, while waiting until they’re ½-size or more gives you more certainty that they’ll be healthy.
By that point, the pups will often have roots of their own. Don’t be too concerned if they don’t, though. Most Bromeliads rely less on their roots for survival than other plants do. They can often take in water and nutrients through their leaves, particularly the epiphytic (tree-dwelling) species.
Supplies for Propagating Bromeliad Pups
Once your Bromeliad pups are big enough to cut off and repot, you’ll need:
- A sharp knife.
- Something to disinfect the blade. We like rubbing alcohol, but you can also use hydrogen peroxide or a blend of one part bleach and nine parts water.
- A container or mount for your baby Bromeliads. See below for more on this.
- Potting mix (if you’re using a pot). Once again, we offer some detailed suggestions below.
It might also be wise to use some gloves, depending on what kind of Bromeliad you have. Some of them have rigid, spiny leaves that could hurt your hands if you’re not careful.
A bit of rooting hormone powder might help as well. Different growers report different levels of success with this method, though, and it’s certainly not necessary. Some fungicide could also improve the plant’s chances of success, but never use a fungicide containing copper. It’s poisonous to Bromeliads.
How to Divide Your Plant
Wipe down your cutting tool with a clean cloth doused in whatever sanitizer you settled on. Then, take your Bromeliad out of its pot. It’s best to do this gently, lifting from the base — these plants often don’t have many roots to spare, so you may not want to risk breaking a lot of them. You might have to grip the plant near the bottom of the foliage and tilt the pot to the side, maybe even giving it a few smacks on the base to loosen things up.
Find the point where the pup connects to the rest of the Bromeliad. This shouldn’t be difficult — because pups emerge from the sides, there’s usually a clear “seam” between both sets of leaves. Work your blade into this gap and slice through the plant’s tissue, cutting all the way down to the bottom of the root mass. You may have to saw at it a bit rather than cutting it in one smooth slice.
You should err on the side of cutting into the original Bromeliad rather than into the pup. The bigger plant is better able to withstand damage, and if it’s already flowered, it’s on borrowed time anyway.
More mass at the base also makes it easier to keep the pup upright in its pot. It’s even better if you can leave some of the parent plant’s root mass connected to the clone. This will both help anchor the developing Bromeliad and enable it to absorb some moisture and nutrients.
Repeat the process above until you’ve pared away all of the developing pups. Once you’re done, you can return the original Bromeliad to its pot to see if it continues producing offspring.
Transplanting Your Bromeliad Pups
You’ll need to decide ahead of time what kind of substrate to use when propagating Bromeliad pups. There are three basic choices:
- Potting mix. Most Bromeliad species can live in a soilless potting mix as long as it has good drainage and aeration. Terrestrial Bromeliads (those that live in the ground) are particularly well-suited to this environment. Cryptanthus (Earth Star) Bromeliads are notable examples of the terrestrial type.
- Decorative mounts. Bromeliads that are epiphytes or lithophytes in the wild can often grow without any soil at all. You can mount them on a piece of driftwood, a chunk of lava rock, or some other solid object with a rough surface. Some varieties, such as Tillandsia (Air Plants), can only be grown this way.
- Semi-hydroponic. You can also grow many Bromeliads in a jar filled with a uniform substrate such as perlite or clay pebbles, keeping a reservoir of water at the bottom. This can be a good way to provide extra humidity while reducing the risk of crown rot.
Let’s look at these three options in detail.
Option 1: Pots and Potting Mix
The growing medium for a potted Bromeliad pup should have a large fraction of chunky ingredients that retain little water. Inorganic elements like perlite work especially well since they don’t decay into smaller bits over time.
For an easy-to-make and effective Bromeliad potting mix, combine equal parts orchid bark, perlite, and coconut coir. You can replace the perlite with pumice chunks if you have tall, top-heavy pups and want to weigh down the pot. Mixing in a bit of vermicompost (about 10% by volume) can provide the plant with a little nutrition. You can find more suggestions here.
As for the pot, drainage holes are non-negotiable — root and crown rot are the biggest dangers to Bromeliad pups. A small pot, about three to four inches across, should work well. Choose the right material for your climate and watering style. Porous terra cotta is good if you struggle with overwatering or the weather is cold and damp. Plastic is helpful if your plants tend to get dehydrated.
Moisten the potting mix lightly and fill the pot most of the way to the top. Make a shallow hole into which you can set the base and roots of your Bromeliad pup. The crown (where the leaves spread out from the base of the plant) should be at or above the soil surface if possible.
If desired, you can apply some rooting hormone to the base of the pup before planting it. Dip it into the powder and tap most of it off, leaving only a thin film in place. Then, set your Bromeliad down in its pot.
You might find that it’s hard to keep the plant upright. It may help to surround it with bamboo stakes, wooden chopsticks, or a heap of large pebbles.
Option 2: Mounting Bromeliad Pups
You can attach an epiphytic or lithophytic bromeliad to almost any sturdy object that won’t absorb a lot of water. A rough, uneven surface will make it easier for the roots to cling tight. Popular choices include dead stumps or branches, jagged rocks, or moss poles. If you have an artsy streak, you can easily create some very beautiful displays that will look great hanging from walls or perched on bookshelves.
Prepare your mount by scrubbing away any loose organic material. Dead bark or wood should be okay, but you don’t want any green leaves, moss, or dirt. Dunking it in boiling water for a minute will help make sure there are no microbes that could rot your Bromeliad. Materials scavenged from the shoreline, like driftwood, should be soaked in fresh water for a day or so to remove any salt.
You can tie your Bromeliad pup to its mount with natural twine, wire, fishing line, or some other string-like material. Metal staples or even glue can also work. Just remember that inorganic materials like metal and plastic won’t stretch or dissolve — as the plant grows, these materials could cut into it. You may be able to clip the mounting hardware away once your Bromeliad grows grippy roots.
Never use copper wire. As we noted above, this metal can damage or kill a Bromeliad.
Attach the plant firmly to the mount, securing it by the stem rather than the leaves or roots. Don’t pull your twine or wire so tight that you gouge into the pup, but make sure it will stay put.
Option 3: Semi-Hydroponic Propagation
The key to this method is using a coarse, sterile, uniform growing medium that can absorb moisture without turning into a sludgy mess. This allows you to keep a reservoir of water in the base of the container with minimal risk of rot.
You can use any of the following media when propagating Bromeliad pups:
- LECA. These pebbles of baked clay are probably the most widely used of all the semi-hydro substrates. LECA is on the expensive side, but it does a great job of drawing moisture up to the roots while leaving room for oxygen. We’ve written up a detailed guide to growing plants in LECA if you need more info. Most of the advice applies to the other materials below as well.
- Pon. A mix of several types of porous rock that resembles aquarium gravel. It’s got a devoted fan base of home gardeners, though it’s even pricier than LECA.
- Perlite. This baked volcanic glass is porous, lightweight, and often quite affordable. The plain white color isn’t to everyone’s taste, but it’s a practical, effective choice.
- Lava rock. A more organic-looking alternative that can be even chunkier than perlite. It’s also heavier, which can be good when you want to stabilize a tall Bromeliad. Plus, the brick-red color is cool.
- Pumice. Its physical properties are very similar to those of lava rock. However, it tends toward a more muted gray color, which some growers may prefer.
You’ll need to soak your substrate before using it, then use it to fill up a tall vessel with a solid bottom. Glass vases are popular choices because they allow you to see the substrate and the developing roots. Fill the bottom ⅓ with clean water, then settle your Bromeliad in place at the top.
Caring for Bromeliad Pups After Propagating
Now that you’ve gotten your new Bromeliads settled into their new homes, how do you keep them healthy? The answer is more or less the same no matter which propagation method you’re using.
First of all, you’ll need to keep your plants out of direct sunlight, at least for a little while. Some Bromeliad species can tolerate a few hours of unfiltered sunlight per day (especially in the morning), but they’re more tender when they’re young and freshly transplanted. Keep them in bright, indirect light for the first few weeks at a minimum.
Second, try to keep them moderately warm. The air should be between 55 and 85 degrees Fahrenheit. In most homes, this shouldn’t be too much of an issue, but make sure not to place your pups too close to things like:
- Poorly insulated windows
- Fireplaces
- Heating vents
- Air conditioning units
- Doors to the outside
Third, provide moist air if possible. Your Bromeliads should have an easier time growing roots if the relative humidity is around 65%. This is easiest to achieve with an electronic humidifier, but placing some tall containers of water around your plants can also help.
Finally, take it easy on the watering. Bromeliad pups generally do best if the soil dries out somewhat before you rehydrate it.
This is easy if you’re using semi-hydroponic growing — simply make sure the bottom third of the vessel stays full, but don’t let the water get high enough to touch the plant. You can use a similar approach if your Bromeliad’s foliage forms a central “tank”. The plant can absorb water through the base of those leaves, so just keep a bit of water in there at all times. You should rinse it out and refresh it every one to two weeks, though.
How Soon Will Bromeliad Pups Reach Adulthood?
The speed at which your baby Bromeliads grow up depends on many different variables, such as:
- What species you’re growing
- How much sunlight they get
- What kind of fertilizer (if any) you’re using
- How diligent you are about watering properly
With proper care, most Bromeliad pups can reach maturity within one to three years. But with dim light, sparse watering, and little nutrition, it could be closer to three to five years.
Some Bromeliad owners like to give their plants a bit of a nudge when it comes to blooming. You can do this by exposing them to ethylene — a gaseous hormone used to stimulate fruiting and flowering. Take a slice of fruit, such as an apple or banana, and place it in the pot. Then, cover the plant and the fruit with a clear plastic bag for a week or two.
Your plants will need to be at least a year old for this method to work. And remember that as soon as each one finishes flowering, it will begin to die off. At that point, you’ll need to get ready for another round of propagating Bromeliad pups!
Final Thoughts
This method is the simplest and fastest way to multiply your Bromeliads. If you take the appropriate precautions, like disinfecting your cutting tools and using a well-aerated potting mix, your clones should quickly feel at home in their new pots. After a few rounds of helping your plants grow, flower, and sprout new offspring, you’ll be an expert at propagating Bromeliad pups.