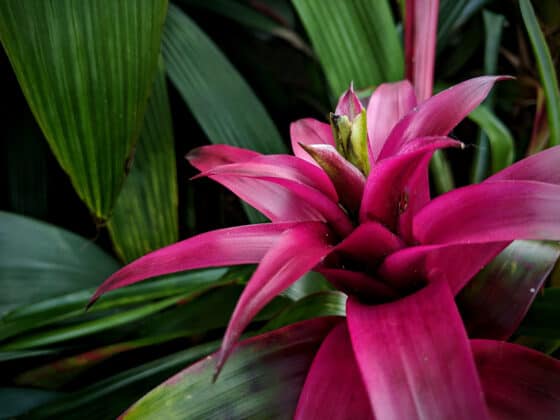
It’s not always obvious when you should prune a houseplant, especially a relatively slow-growing type like a Bromeliad. Do you need to trim its leaves regularly, or can you leave it be unless it’s in poor health? In general, you can prune a Bromeliad sparingly, but a few careful cuts at the right time can enhance its growth and improve its looks.
The most common reason to prune a Bromeliad is to remove unsightly or unproductive leaves. You might also need to clip off rotting tissue if your plant is overwatered. When it’s growing pups, trimming overhanging growth can help them get more light. Use sharp, disinfected blades and cut close to the base of the leaf.
Pruning a Bromeliad to control its size is rarely necessary or helpful. These plants don’t grow quickly enough or live long enough to need regular cutting back. Besides, the tidy spiral shape of their foliage rosettes doesn’t usually lend itself to trimming for size. If you want your Bromeliad to stay compact, it’s best to choose a naturally smaller variety — many Neoregelias and Tillandsias fall into this category.
Why Prune Your Bromeliad?
When is it a good idea to trim your Bromeliad houseplant? Here are a few scenarios where it can be helpful:
#1: Clearing Ugly Leaves From Your Bromeliad
This is probably the most common type of Bromeliad pruning. Let’s face it: sometimes the foliage on our houseplants just isn’t as attractive as it could be.
If you forget to water your Bromeliad or the sunlight is too harsh, the leaves might get dry and crispy. Poor nutrition or lighting could leave them looking washed-out and pale. Overwatering, sunburn, or humidity issues may cause yellowing or unsightly brown spots.
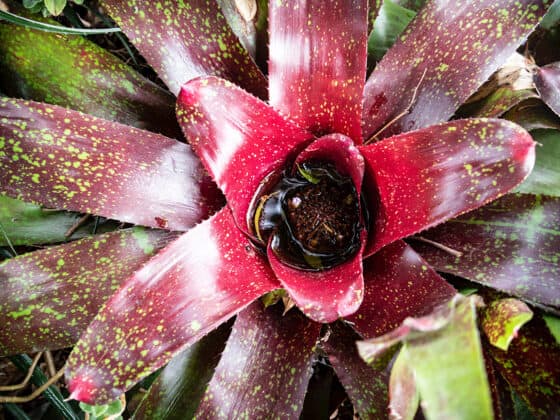
Care mistakes aren’t necessarily the only reason a Bromeliad’s foliage might look less than breathtaking. The plant might simply be phasing out older leaves as newer, stronger ones emerge. This is usually the case if all of the leaves turning yellow or brown are located around the outside of the rosette, while the inner leaves remain healthy.
You can always prune your Bromeliad to remove this aged or damaged growth. Along with the obvious aesthetic benefits, this can also improve your plant’s vigor. Maintaining leaves, even damaged ones, costs your Bromeliad energy, moisture, and nutrients. Clipping them off lets the plant put those assets to better use growing new foliage (and possibly blooming).
On the other hand, it may not be worth removing an entire leaf just to get rid of a few minor flaws. A mostly green leaf that’s turning brown at the tip is still giving your Bromeliad more than it’s getting. You may be better off removing only the end of the leaf and keeping the rest in place.
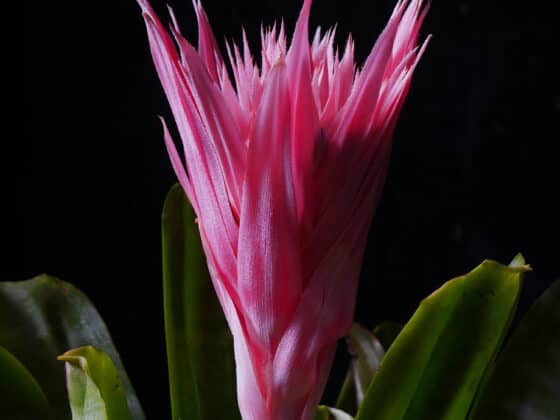
#2: Pruning a Spent Bloom
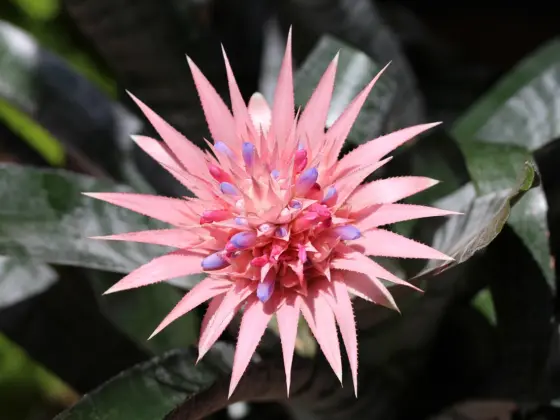
A Bromeliad in bloom can be a majestic sight. Each one can produce a spectacularly colorful inflorescence that will remain alive and radiant for up to six months. But even these long-lasting blooms must come to an end.
When you see the color draining out of your Bromeliad’s bloom, it’s time to think about removing it. A flower spike is even more taxing to maintain than a handful of ordinary leaves. If you prune your Bromeliad bloom once it’s no longer attractive, the plant will have many more resources to channel into the next phase of its life.
That doesn’t mean it will rebloom. Very few Bromeliads can flower more than once in their lifetimes. (The ones that do tend to have less showy blooms anyway and are usually grown mostly for their foliage.)
Instead, clipping off the flower spike lets your plant prioritize growing pups. Also known as offsets, pups are juvenile clones of your Bromeliad that will eventually grow into full-sized plants. Cutting off and propagating pups is how indoor gardeners usually ensure a steady supply of Bromeliad flowers. And, removing the flower stalk once it’s spent means your plant will have more resources available for raising a healthy crop of pups.
#3: Trimming Your Bromeliad to Let In More Light
If you want to really boost the growth of your Bromeliad pups, you can cut back the older foliage. After your plant has finished blooming, the central rosette no longer has any need to keep growing. It won’t produce any new leaves — instead, all the new growth will be from the offsets growing around the edges.
That means that the older leaves spreading out from the center aren’t serving any particular purpose. If they’re overshadowing the pups, you can chop them back, allowing your baby plants to get more sun.
The pups will grow considerably faster with more light. You won’t have to wait as long to transplant them, and they may also be quicker to reach maturity and bloom.
Just to be clear, this isn’t necessary for healthy Bromeliad growth. If you don’t like the idea of cutting your plant’s biggest leaves down to awkward stubs, you don’t have to. Leaving the foliage alone will mean you can enjoy your older Bromeliad’s foliage for longer. Its pups might need a little more time before they’re ready to move out and get a place of their own, but that’s hardly the end of the world.
#4: Removing Infected or Infested Leaves
The only time it’s truly urgent to prune your Bromeliad is when you’re trying to prevent the spread of disease. Some leaf problems will just get worse and worse unless you amputate:
- Crown rot. An overwatered Bromeliad may start to decay while it’s still alive. Treating crown or root rot requires cutting off all infected foliage.
- Fungal disease. Infectious fungi like rust or leaf spot can quickly colonize your plant. If the disease is limited to a couple of leaves, it’s best to cut them off before the rest are contaminated. (You might also want to treat the plant with a non-copper-based fungicide).
- Insect or arthropod pests. Getting rid of invaders like spider mites, mealybugs, or scale will probably require repeated treatments with insecticidal sprays or wipes. However, a little strategic pruning to remove the most heavily infested leaves may also help.
When Should You Prune Your Bromeliad?
Whenever you feel like it! In general, there’s no particular season that’s best for trimming a Bromeliad. These plants grow more quickly in the summer and more slowly in the winter, but since you’re not pruning to control their growth, this isn’t much of an issue.
That means you can cut off damaged leaves or fading blooms whenever you decide that they look more dead than alive. If your Bromeliad only has a few minor damaged spots, you can remove them anytime you get tired of looking at them.
Late winter may be the best time for cutting back older leaves to expose the pups to more sunlight. That way, the pups will be able to adjust to brighter conditions gradually with the onset of spring. You don’t want to expose them to too much sun all at once, or they’ll be at risk of leaf scorch.
Supplies You’ll Need to Prune Your Bromeliad
There are only two indispensable things to have on hand when you prune a Bromeliad. The first is your cutting tool. For varieties with thin and flexible leaves, like Vrieseas or Guzmanias, a small pair of pruning scissors should work just fine. You may want a pruning knife or even a hand saw for those with thicker, fleshier foliage, like Neoregelias and Cryptanthus.
You should also have something you can use to disinfect your tools. This helps you avoid contaminating the cuts with bacteria and potentially causing an infection. Rubbing alcohol (70% isopropyl alcohol) is our usual choice, but you can also use household bleach diluted to 10% strength. Get a clean rag or two that you can use to apply your sanitizer to the blades.
Some Bromeliads, such as Aechmeas, Dyckias, Hetchtias, and Neoregelias, may also call for a good set of gloves. These varieties often have serrated edges or sharp barbs on their leaves.
In fact, if you have sensitive skin, hand protection might be a good idea when cutting any type of Bromeliad. The sap of these plants often contains tiny, sharp crystals of calcium oxalate. In high concentrations, they can cause skin irritation in some people.
How to Prune Your Bromeliad’s Leaves
The first step in Bromeliad pruning is choosing the leaves you’re going to cut. Then you can wipe down your blades with your disinfectant solution and start snipping or slicing. Shoot for a clean cut with even edges — microbes have an easier time colonizing a jagged wound. Repeat until your Bromeliad looks clean and healthy again.
If you’re removing leaves because they’re looking unattractive or covered with pests, it should be fairly easy to tell which ones need to go. But when you’re treating for crown rot, you should also gently probe and pinch the leaves with your fingers. This can help you find infected areas that aren’t marked by obvious brown spots.
Healthy foliage feels relatively smooth and firm, with either a glossy or waxy texture. If you encounter mealy, squishy, or slimy spots, you’ve found rot. Remove these sections along with a bit of the healthy surrounding tissue just to be safe. Disinfect your blades before every cut when doing this type of cleanup, or you might just be spreading the disease around.
When you’re dealing with a leaf that’s thoroughly diseased or damaged, you can take off the entire thing. Get as close to the base as you can without snipping anything else. But if only part of it is damaged, you may want to cut away only the bad-looking portions and leave the rest in place.
A little finesse may be called for when removing a leaf tip, because cutting straight across will result in an odd, square end. It’s often better to trim the cut end into an arc or a point. That way, the leaf will look more like its neighbors.
How to Trim a Spent Bloom
The procedure for pruning an aging inflorescence from your Bromeliad is very similar to cleaning up the foliage. Always disinfect your trimmers first, then cut as close as possible to the base of the flower stalk.
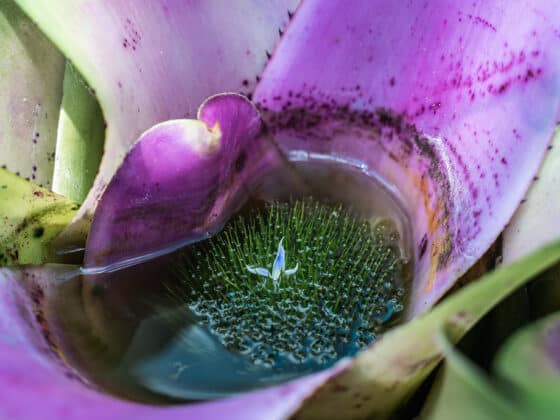
Getting close enough without going too far can be a little tricky. The bloom often stretches up from the “tank” — the deep well at the center of your Bromeliad’s foliage. That can make it a bit hard to see what you’re doing, and you don’t want to accidentally slice the living parts of your plant.
Our recommendation is to simply take it slow and don’t worry if you can’t reach the very bottom of the flower stalk. Even if there’s still a small stub remaining, you’ve removed the most resource-hungry parts of the bloom.
Some types of Bromeliads, like Neoregelias and Cryptanthus, don’t form elevated flower stalks. In these plants, the blooms stay nestled inside the central cup. In the wild, they’re often partly submerged in rainwater, making them look like lotus flowers or water lilies.
This makes it pretty much impossible to prune your Bromeliad bloom with scissors or a knife. Instead, you can just reach in and twist it off with your fingers.
Separating Bromeliad Pups
Removing and transplanting offsets isn’t technically pruning. However, the process is similar enough that it’s worth a brief discussion here.
It’s best to split off Bromeliad pups when they’re at least ⅓-½ the size of the “mother” plant. There’s some wiggle room here, though. Waiting longer gives the pups better odds of survival, while cutting them off sooner can often mean that the older plant grows more pups.
If you lift your Bromeliad out of its pot, you’ll see that it’s joined to the pup at the roots, usually with a bit of stem linking them. You can simply cut through the connection with your pruning knife or saw.
It’s often helpful to leave at least a few roots attached to the new plant, as long as they’re healthy (i.e., not black, squishy, or covered in slime). Don’t worry if you don’t manage to include any roots, though. The pup should be able to produce new ones on its own.
Transplanting Your Bromeliad Pup
Plant your Bromeliad pup in a small container — a four inch nursery pot is usually big enough. Use a coarse potting mix that will drain quickly. You can moisten the mix a little before filling the container, but don’t get it soaking wet.
For the first few weeks after planting your pup, keep it away from any and all direct sunlight. Don’t water it more than you have to, either. If you can maintain a humidity level of around 60%, your plant should need less water and have an easier time growing roots.
Final Thoughts
It’s hardly ever necessary to prune your Bromeliad unless it’s badly plagued by rot, disease, or pests. However, trimming at the right time can improve your plant’s growth and help its offspring reach maturity faster. It can also help you maintain the natural beauty of your Bromeliad.