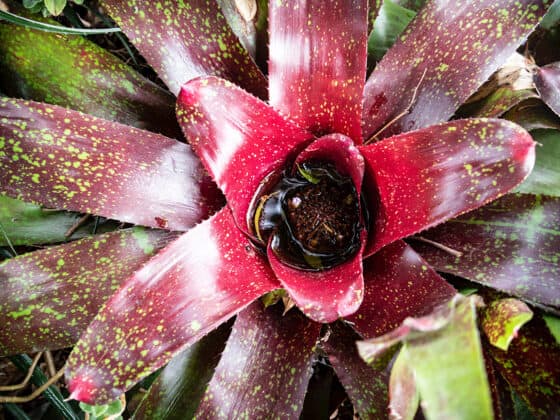
Does your Bromeliad need more living space? It’s not always clear when you need to move these slow-growing, shallow-rooted plants to new containers. They can often persist in the same space for years at a time. However, there are a few situations in which it’s absolutely the right choice to repot your Bromeliad. This article will explain why and how to make the switch.
While growing from a pup to a full-size plant, a Bromeliad may need to be repotted once or twice to give it more space. After maturity, it will likely produce offsets which you can split off and repot to propagate your plant. You might also have to repot your Bromeliad if it’s getting overwatered and needs better drainage.
For most Bromeliad owners, moving their plants to new pots is a regular but infrequent task. There are only a couple of specific points within a Bromeliad’s life cycle where breaking out the potting mix and planters is necessary. However, it’s important to know how to do it right, because it will likely come up every few years as long as you keep growing these plants. Here are the four key indicators that you should repot your Bromeliad.
#1: Your Bromeliad Has Pups That Need Pots
The most common reason Bromeliad owners have to repot is that their plants are trying to reproduce. As well as growing flowers and seeds, Bromeliads multiply by vegetative propagation. In other words, they make clones of themselves.
These baby Bromeliads are often called “pups” or “offsets”. They look like small copies of the parent plant, and they pop up at the edges of the central ring of foliage. If you bought your Bromeliad while it was already flowering (as many indoor gardeners do), it may already have some pups!
Rather than repotting the entire plant, the usual approach is to propagate the pups by separating them from their parent and repotting them. You can do this anytime the clones are at least ⅓ the size of the original.
It’s fine to wait longer if you want — this will let them get stronger and healthier before repotting. They’ll often be more likely to survive and flourish in their new pots. Just remember that the sooner you separate them, the more likely your Bromeliad is to produce more pups.
#2: Your Bromeliad Is Running Out of Room
You might also need to repot your Bromeliad if it’s too big for its current container. When your plant starts pushing up against the edges of its pot, you should probably transplant it to a bigger one.
This is rarely an issue for first-time Bromeliad owners. As we noted above, most people buy these plants while they’re in full bloom. At that point, the plant is already done growing — almost all Bromeliads are monocarpic plants that flower once, then slowly decline and die. However, if you’re keeping your Bromeliad collection going by raising that plant’s pups, they may need more space eventually.
(That’s not a guarantee — you might be growing a compact variety. May Neoregelias and Cryptanthus, for instance, may do just fine in a four inch pot for their entire life cycles.)
It’s also worth remembering that you don’t have to remove and propagate your Bromeliad pups. Some people prefer to let them grow in clusters, opting for a wild, unmanicured look. If you go this route, you’ll almost certainly need to pot up your Bromeliads at some point.
You should be able to tell fairly easily whether your Bromeliad needs more elbow room. Just pay attention as it grows, and transplant it if the base of the plant is nearly pressed against the rim of the pot.
#3: Your Bromeliad Is Root Bound
One of the most common reasons for repotting houseplants is that their roots fill up the available space. They start to pack tightly together, limiting their ability to absorb water and nutrients. That’s what gardeners mean when they say a plant is root bound.
Though this happens often with many other kinds of houseplants, it’s quite rare for Bromeliads. Many of the varieties routinely grown indoors are epiphytes — in nature, they attach themselves to trees rather than growing in the soil. These plants tend to have shallow root systems that aren’t very important for hydration and nourishment. As a result, it’s rare for them to become root bound.
On the other hand, there are some “terrestrial” varieties that grow in the ground. If you have one of these types of Bromeliads, there’s a chance they could become root bound over time. Examples include:
- Cryptanthus, or “Earth Stars”, which tend to grow in starfish-like shapes and may sport bold patterns on their foliage.
- Dyckias, desert-adapted Bromeliads with narrow, rigid, and often spiky leaves.
- Hechtias, succulent Bromeliads very similar to Dyckias that frequently flush to vivid sunset colors as they flower.
- Puyas, which tend to bloom in enormous cone-shaped flower clusters. This genus includes some of the largest and longest-lived Bromeliads.
A common sign of a root-bound Bromeliad is that the soil refuses to hold water. If you try to saturate it, almost all the liquid drains away immediately. The plant’s growth may also be stunted, and you might see crispy leaf tips or other indicators of dehydration.
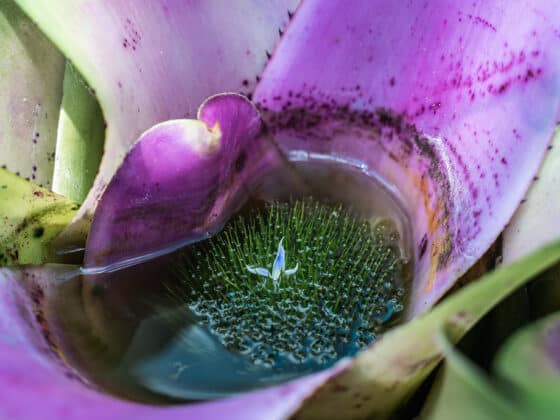
#4: Your Bromeliad Has Drainage Problems
Root and crown rot might be the single biggest threat to the health of indoor Bromeliads. These plants don’t do well when their roots are consistently swamped, or the environment around their foliage is too wet. It can cause the buildup of aggressive fungi or bacteria that start to eat away at your Bromeliad.
Sometimes, this is caused by watering too frequently, but it can also be due to the use of the wrong soil. If your potting mix is too dense or contains too many absorbent, organic components, it can hold an excessive amount of moisture. Even a healthy mix may break down over time — the large pieces can decay into finer particles, leaving less room for the flow of air and water.
There could also be an issue with the container. If it doesn’t have any drainage holes, or if they’re too small and easily clogged, it may not matter how well the potting mix drains.
You can get a read on the drainage by watching how quickly your Bromeliad’s soil dries out after watering. If it still seems noticeably damp more than a couple of days later, it probably needs to be changed. In addition, if you ever have to treat your Bromeliad for crown or root rot, repotting should always be part of the recovery process.
How to Repot Your Bromeliad
Once you’ve confirmed that your Bromeliad needs a new home, how can you make the move as smooth as possible?
Get Your Potting Mix Ready
The first step is to choose a growing medium for your Bromeliad. As we explained above, it must be well-aerated and fast-draining if you want your plant to thrive.
You should make sure that at least half of the blend consists of large-grained ingredients. Perlite, crushed pumice, orchid bark, and horticultural charcoal are all good options. You can bulk out the rest with some spongier elements to keep the roots hydrated, such as coconut coir or peat moss.
Here’s a quick, easy mix that should be good for most Bromeliads:
- ⅓ orchid bark (by volume)
- ⅓ pumice
- ⅓ coconut coir
Interested in learning more about the best pot and soil for your Bromeliad?
Prepare Your Pot
When repotting a Bromeliad into a bigger container, a slight increase in size is usually plenty. You can generally get away with a container that’s one to two inches larger in diameter. The main exception is if you have a very large cluster of Bromeliads growing together, and they’ve put out a lot of pups this season. In that case, you might want to size up a bit more.
Make sure that the pot has at least a couple of good-sized drainage holes. You can enhance aeration even more by using a vessel made of terra cotta (unglazed clay). The pores in this material allow moisture to escape out the sides as well as the bottom, helping the mix dry faster.
Moisten your potting mix a little bit. It should be about as damp as a sponge that’s been used and then squeezed out. Err on the side of dryness — the last thing you want is to drown the fragile roots in swampy soil. Then, fill the pot most of the way with your mixture.
Remove Your Bromeliad and Inspect the Roots
Take a hold of your Bromeliad near the base of the rosette. (You may want to wear gloves if you’re growing a variety with spiny leaves.) Then, tilt the pot over and slide your plant free.
In most cases, it should slip loose quite easily. However, some terrestrial Bromeliads might need a couple of firm slaps on the bottom of the pot.
Once you’ve got your plant out, brush away as much of the potting mix as you can with your fingers. If the root mass is squished tight, you may also want to gently pry some of the roots outward. This can help them spread out in the new container.
You should also check for any hint of rot. Squishy or slimy roots are likely infected, as are any that have a dark brown or black color. Foul smells can also be a bad sign. If you find any infected roots, snip them off with a disinfected set of pruners.
If you’re propagating pups, you can use a serrated knife to slice them away from the main plant. Disinfect the blade, then slide it into the seam between the base of your Bromeliad and its offspring. Saw through the root mass and pry the pup loose.
Settle Your Bromeliad In Place
Make a shallow hole in the potting mix for your Bromeliad’s root system. Set the plant in its new container and cover up the roots and the base of the stem.
Because of their shallow roots, many Bromeliads can be fairly top-heavy. It may be a good idea to sink some chopsticks or small garden stakes into the soil around the plant. That can help keep it from tipping over.
Now, set the plant and its pot in an area where it will receive bright light without any direct exposure to the sun. That usually means placing it a few feet back from the closest window. Hanging some partly see-through curtains will enable you to place your Bromeliad quite a bit closer.
Ideally, you should monitor the relative humidity near your Bromeliad and keep it around 60%. (If you need recommendations, take a look at a few of our favorite humidifiers.) Water your Bromeliad sparingly, making sure that the potting mix feels dry before giving it more to drink.
Final Thoughts
You probably won’t have to repot your Bromeliad very often. However, it’s important to recognize the signs that your plant is ready for a new place to live. Repotting when the time is right can often be crucial for healthy growth. We hope this guide helps you ensure that your Bromeliad has the space it needs to survive, flourish, and bloom!