Bromeliads make superb houseplants, but can they make good additions to an outdoor garden as well? The answer will vary based on where you live and which cultivar you’re growing. Still, many of these plants can flourish outdoors during the growing season, and in the right climate, they may be hardy year-round. If you want to know how to successfully grow a Bromeliad outdoors, just keep reading!
Most Bromeliads are adapted to tropical conditions. They can only live outside year-round in USDA Zones 10 and above, with some varieties hardy down to Zone 9. However, you can grow a Bromeliad outdoors during the spring and summer as long as you bring it indoors before the weather gets cold.
Not all outdoor locations are equally hospitable to Bromeliads. Your plant might thrive or flounder depending on where you place it in your garden. It’s important to carefully consider factors like shade, wind, and moisture when raising an outdoor Bromeliad. If you get it right, though, you can often give a huge boost to your plant’s growth and flowering.
Why Grow a Bromeliad Outdoors?
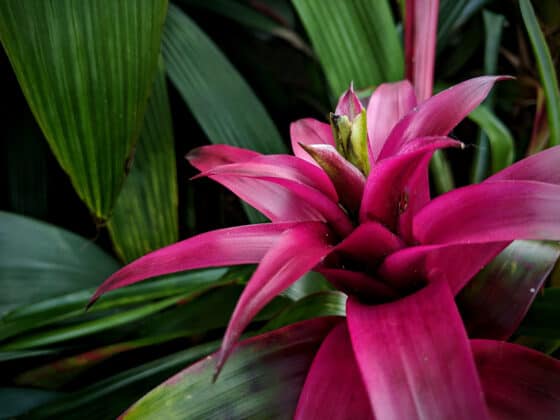
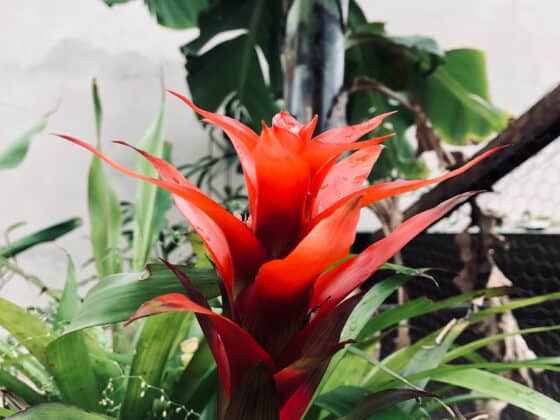
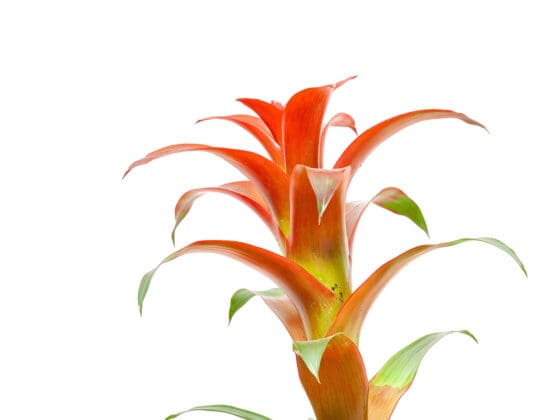
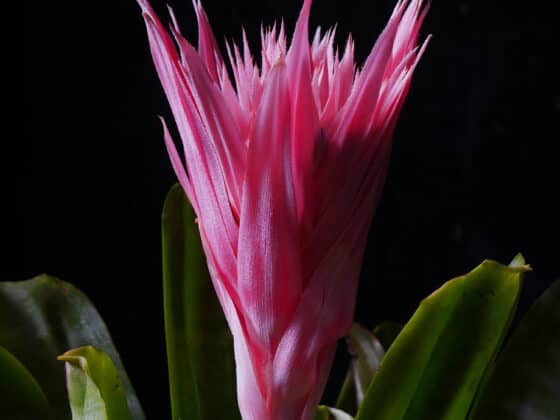
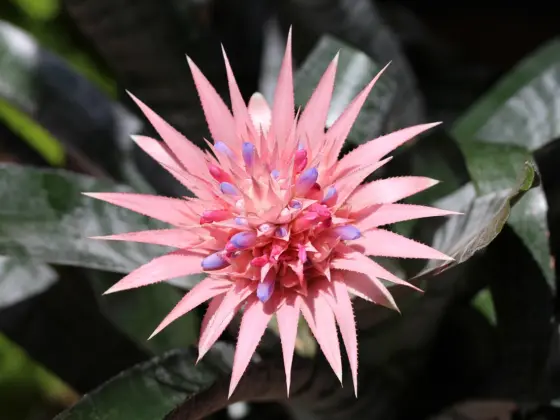
For some people, the answer to this question is obvious: because they’ll look fantastic. The beautiful leaf rosettes and showy, long-lasting blooms of Bromeliads might be just what you need to spice up your garden, patio, or balcony.
One especially cool factor is that many varieties don’t need soil to grow. That means they can be used as mounted or hanging plants, letting you play with vertical space in your landscaping. A quick image search can give you tons of inspiration for using Bromeliads to enhance everything from walls to ornamental trees.
Another good reason to grow a Bromeliad outdoors is to help it get bigger and more beautiful. Although these plants typically appreciate partial shade, they rarely get enough sunlight indoors to reach their full potential. A Bromeliad that gets at least some time outside tends to grow larger than one that stays behind closed doors. The flowers and foliage often display more vivid colors, too.
There are certainly risks to this approach as well. It’s harder to guarantee that your Bromeliad won’t be exposed to pests if you place it outside. Harsh winds, heavy rain, heat spells, and cold snaps can also threaten its health. But if you’re careful and attentive, some exposure to the wider world could help your plant become even more spectacular.
Are Bromeliads Cold Hardy?
Readers who have seen our previous articles on Bromeliad care are probably aware that this enormous plant family contains more than 3,000 species. This makes it hard to generalize too much about what kinds of environments they like.
With that said, most of the varieties that are popular for home gardeners hail from tropical or subtropical regions. They tend to do best in relatively warm and humid climates. Most people in the continental United States won’t be able to grow a Bromeliad outdoors year-round. Unless you live in a Zone 10 or 11 region, such as southern Florida or California, your Bromeliad will likely need to stay indoors for the winter.
The Best Bromeliads for Winter Weather
Despite what we’ve said above, some Bromeliads are capable of withstanding below-freezing temperatures and may be able to live outside year-round in Zone 9. These tough varieties include:
- Puyas. Perhaps the most cold-tolerant group of Bromeliads, Puyas grow high in the Andes mountains. Most grow into bushy, cone-like shapes, and some varieties produce vibrantly colorful flower clusters that look like alien life forms. Almost all Puyas can withstand temperatures in the high teens or low 20s (Fahrenheit).
- Dyckias. Like Puyas, Dyckias tend to grow at high elevations and are fairly tolerant of cold and droughts. They tend to resemble cacti or succulents, with spreading rosettes of spiky, fleshy foliage. Dyckias can live in similar conditions to Puyas, though some can grow attached to rocks instead of planted in the ground.
- Vriseas. The genus Vrisea is known for tall flower spikes that often have a distinct blade-like shape. Many Vriseas can survive freezes, including Mariae, Flammea, and Philippo-Coburgii.
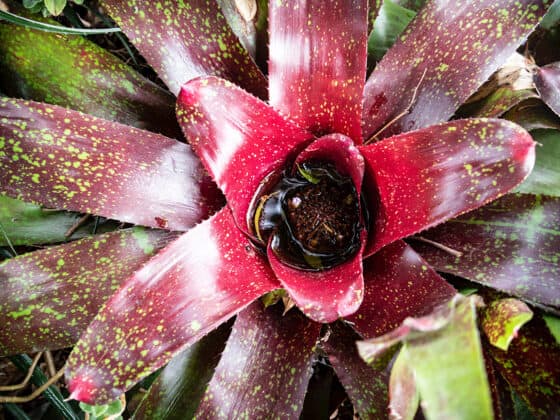
- Aechmeas. Some of the showiest blooms in the Bromeliad family are found in the Aechmea genus. That includes a few capable of enduring a mild winter and living to tell the tale. A couple of our favorites are Aechmea Distichantha and the fantastically named Aechmea apocalyptica, both of which sprout large blooms in wild shades of pink, purple, and blue.
This is far from a complete list. Altogether, there are more than a hundred Bromeliad varieties with some ability to survive cold temperatures.
It’s important to note that even these frost-friendly species won’t survive the depths of, for example, a Michigan winter. As far as we’ve been able to discover, there are no Bromeliads that can tolerate hard freezes and sub-zero temperatures. You’re probably better off overwintering your plants inside if the thermometer routinely drops below 20℉ where you live.
Picking an Outdoor Location for Your Bromeliad
How can you choose the right place to grow a Bromeliad outdoors? Here are the main factors to consider:
Lighting
Just about any Bromeliad variety on the market should be happy with a mixture of light and shade. Placing your plant beneath a tree that can filter the sunlight through its leaves is often the best option. This mimics the conditions in the forests where most Bromeliads live in the wild.
Ideally, your plant should get the most shade during the hottest part of the day. The brightest light should be in the cool of the early morning. That means you’ll want to place a Bromeliad to the east side of any shade source if possible. Late afternoon or evening sun should also work.
Note that there are some exceptions to those rules. Certain Bromeliad varieties, most notably Dyckias, Puyas, and Hechtias, can thrive in full sun.
Wind
If hot, dry summer winds are common in your area, your Bromeliad could be at risk of dehydration. For plants that will be living outside full-time, cold winter gales can also be a problem.
In either case, it’s best to find a space for your Bromeliad that’s at least partially sheltered. Nestling it against a rock, tree, or building can help shield it from the elements.
Drainage
Finally, give some thought to how damp the location you’ve chosen will get. If you’re planting your Bromeliad in the landscape, make sure the soil drains well. These plants can rot easily if they sit in wet soil for more than a day or two. Don’t place it in any part of your lawn that regularly gets soft and marshy.
If you’re keeping your Bromeliad in a pot, use a fast-draining potting mix. It’s best if a little over half of the ingredients are large chunks of hard material such as pumice or conifer bark. We discuss detailed instructions on preparing Bromeliad potting mix.
Moving a Bromeliad Outdoors for the Summer
Though most of our readers probably can’t grow a Bromeliad outdoors full-time, they should be able to place it outside during the warmer months with no trouble. You’ll just need to time the transition right.
You can begin the process in the spring. Wait until temperatures in your area are consistently above 50℉, and you’re fairly certain you’re past the last frost. Even if you have a reasonably hardy Bromeliad variety, its resistance to the cold will be lower if it’s been indoors all winter.
For the same reason, you shouldn’t just place your plant outdoors and leave it there. Instead, move it little by little, giving it time to get accustomed to its new circumstances.
A quick two hour trip outside is a good start. It’s best to time this for the morning, after the air has begun to warm up but before it reaches peak temperature. Every day, you can increase the length of its “vacation” by an hour or so. After you’ve been putting your Bromeliad outdoors first thing in the morning and taking it back inside after sundown, it’s probably safe to start leaving it out overnight.
During this process, make sure you’re keeping an eye on the thermometer and the weather forecast. If it looks like you’re in for a late frost or a day of icy winds, shelter your Bromeliad indoors again until the danger is past.
Pay attention to the plant’s condition, too. If you move it into overly bright sunlight too quickly, you’ll likely see some damage to its leaves. They can develop dry, crispy, discolored spots, especially on the surfaces that receive the most direct light. When you see this happening, slow down the process and consider choosing a less sunny spot for your plant.
Mounting a Bromeliad Outdoors
Quite a few of the most popular Bromeliad houseplants are epiphytes or lithophytes. In the wild, they live on rocks and trees instead of growing in the ground. You can grow yours the same way, adding a whole new range of possibilities for outdoor placement.
Want to add an extra touch of wildness to your Wisteria? Nestle a Bromeliad into the branches. Going for a mysterious fairy garden look? Attach a few Bromeliads to the arch at the entrance.
You can do this even if you’re not planning to grow a Bromeliad outdoors full-time. Simply tie the plant to a portable mount that you can hang from or strap onto a garden feature. Then you can take the mount off when the weather gets cold and bring it inside.
What to Use for a Bromeliad Mount?
The best surfaces for mounting Bromeliads are rough and textured. Rot-resistant woods, like cedar, oak, or rosewood, tend to work very well, as do large slabs of thick bark. You can also use chunks of rock, though they’ll be heavier and harder to hang from other surfaces.
For Bromeliads, if you intend to move inside during the winter, do yourself a favor and pick a mount that’s light enough to move easily.
How to Attach an Outdoor Bromeliad to a Mount
You can tie your Bromeliad onto its mount with twine or wire (but do not use copper wire). If you’re careful, you could also use heavy-duty wood staples to nail the plant in place or stick it down with silicone glue. Whatever method you use, the point of attachment should be the tough stem at the very base of your Bromeliad.
It’s often a good idea to pack some dried sphagnum moss around the bottom of the plant. This will give the roots something to grow into until they’re big enough to grip the mount directly. Leaving the moss visible creates a more natural, wild look. If you aren’t a fan, you could wrap it up with burlap or some other fabric.
Remember that Bromeliads aren’t long-lived plants — they die after flowering, giving them a typical lifespan of two to five years. You may not want to place yours in a spot that’s hard to reach since you’ll have to replace it before long!
You’ll usually get the best results if you do this when your Bromeliad is still a pup. The plant will have more time to settle in place and grip the mount with its roots. Besides, this is a bit of an effort-intensive process for something that will die in a few months.
Caring for Your Outdoor Bromeliad
There aren’t as many differences between indoor and outdoor Bromeliad care as you might think.
As we noted above, you should keep your plant out of direct sunlight during the hottest part of the day. If you notice crispy brown or black spots on the foliage, it may need more shade.
Watering may not be necessary if you get regular rainfall. Most Bromeliads can withstand short periods of drought. When you’ve gone for a couple of weeks without rain or the temperature is above 90℉, your plant may need some supplemental watering.
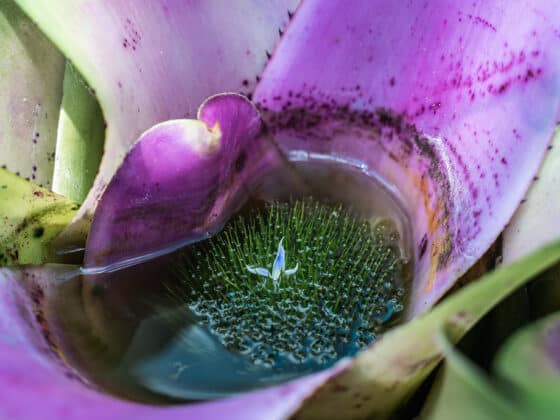
Lots of Bromeliads have a round rosette of leaves that slope down to create a “tank” at the center. You may notice water pooling in this reservoir — an adaptation to help the plant stay hydrated. The leaves can absorb moisture, keeping your Bromeliad healthy through dry stretches.
As long as the tank stays at least ⅓ full of water, you shouldn’t need to worry about your Bromeliad getting thirsty. However, it’s best to empty it and refill it about every one to two weeks. This keeps it oxygenated and prevents leaf rot (not to mention preventing mosquito breeding). Filling it with rainwater is ideal if possible, but tap water also works as long as it’s not too mineral-heavy.
Fertilizing your Bromeliad a bit will also help, especially since the extra sun means it will have plenty of energy to make use of the nutrients you’re giving it. A ¼-strength to ½-strength dose of balanced fertilizer about once per month should boost its growth. Alternatively, you could sprinkle some slow-release pellets on the soil when you move it outdoors. That will take care of it for the entire season.
Bringing Your Bromeliad Back Inside
As the growing season draws to a close, you’ll need to get your Bromeliad into shelter again. When you notice nighttime temperatures dipping into the mid-50s, your plant’s summer vacation is over.
You should make this move a little bit at a time, just as you did when bringing your Bromeliad outdoors. Start by placing the plant in full shade for a few days to get it accustomed to lower light levels.
Before you take it inside, check it for pests like aphids and spider mites. It’s a lot easier for bugs to find their way onto your plants while they’re outdoors. And they can cause a lot more trouble in your home than out in the wild, where they’re subject to predators and variable environmental conditions.
Look over the foliage and blooms thoroughly, making sure to peek into the small spaces between the leaves where mealybugs love to hide. If spot signs of pests, treat the plant with Neem oil or insecticidal soap.
Even if you don’t find any hint of an infestation, rinsing your Bromeliad off may be a good precaution. (Make sure to let the soil dry out first.) You can even dunk the entire plant underwater for a minute or two to drown any lurking pests.
After you’re sure your Bromeliad is pest-free, start transitioning it to the indoor environment. Choose a spot in your house with bright, indirect light and set the plant there for a few hours each morning. Each day, add an hour or two of inside time. Once it can spend the entire day inside, you can leave it there until spring.
Final Thoughts
Unless you have a pretty balmy climate, your Bromeliad can’t spend its whole life outside. But moving it outdoors while the weather is warm should yield major benefits for its growth, health, and color. When you grow a Bromeliad outdoors for the summer instead of keeping it shut away, the results can be truly stunning.