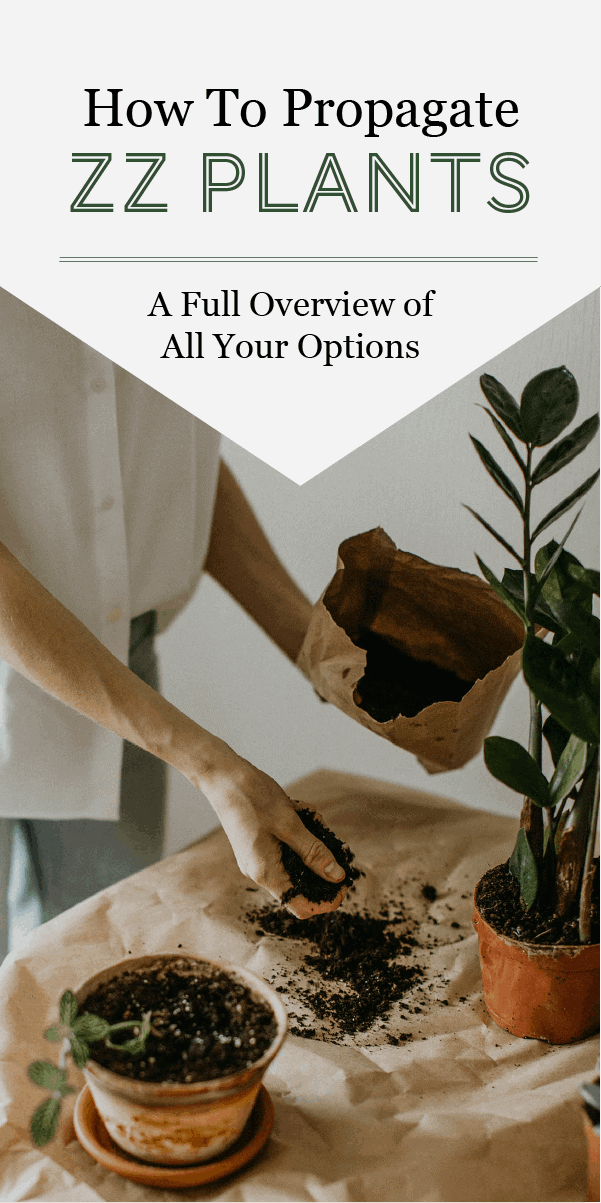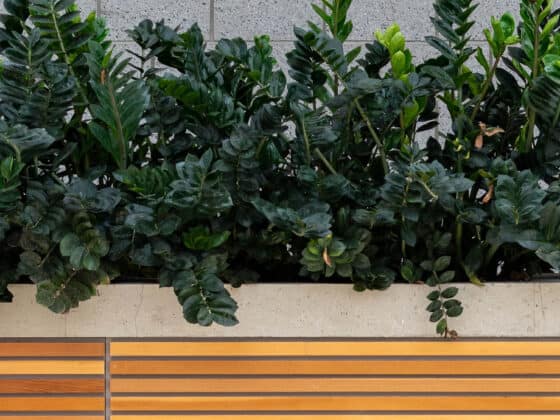
ZZ plants (Zamioculcas Zamiifolias) are a hardy, low maintenance houseplant that can be easily reproduced within the comfort of your home or office. But many ZZ plant lovers find themselves asking, “How exactly do I propagate my ZZ?”
How can you propagate ZZ Plants? These “survivor” plants can be propagated from leaf cuttings, stem cuttings, separation, and division. ZZ Cuttings, as well as separated/divided plants, do best to be started directly in soil. Water propagation is possible with ZZs but soil propagation is generally better.
Curious about how these techniques work, and what might be best for you? Just keeping reading for a full overview of propagation techniques to help you build your ZZ plant collection!
Are ZZ Plants Toxic?
Before we get started, let’s tackle the rumor that ZZ Plants are dangerous. The truth is that, with normal handling, ZZ Plants are perfectly safe in offices and homes.
But where does this misunderstanding come from? ZZ Plants create a substance called calcium oxalate, which is made of tiny crystals. These microscopic crystals, which are found in Zamioculcas Zamiifolias sap, are sharp and scratchy, which can sometimes cause an itchy skin reaction. The same crystals can also cause irritation in the mouth, throat, and stomach if swallowed.
These side effects can be found in pets, too, if the pets play with broken stems or leaves. But not everyone experiences a rash from handling a ZZ. This is because ZZ leaves are covered in a waxy “cuticle,” which gives them a glossy appearance. The wax coating protects the plant from the environment but also decreases the chance that your skin will encounter irritating sap.
The safest strategy is to wear gloves when handling the plant, especially if leaves or stems might get broken, and to keep the plant out of the reach of curious pets and children. By following these steps, even ZZ lovers with sensitive skin should be safe from any discomfort. For more info, read this article on ZZ toxicity.
A Quick Overview of ZZ Root Structures
Part of the reason that ZZ Plants are so easy to propagate is their unique root structure. For a detailed discussion of ZZ roots, read this article or continue on for a quick summary.
When most people think of roots, they usually think of a ball of thin strands that absorb water and nutrients from the soil. These roots are delicate and can be torn or damaged when repotting, which can damage the plant.

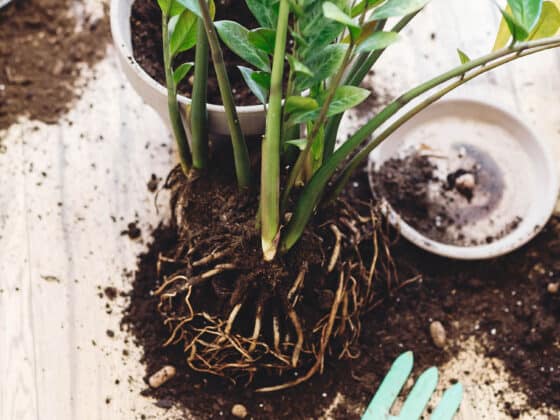
But ZZ plants have a sturdier type of root that can support division. These structures are called rhizomes. Rhizomes aren’t actually “roots,” and aren’t bulbs, either. They are a kind of stem that supports the plant beneath the soil. These rhizomes absorb and store water from the soil, helping the plant to stay hydrated in drought conditions.
In an adult ZZ Plant, these rhizomes tend to look like potatoes, with smaller, tube-like structures sometimes attached. In addition to helping the plant survive difficult conditions, rhizomes also make it much easier to divide your plant, since a whole rhizome, or even a portion of a rhizome, can be repotted successfully.
But this isn’t the only way that rhizomes help ZZ plants thrive. ZZ leaves and stems can develop their own rhizomes if cut. Since rhizomes grow slowly on leaves and stems, this process can take a while. But this feature provides even more opportunities for successfully propagating your ZZ.
Propagating Stems
One of the easiest ways to propagate a ZZ is to use a healthy stem cutting. With patience and care, this cutting will grow into a healthy ZZ Plant that can be added to your collection. But first, you will want to pick the best stems to cut to give your new plant a healthy start.
Picking the Best Stems for Propagating
When you’re ready to propagate, look for mature stems, with an even, dark green color. These stems will have at least a few healthy leaves on them and should be a few inches in height. You may also want to pick an additional stem to give yourself the best chance of successful propagation.
Once you’ve chosen your stems, you’re ready to start snipping!
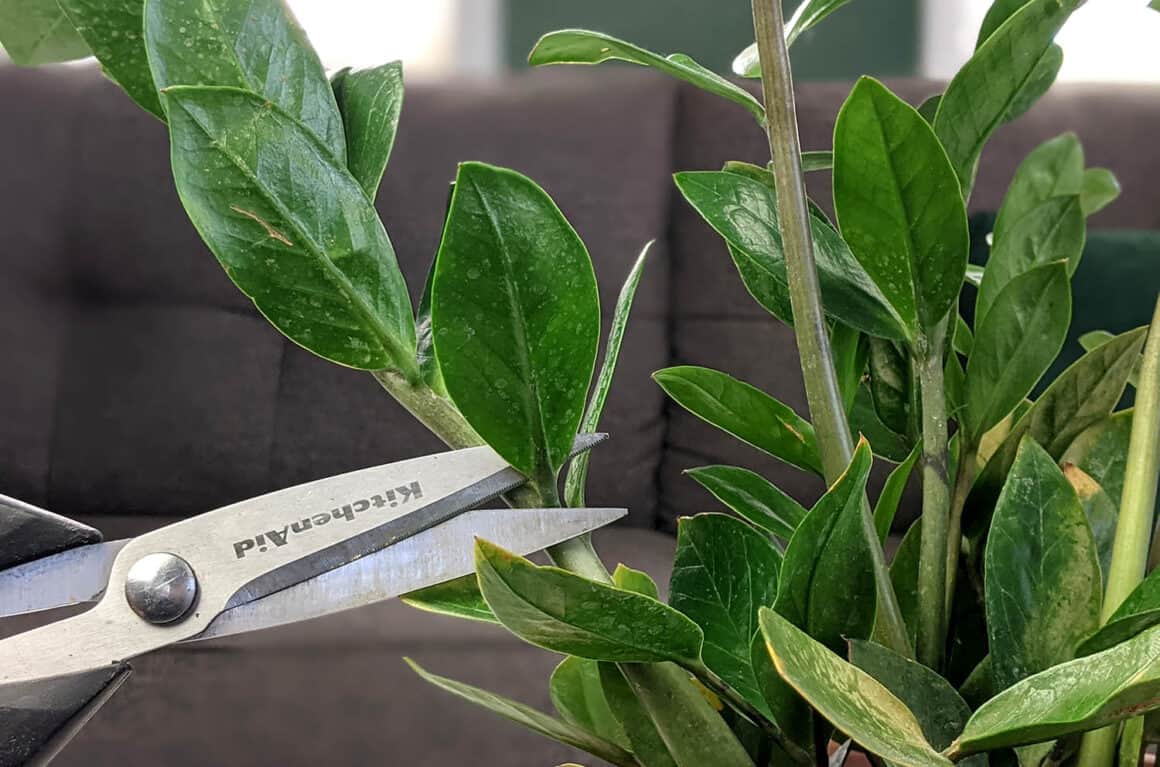
How to Take ZZ Stem Cuttings
A clean, disinfected blade is best for cutting and will help keep bacteria from harming your plant.You may also want to wear garden gloves to protect your hands.
Make your cut at the base of the stem, with at least 3” of stem below the bottom leaves – this gives you more to plant and will help stabilize your cutting. Repeat this step with your second cutting.
Next, lay the stems on a warm, dry surface for a few hours, until the air creates a “callus” on the end of each stem. Once this callused layer has formed, and the cutting looks a little dry on the end, you will be ready to plant your stems! For more information on propagating stems, read this article.
But what about propagating with leaves?
Propagating Leaves
Healthy ZZ Plants usually have plenty of leaves to choose from. Propagating with this method can be a great way to grow a new plant without having to cut off whole branches or sever rhizomes.
As you can imagine, growing a whole plant from a single leaf can take a long time, but because so little damage is done to the parent plant, leaf propagation can be a very safe approach to propagation.
How to Take ZZ Leaf Cuttings
As with a stem cutting, you will want to use disinfected pruning shears or a sharp knife for leaf propagation. It will also be essential to choose healthy, mature leaves that are dark green and glossy. A light green color suggests a baby leaf that isn’t done growing. Avoid leaves starting to yellow, curl, or turn brown to help give your plant the best start possible.
Try to pick 2-4 healthy leaves for propagation to improve your chances of success, and give you a fuller-looking pot while the leaves are rooting. As with stem cuttings, wear your gloves as you may encounter some ZZ sap while clipping.
Set your cuttings aside on a clean, dry surface for a couple hours until calluses have formed. Once the callused layer has formed, you’re ready to start planting.
Have more questions? Check out this article on leaf propagation for more great tips.
Rooting in Water
But what about ZZ lovers who don’t like to play in the dirt? We have another fun option for you! I’ve written an in-depth article on the process, but I’ll review it here as well.
It’s important to know that, while some plants love to grow in water, ZZs aren’t among them. This doesn’t mean that you can’t propagate a ZZ Plant in water, but it does take more time, and the plants may not be quite as strong and healthy.
Once you’ve taken your cuttings and are ready to root them in water, you’ll need to find the proper container. While you can place your cut leaves or stems in a variety of containers, sconces, and jars, a simple plastic water bottle, or narrow-necked vase, can work just as well. This is because the small neck of a bottle, or narrow vase, can help keep the whole leaf or stem from slipping into the water. If too much for your plant soaks in water, it may become mushy or sickly.
When propagating your ZZ plant in water, it is best to use fresh, clean water. And while tap water can work, chemicals like fluoride are sometimes added. With this in mind, filtered water may be the safest choice for your baby ZZ.
Once you have placed your cutting in the water, place your bottle or vase in a warm, bright location with plenty of indirect light – like a bedroom or office with big, curtained windows. Be careful not to let direct sunlight touch the plant’s leaves. Unfiltered sunlight can burn ZZ leaves and kill a fragile cutting before it can root.
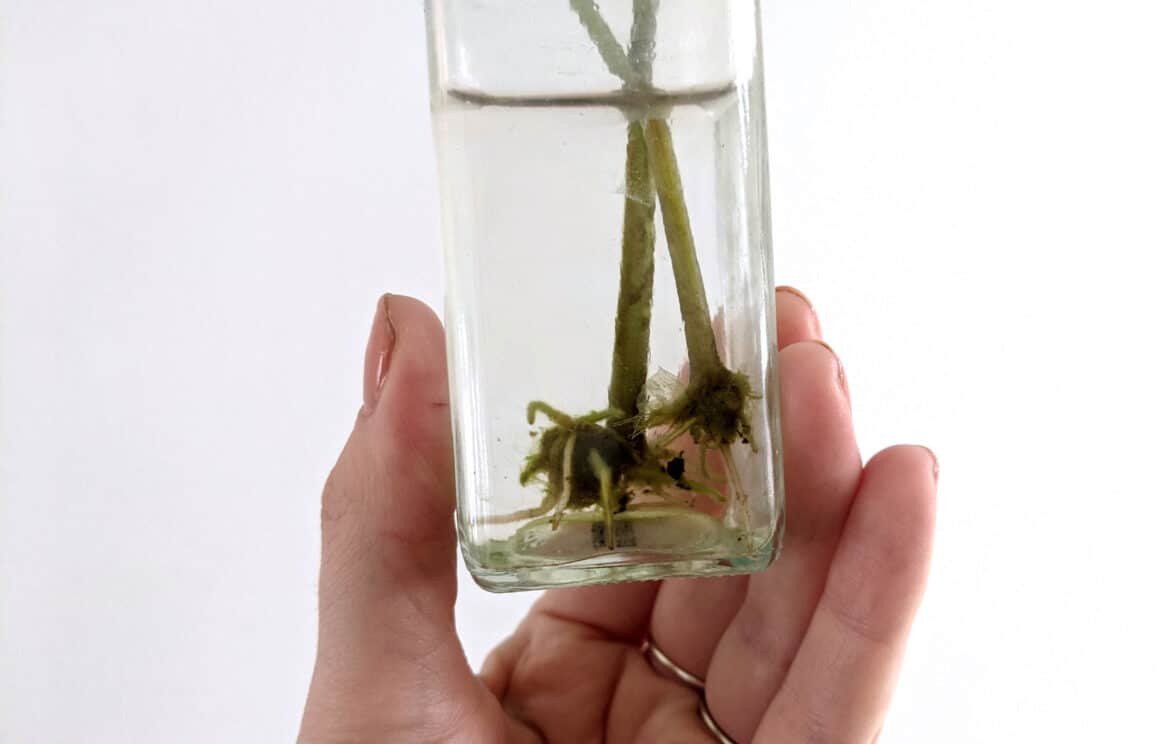
You will also need to change your plant’s water regularly to help it stay healthy. Over time, even filtered water can become contaminated, collecting dust and lose cells from your plant. Cloudy, murky water can kill your plant by contributing to root rot.
Try changing the water once a week. When you do, gently rinse the bottom of the cutting to remove any slimy build-up that can harm the plant. But be careful, hard running water or rough rinsing can detach any growing rhizomes.
And now the waiting begins. Water propagation is a slow process, but as long as the leaves continue to look healthy, your plant is growing. Slow and steady wins the race!
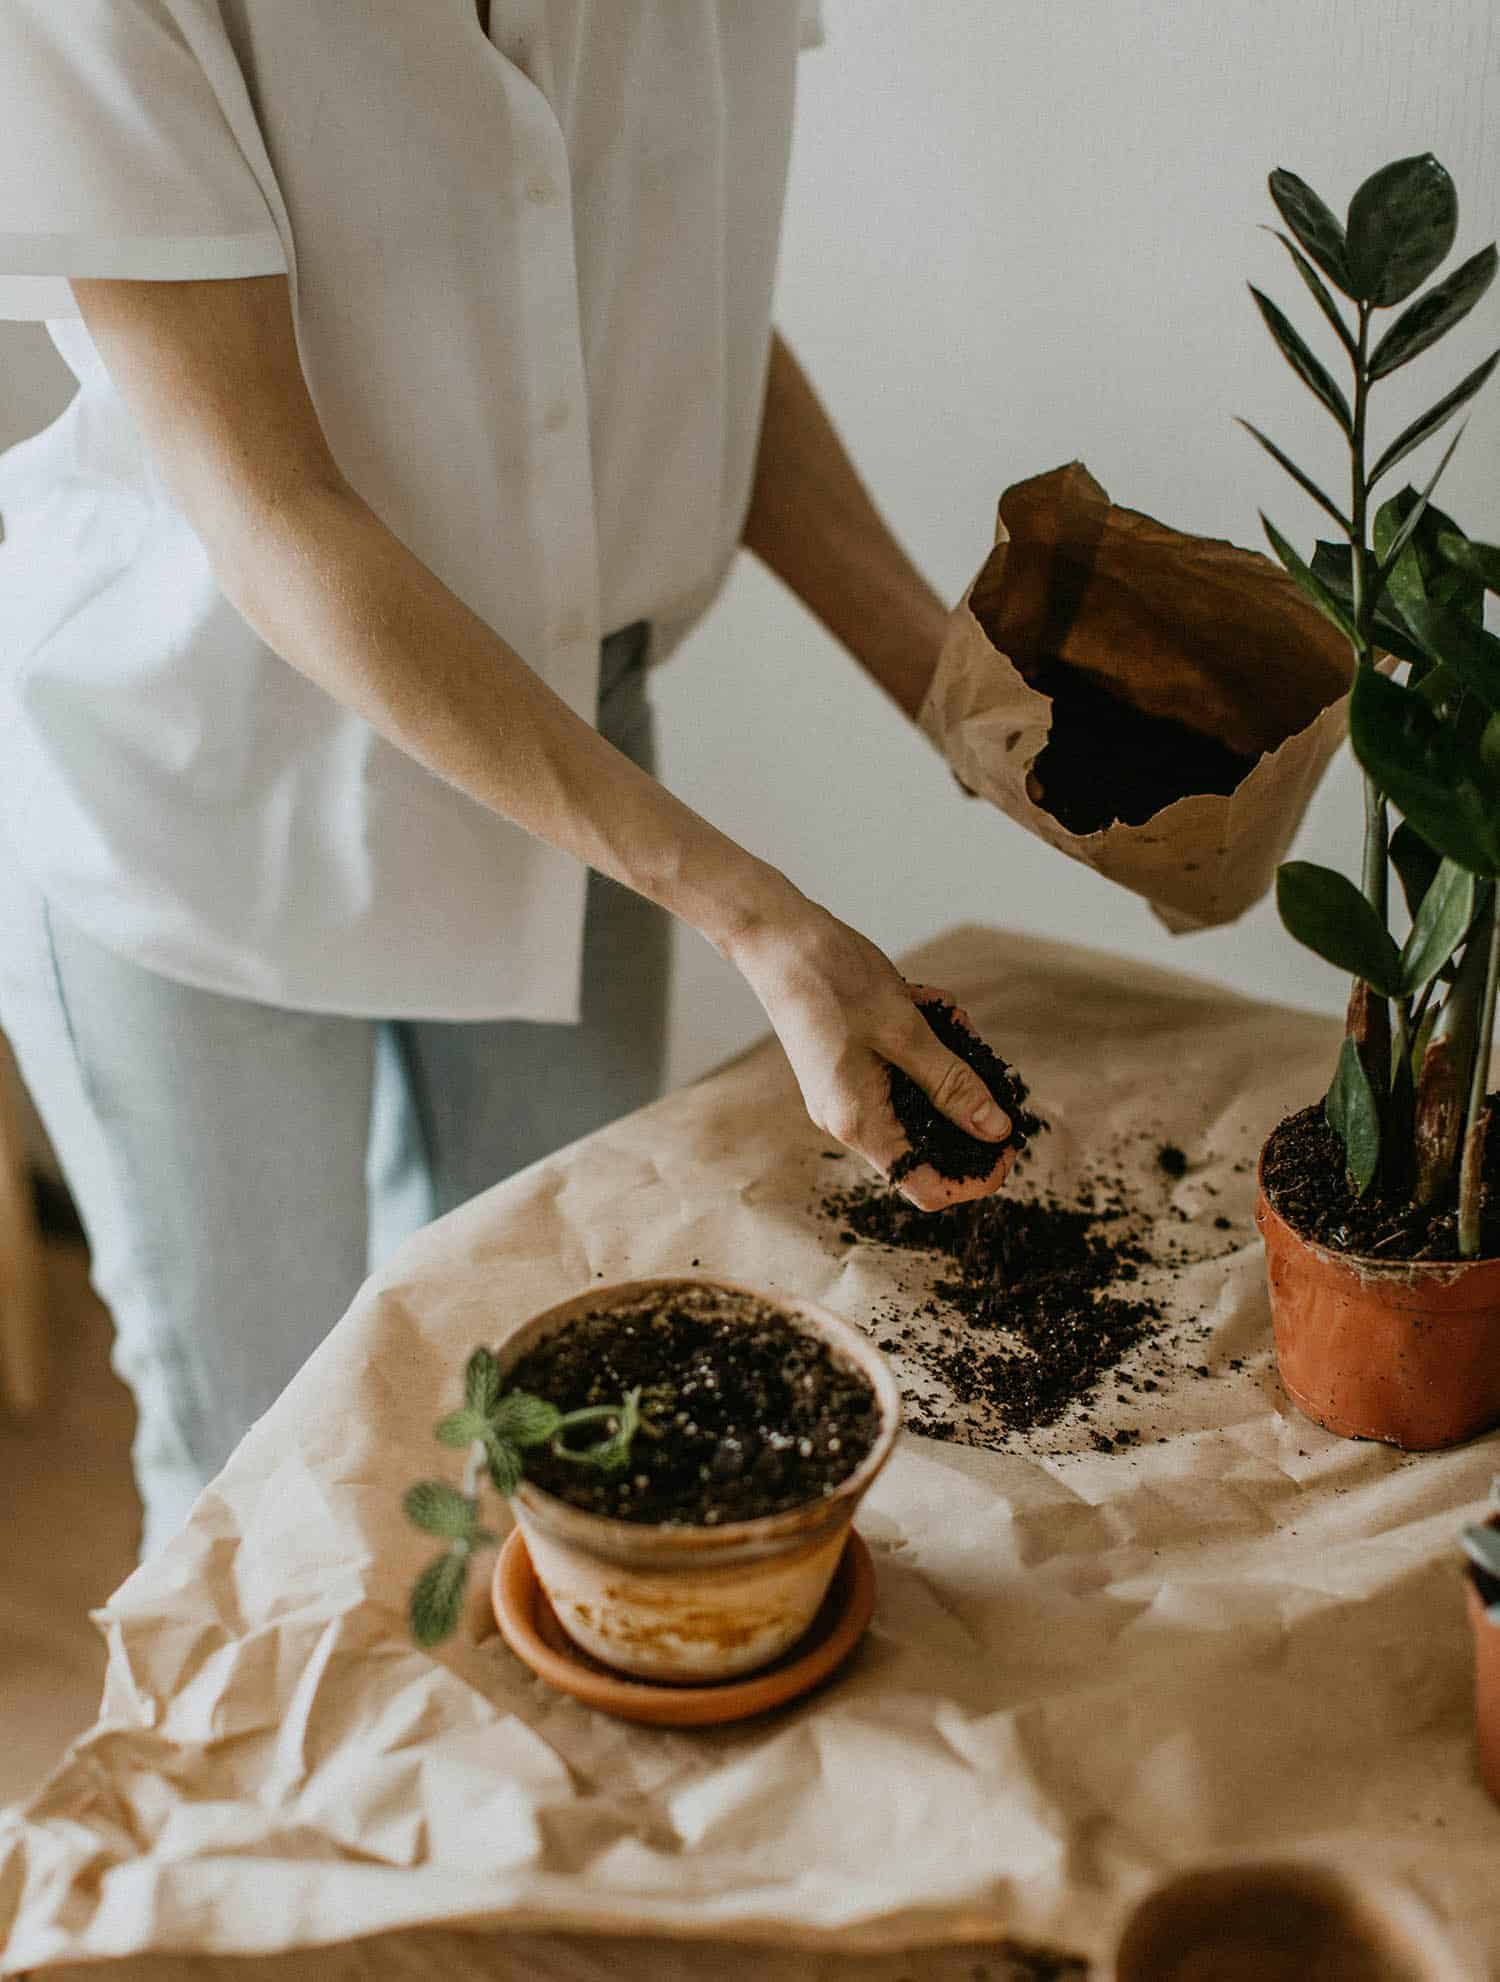
ZZ Cuttings and Soil
Soil propagation is the best option for the long-term health of your ZZ Plant. Fortunately, it’s an easy and affordable process that almost any plant lover can do at home.
Just follow the simple steps below, and you will be growing your new ZZ Plant in no time!
Best Soil for ZZ Plants
ZZ Plants can survive in most types of potting soil. But if you want to watch your plant really thrive, some soil tips can really make a difference. Remember that these plants do not thrive when overwatered. Sitting in damp soil will eventually kill the plant.
To help reduce that risk, try using a blend of regular potting soil and cactus mix, both of which are available online and at local stores. Black Gold’s Natural and Organic Potting Soil can be a great option since it contains perlite and fertilizers. Perlite helps keep the soil light and dry, while fertilizer helps provide the plant with a little extra nutrition to keep it strong.
Consider adding a bit of succulent or cactus soil mix to create an even lighter potting mix. Including succulent soil can add some additional drainage for the health of your ZZ.
But don’t try to plant your ZZ into a mixture that is mostly sand. ZZ Plants are not members of the cactus family and need some soil to help keep them nourished. Also, since ZZ Plants grow tall, they need a bit of structure to help them stand. The rhizomes won’t anchor well in soil that is too light.
Containers for ZZ Plants
Nothing complements a great soil like the right container. And since too much water is harmful to ZZ plants, look for a planter with excellent drainage.
Multiple drainage holes help prevent water from building up in the bottom of the pot – which can happen even with proper watering habits. Consider using porous planter materials like concrete and terra cotta, which can pull excess water out of the soil.
Pick a planter that is wide and deep enough to give your plant some room to grow – and allows you to plant the rhizomes deep enough to give any tall stems some support. This is less important if you are planting leaves since they are so much smaller, but even leaves will need a bit of room to grow over time.
Need more tips on ZZ soil and containers? Visit our helpful how-to article.
Planting ZZ Cuttings in Soil
Once you’ve chosen a planter with enough drainage and room, it’s time to plant your cuttings. Using your finger, create a small hole in the potting mix for every stem you will be planting.
If you are planting a leaf, the hole should be about 1 centimeter deep. Make sure to plant your ZZ leaves with the cut ends down, and gently cover the buried portion, without applying pressure.
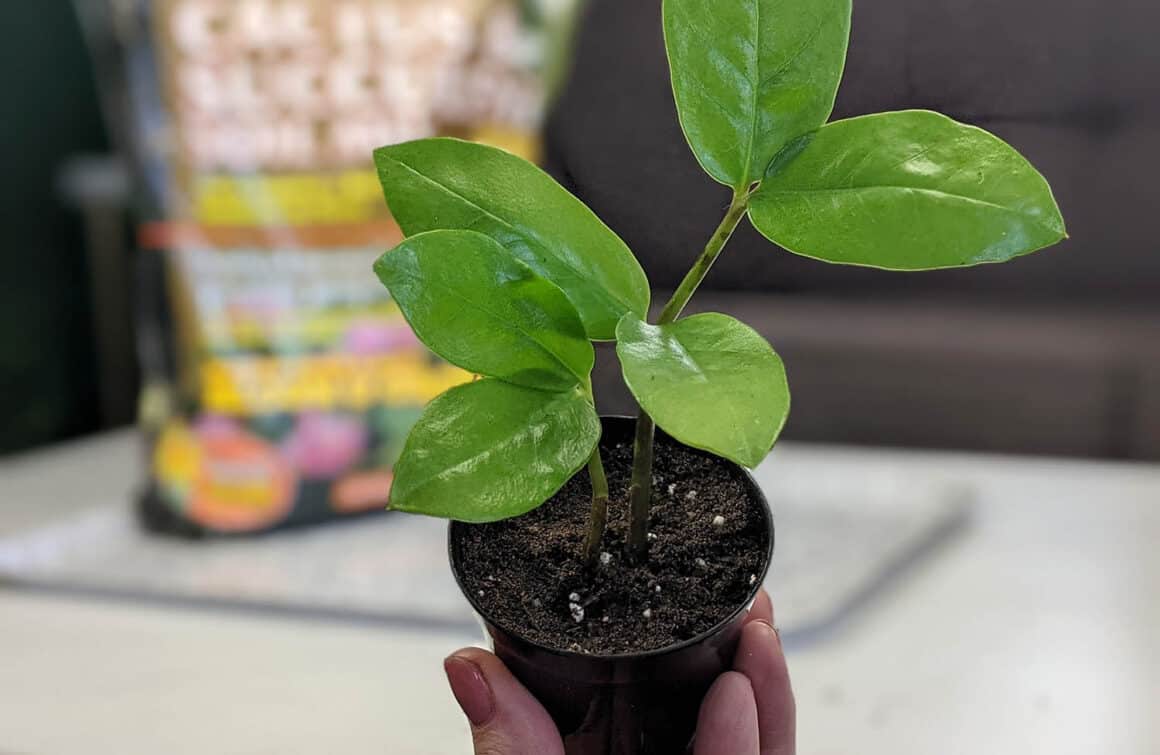
If you are planting stems, the holes should be deep enough to provide stability. Depending on the stem’s height, this can vary. Use your best judgment here. Be gentle with the stems, and do not push them down into the soil. If a deeper hole is needed, gently remove the stem and deepen the hole with your finger, before refilling.
Water the newly planted stems or leaves while being careful not to uncover them. Then, place the potted cuttings in a bright location. Windows facing east and north can be good choices, and curtains can help protect the plant from leaf scorch.
Dividing ZZs
Another effective way to propagate ZZs is to divide or separate them at the rhizome. This may sound scary, but you don’t have to be a master gardener to use this technique. For a detailed “how-to” on dividing ZZs, you can read our walk-through here. But keep reading below for a helpful overview of this fun propagation process.
ZZ plants are well-suited to division because of their rhizome root system. As we’ve already seen, these roots can regrow themselves and grow from cuttings of leaves and stems. That ability makes it especially easy for novice gardeners to divide their ZZ Plants with confidence.
But dividing a ZZ plant can get a bit messy. Since you will be removing the plant from its container, consider working outside and asking a friend for help. This especially true if your ZZ is large since they can be cumbersome, and the stems and leaves can break if not carefully treated.
Also, be sure you have your gloves, planters, potting mix, and a clean, sharp blade, or pruning saw, handy.
Separating Rhizomes
If your ZZ is heavy, you may want to lay the planter on its side. But be careful and don’t try to tip a heavy planter alone – you may break the planter, damage the plant, or hurt yourself.
Once the planter is on its side, run your finger, or a small blade, around the inner rim of the pot and gently wiggle the planter back and forth, pulling on it to loosen the plant.
If the plant is stuck, you may want to ask your friend to pull on the planter while you hold onto the plant. Just be certain to stabilize the plant toward the base and never “yank” the plant from the pot. This can damage the rhizomes.
Once the plant is free, you should see rhizomes clustered together, accompanied by smaller tuber-like structures. Each rhizome will likely have a couple of stems growing out.
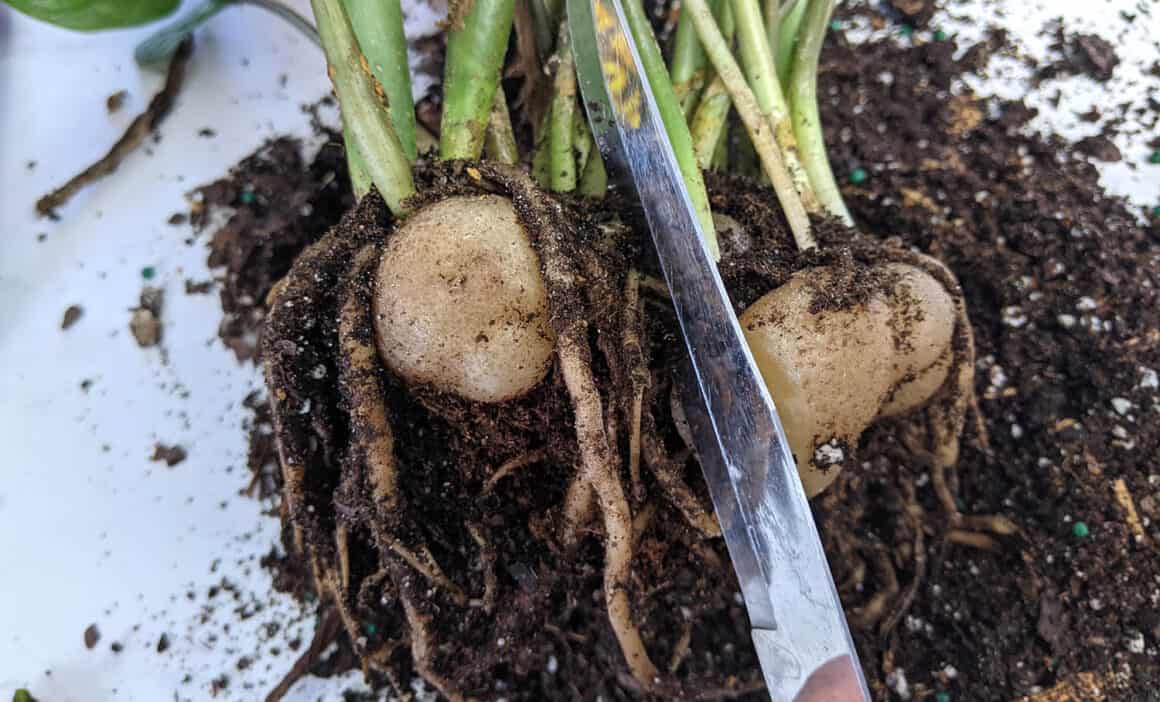
One way to divide the plant is to simply separate the rhizomes from each other. You may still need a sharp knife to accomplish this, but if the plant was not too constrained in its pot, it might be clearer how to cut the rhizomes apart.
In some cases, the rhizomes have grown so close together that they look like a tangled block of tubes. If that is what you find with your ZZ, look over the rhizome cluster for a place to cut that will allow each new plant to have a similarly sized portion of the rhizome cluster.
Once you have decided where you will cut, take your sharp knife and start cutting. But be careful. A rhizome cluster can be tough to cut. Getting impatient or applying to much pressure to the blade could damage the plant or your hand.
Once you have divided your plant, just follow the soil and container advice above…and voila! Your ZZ plants are ready for your collection.
Caring for Your ZZ Baby
Once you’ve cut or divided your ZZ plant, but there is still a bit of work left to do. Don’t forget that your ZZ is still in the process of regrowing roots after propagation, so they may need a bit of extra care – and a healthy dose of patience.
LIGHT
Although ZZ Plants can grow in partial shade, they grow their best in bright, filtered light. Sunlight can be best, so long as it is not direct, which can burn the leaves. However, artificial light is adequate to help ZZ plants grow.
When using artificial light, make sure it is light that is frequently on – like the “safety” lighting in an office, which remains on continuously. If your office is totally dark all weekend, that will not be a great environment for your ZZ. Consider adding a grow light with a small outlet timer for the best results.
TEMPERATURE
Thankfully, if the temperature is comfortable for you, it is probably comfortable for your ZZ plant. An indoor temperature between 55 degrees and 80° Fahrenheit should be suitable for your plant. Be careful not to put your plant close to drafty windows, heaters, or other locations that might cool or heat the air too much, or dry out the leaves of your plant.
WATER
A house full of plants means a house full of different watering requirements. And while your bamboo may love all the water it can get, less is more when it comes to a ZZ. In fact, the most common mistake Zamioculcas Zamiifolia owners make is overwatering, and it is one of the only things that can kill this otherwise resilient plant.
Yellowing leaves and mushy stems are telltale signs of overwatering. But when you see these signs, don’t give up – it may not be too late. So, what do you do if you have overwatered your ZZ? Check out this guide to help bring your overwatered ZZ back to health.
ZZ Plants should only be watered when the top one to two inches of soil have dried out. When in doubt, wait a little longer. Remember, the rhizomes under the soil of your ZZ are great at storing up what your plant needs for the future.
What’s Going on Beneath the Surface
Since ZZ plants don’t grow quickly, the waiting game can feel like torture. This is especially true for cuttings since, for weeks or months, you may find yourself looking at a leaf in a pot, wondering if it is ever going to grow. Relax! As long as the stems or leaves continue to look healthy and green, nature is taking its course.
Still feeling stressed? While every cutting will grow in its own time, and some environments may lead to faster growth than others, generally cuttings planted in dirt will start to develop rhizomes in a couple months. However, it can take up to nine months for rhizomes to develop in some indoor conditions.
And for cuttings rooted in water, waiting six to nine months before rhizomes develop is the norm, with some cuttings taking longer to grow.
If you must peek at the rhizomes under the soil, gently dig out the cutting with a spoon, and carefully look for development. Try to disrupt the plant as little as possible. Never yank the plant from the dirt, rinse the roots, shake the plant, or touch the developing rhizomes. Doing this can damage the rhizomes and harm the plant.
When you’re done, gently place the plant back into the dirt, carefully patting the potting mix back in place. Do not press hard around the stem, or you may damage any forming rhizomes. Also, keep in mind that you can damage the plant any time you uproot it, so try to resist this temptation.
Since leaves and stem are excellent at conveying the health of the plant, they can tell you all you need to know about the needs of your ZZ.